Resource Detail Window
The Resource Detail Window is where all of the specific information about a resource and it's usage is put into the Theatre Manager database.
The following pages describe in detail the different tabs of the Resource Detail Window.
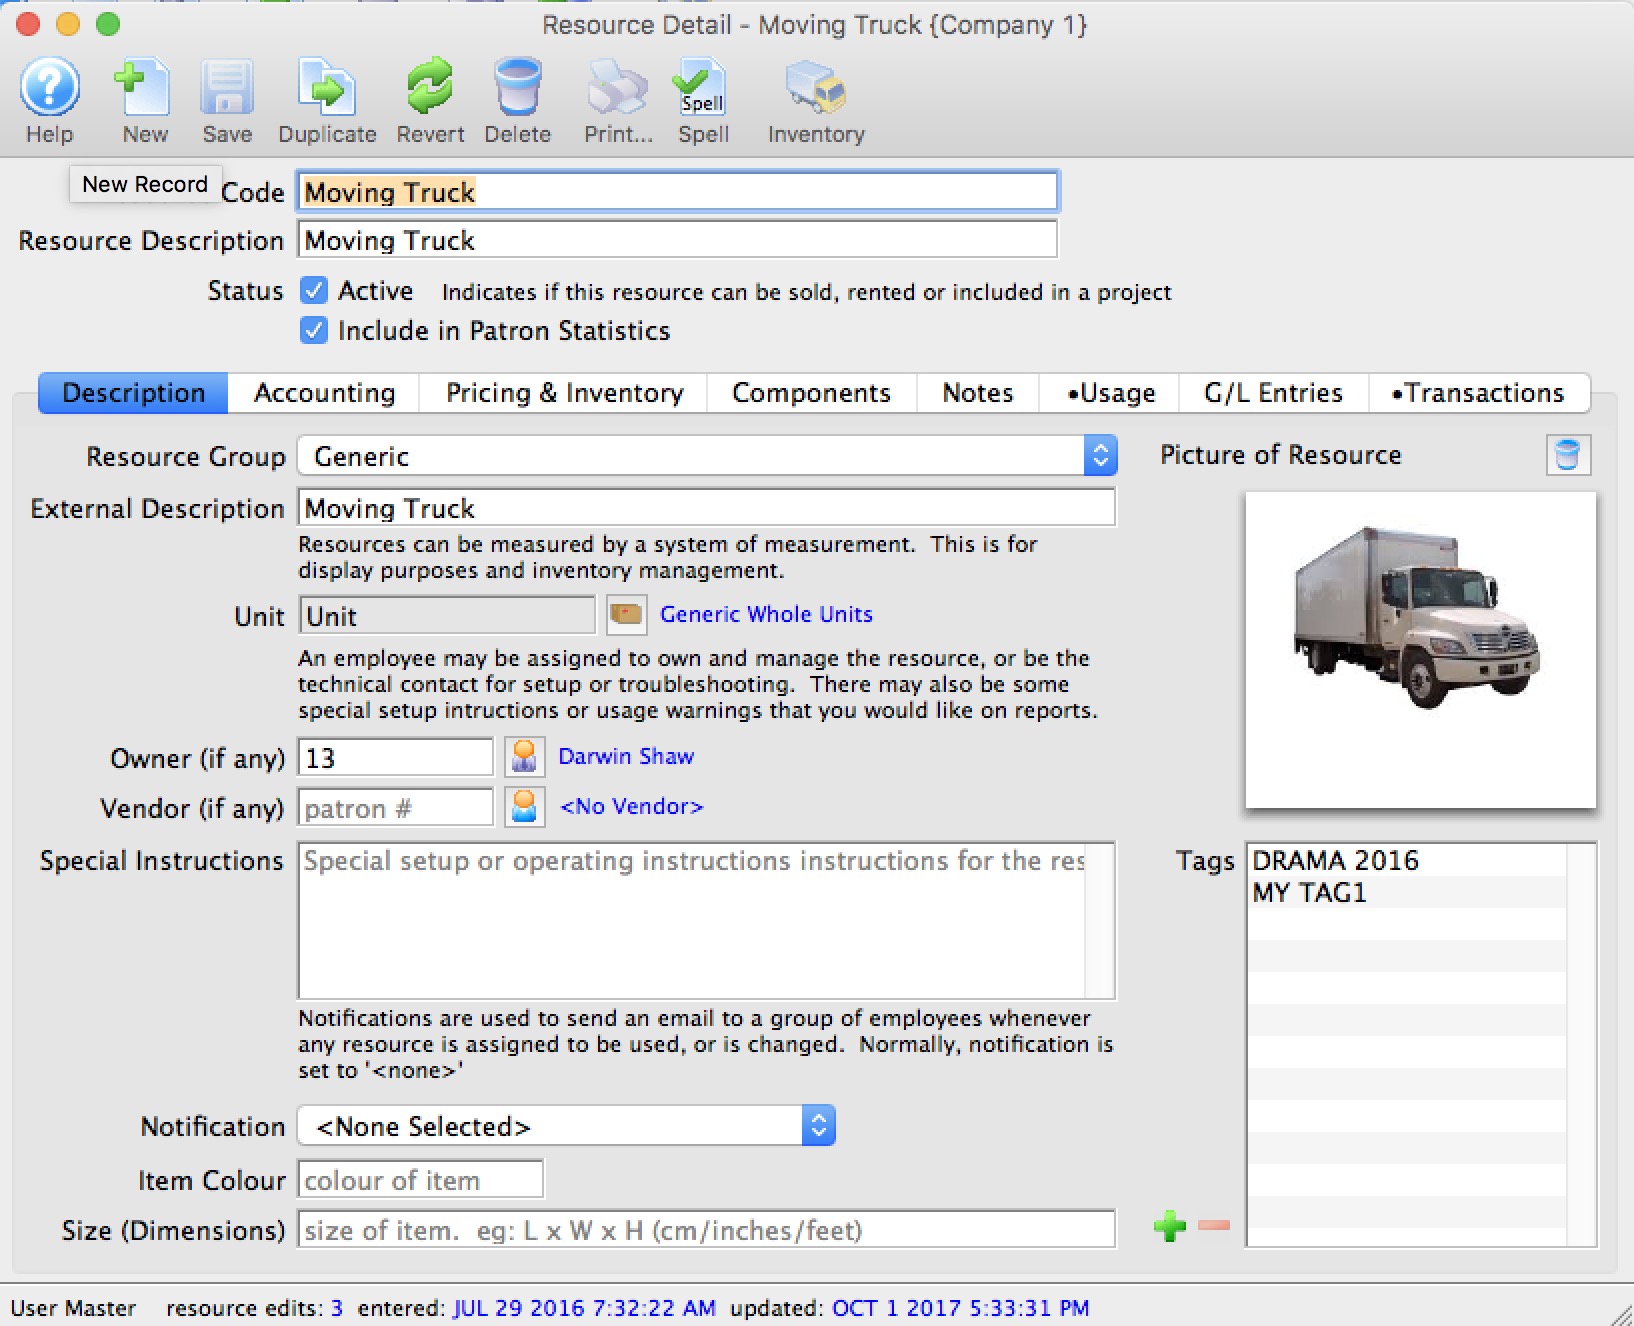
Description Tab
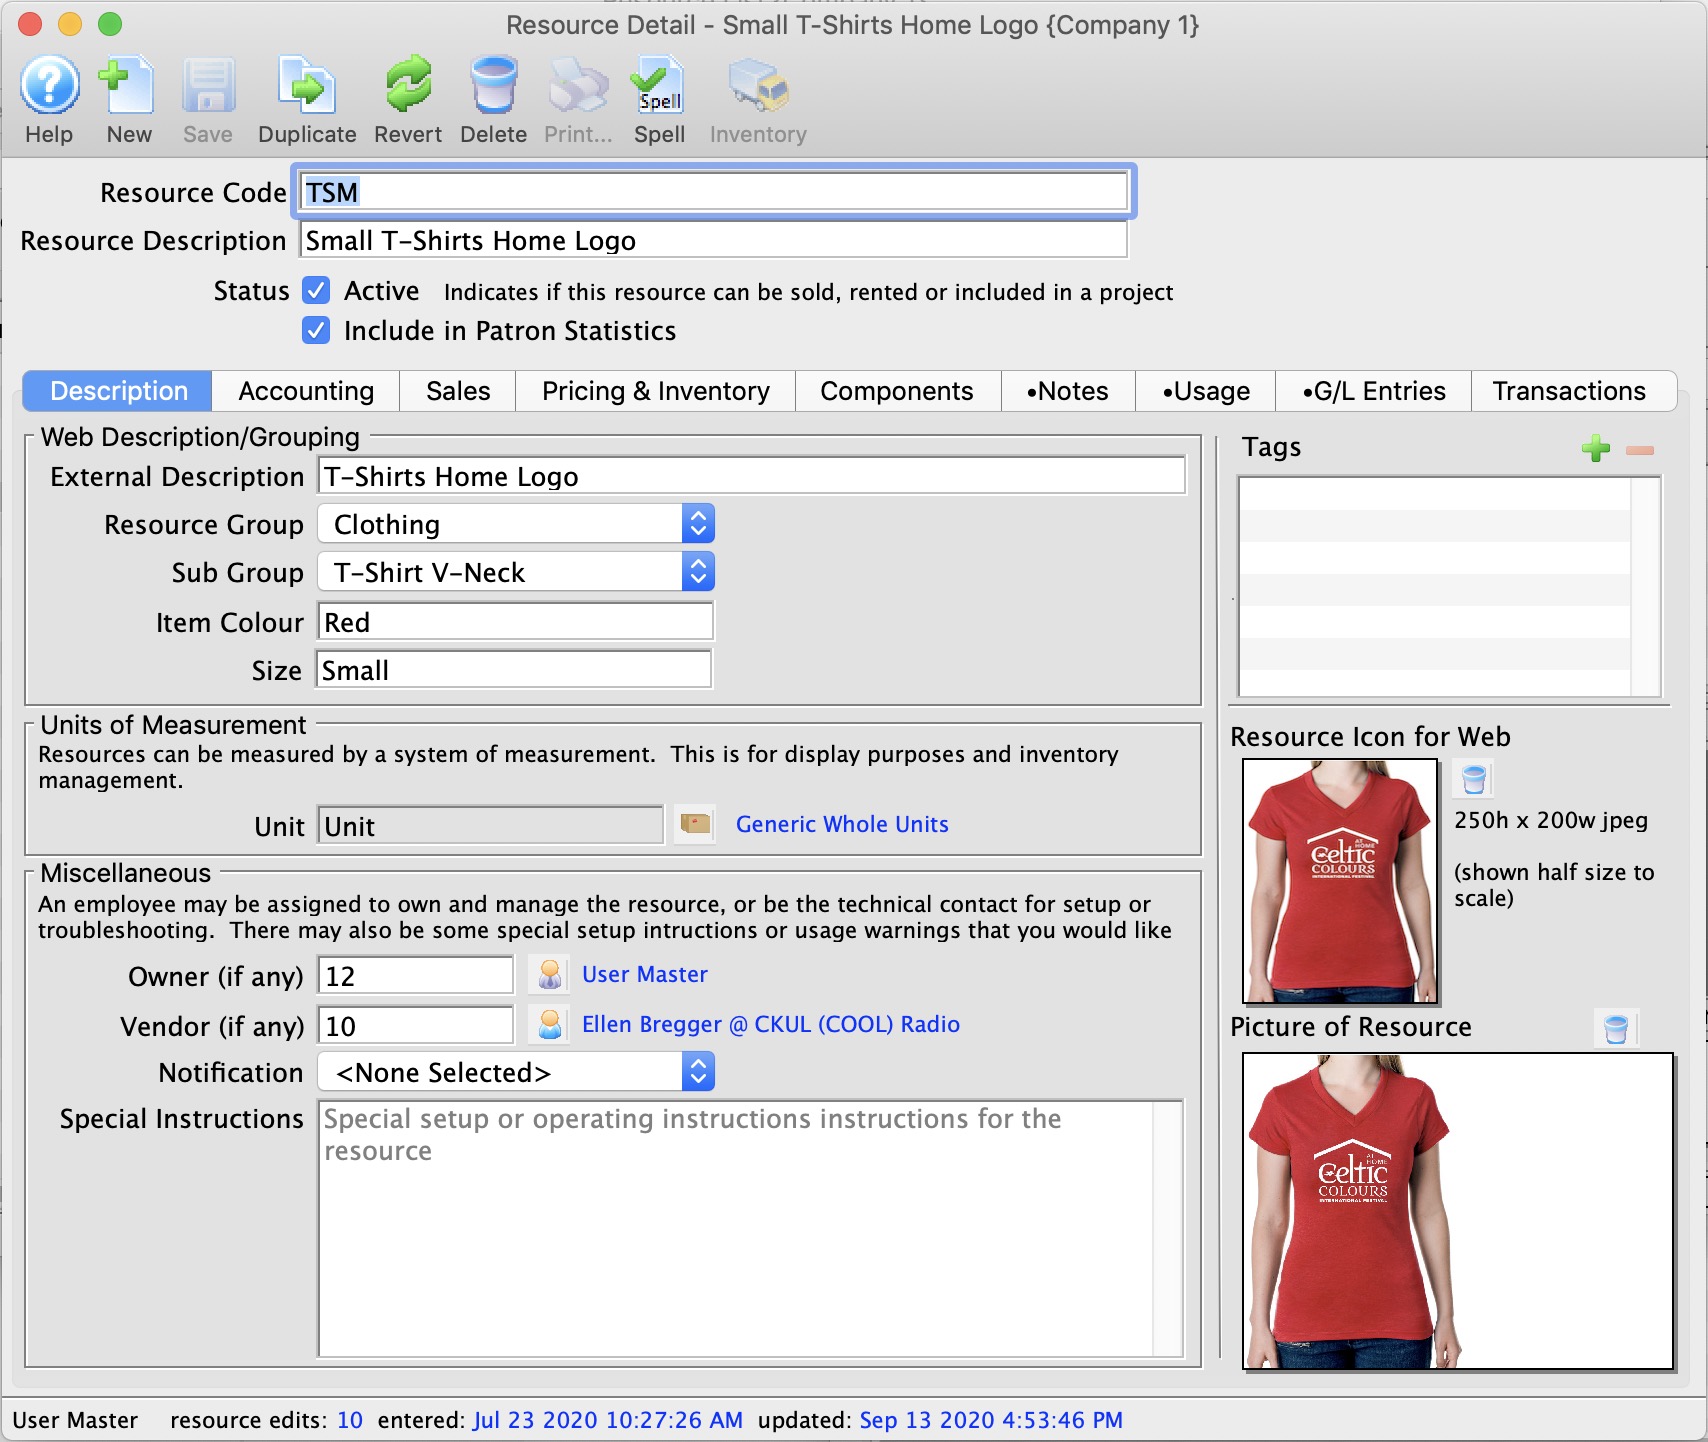
Parts of the Description Tab
 |
Accesses the Help section for this window. |
 |
Inserts a new Resource. For more information on inserting resources click here. |
 |
Saves changes made to the selected Resource |
 |
Copies the selected Resource. |

|
Undoes any changes made to the last saved point. |
 |
Deletes the selected Resource. Click here to learn how to delete resources. |
 |
Generates a report of the resources to the screen or default print location. |
 |
Does a spell check of the record. |
 |
Click to add inventory for the selected Resource. Opens the Pricing and Inventory Tab. |
| Resource Code | A unique code assigned to the specific Resource (similar to an Event Code, for example). |
| Outlet | The outlet to which a Resource belongs (for organizations using Outlet Edition of Theatre Manager). |
| Resource Description | The internal name of the Resource that will show in the Resource List Window and elsewhere in Theatre Manager. |
| Status Box | When checked, the Resource will be marked as an Active resource in lists. |
| Resource Group | The Resource Group to which a resource belongs. Theatre Manager's default Resource Group is "Generic." Click here, for information on how to add another group or groups. |
| External Description | the name of the resource that is viewable by the general public. |
| Picture of Resource | You can drag and drop an image from your computer into the Picture box. You are limited to a graphic less than 500k. Click here, for more information on adding an image. |
| Unit | The unit of measure for the resource for use in inventory management. |
| Owner | If the resource is owned (or managed), you can include that person by using the patron lookup button  and searching for the owner/manager in the database. and searching for the owner/manager in the database. |
| Vendor | The preferred Vendor from whom to obtain the resource (if applicable) |
| Special Instructions | Include any special or important information about the resource in the Special Instructions field. |
| Notifications | Notifications can be set to alert employees about usage of resources if desired. |
| Item Colour, Size and Picture | Item colour and size description may also be included. You may also drag a picture into the picture field if you'd like. |
| Tags | You can add any number of tags to the resource. |
Accounting Tab
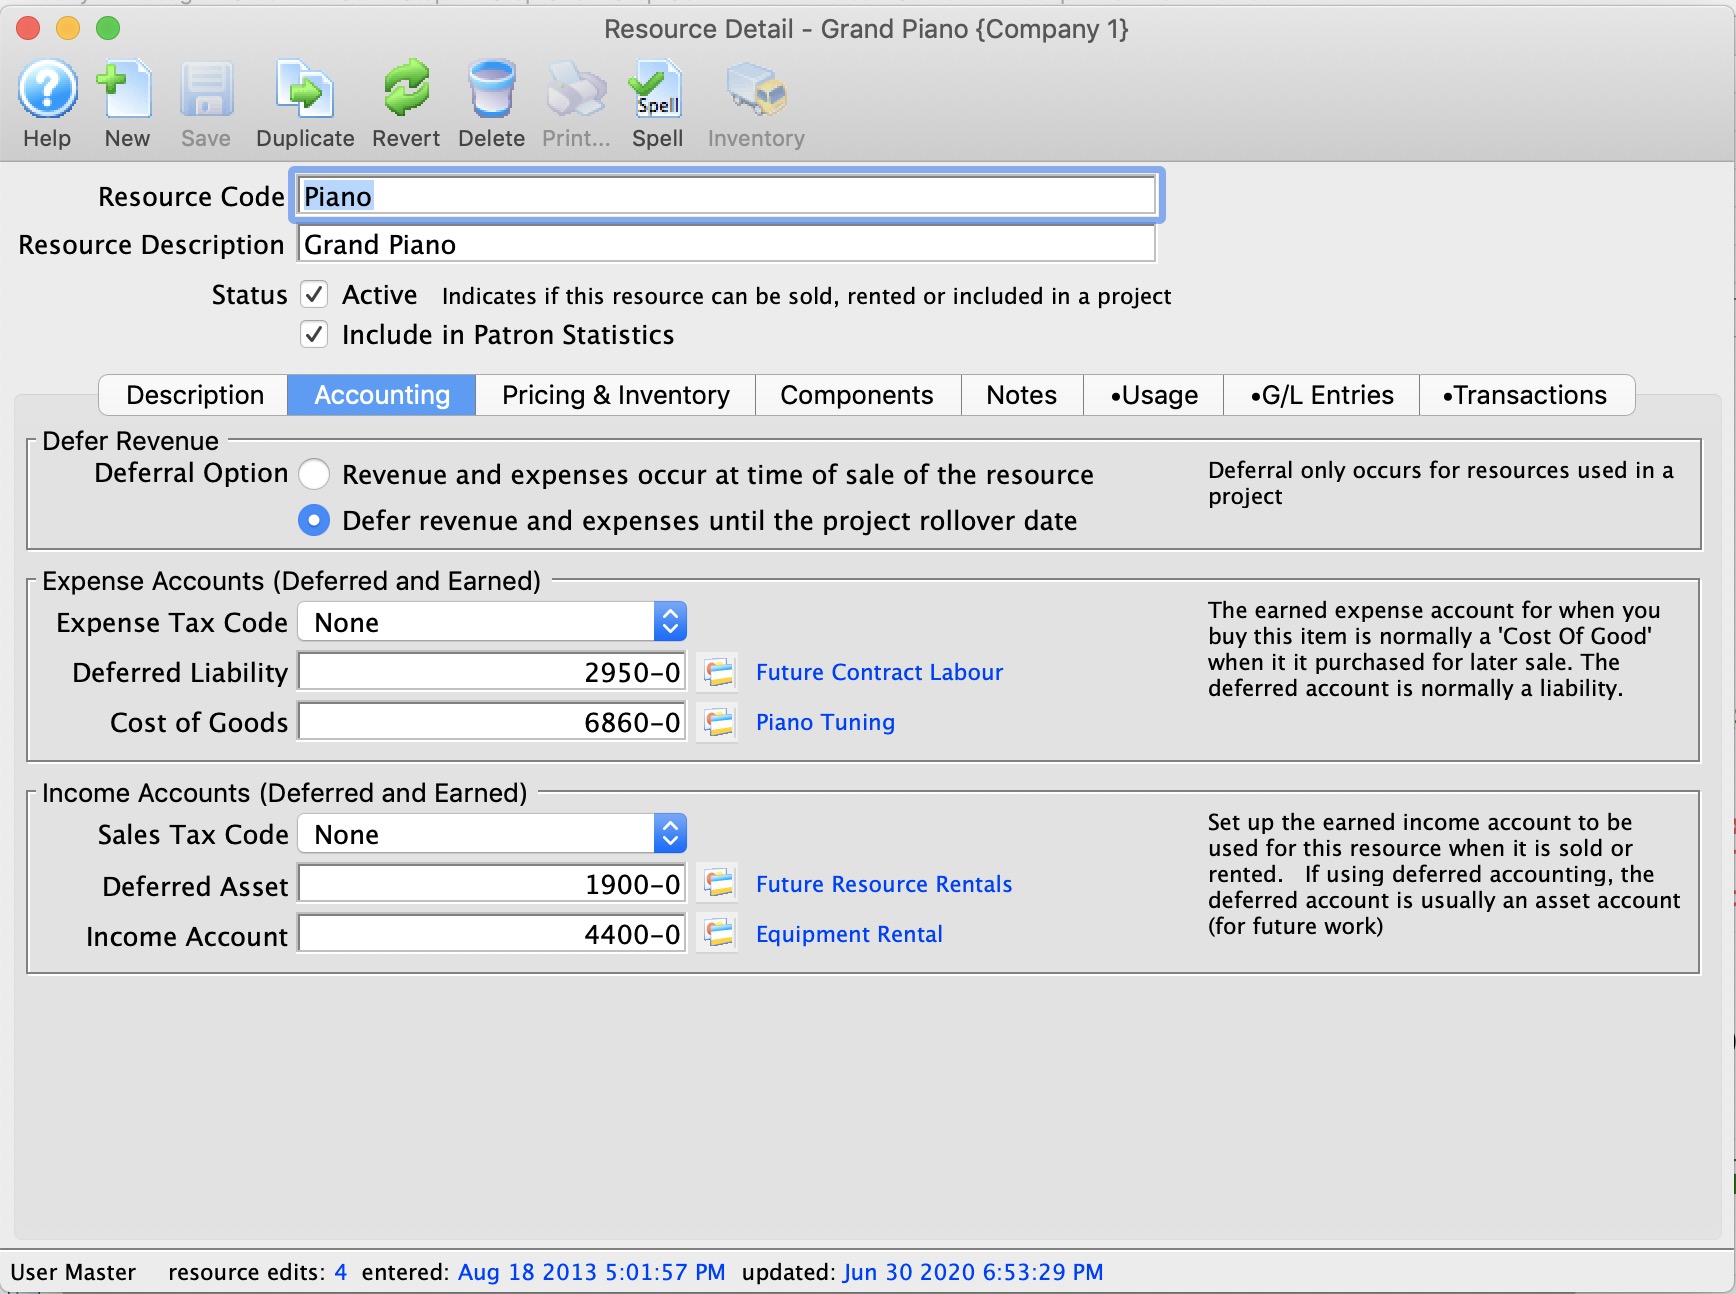
Parts of the Accounting Tab
| Deferred Accotning | For each resource, you can indicate if expenses and income should be deferred.
Even if you select deferred revenue accounting for the resource, it only comes into effect if the resources is attached to a project that is marked to defer revenue on the project's accounting tab. |
Expense Accounts |
|
| Expense Tax Code | The tax rate that applies to the purchase of the resource. |
| Deferred Liability | A liability account as set up in the Chart of Accounts to be used with this resource when it it purchased for later sale. |
| Earned Expense Account | An expense (or cost of goods) account as set up in the Chart of Accounts to be used with this resource when it it purchased for later sale. |
Income Accounts |
|
| Sales Tax Code | The sales tax rate used when selling/renting the resource. |
| Deferred Asset | The deferred income account - usually an asset to track future work (from the Chart of Accounts) to be used when this resource is sold or rented. |
| Income Account | The income account (from the Chart of Accounts) to be used when this resource is sold or rented. |
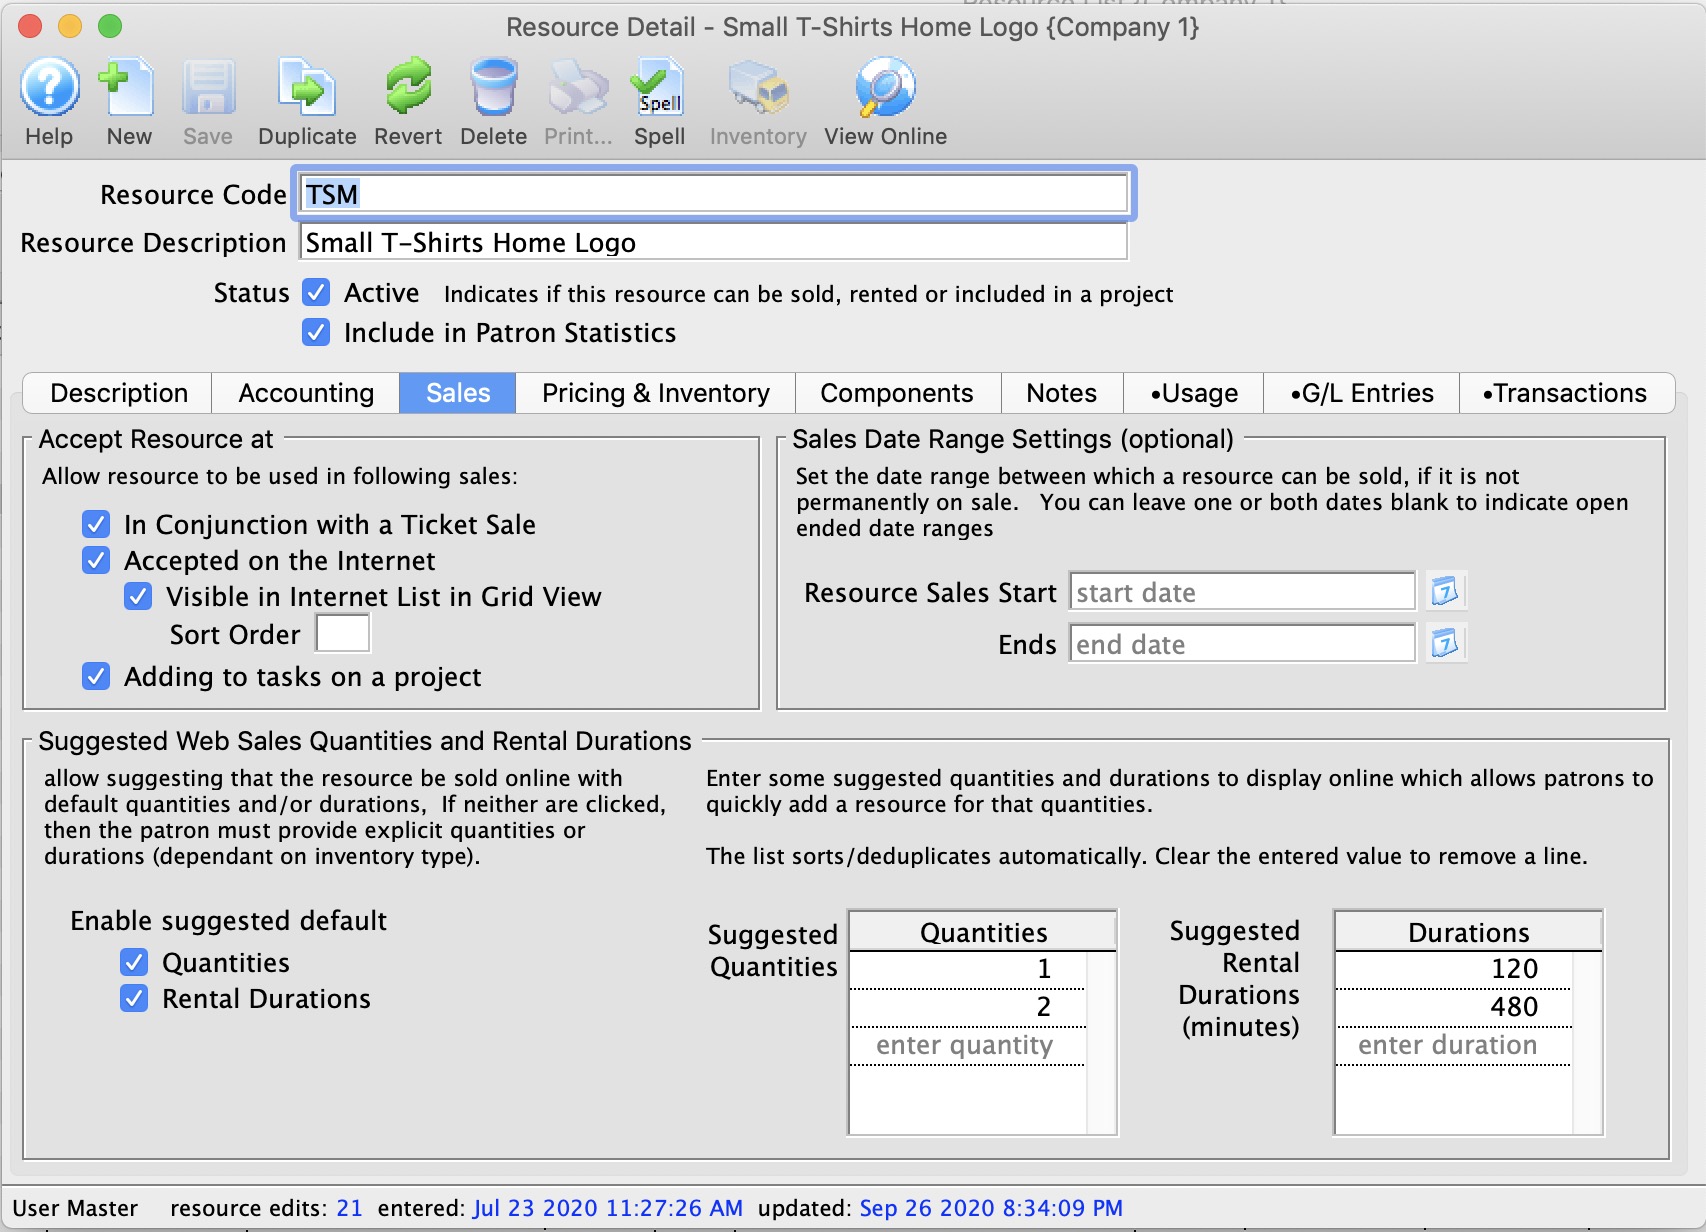
Resource Sales Options
Pricing and Inventory Tab
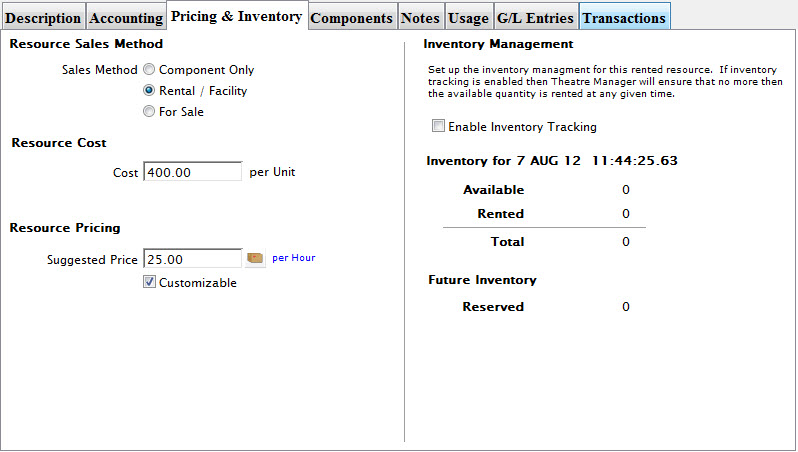
Parts of the Pricing and Inventory Tab
| Sales Method |
The three options are:
|
| Resource Cost | The replacement cost per unit of the resource (unit is set up on the Description Tab). |
| Resource Pricing | The suggested amount is how much should be charged per use of the resource. Usage is defined by the lookup button to the right of the entry field (in the example, it's set to Per Day). |
| Customizable checkbox | When checked, the Suggested Price can be changed when the resource is used. |
| Inventory Management | |
| Enable Inventory Tracking checkbox | Sets up the inventory management for this rental resource. If inventory tracking is enabled, then Theatre Manager will ensure that no more than the available quantity is rented at any given time. Click here to see how to Add Inventory Tracking. |
Enabling Inventory Tracking
Tracking inventory allows you to specify the number of units available. If tracking is not on, Theatre Manager assumes the number of units available are unlimited. To start tracking inventory for the selected resource, perform the following steps:
![]()
- In the Pricing and Inventory window, click to enable Inventory Tracking.
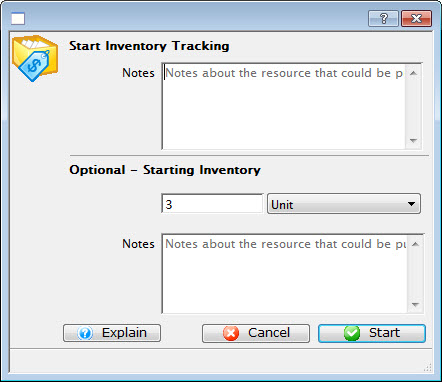
If required, enter Notes about the inventory modification.
Optionally - You can enter the number of units to track.
- To start inventory tracking, click the Start
 button.
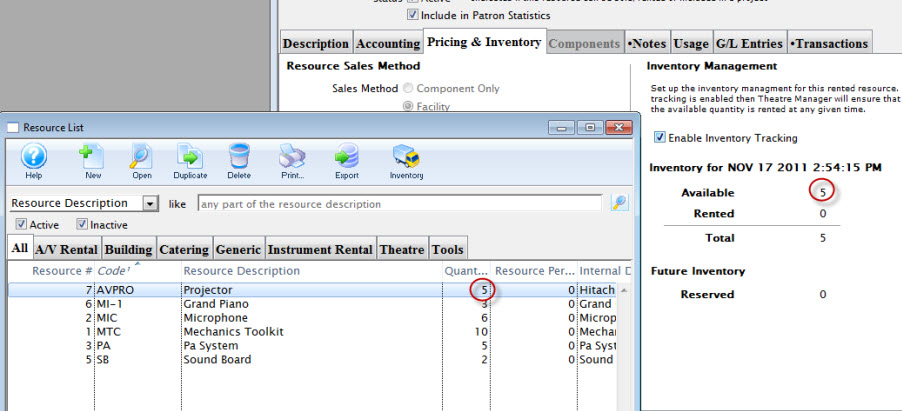
The inventory number appears on the Pricing and Inventory tab and in the Resource List.
Adjusting Inventory Tracking
Removing Inventory Tracking
You can disable the tracing of a particular resource. To remove tracking for the selected resource, perform the following steps:

- In the Pricing and Inventory window, click the check box
 to disable Inventory Tracking.
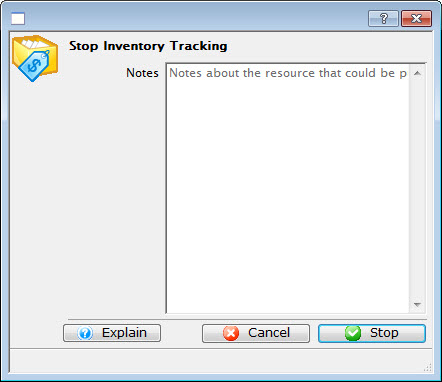
If required, enter Notes, such as a reason the tracking was disabled (for example, the particular unit has been replaced).
- Click the Stop
 button.
Components Tab
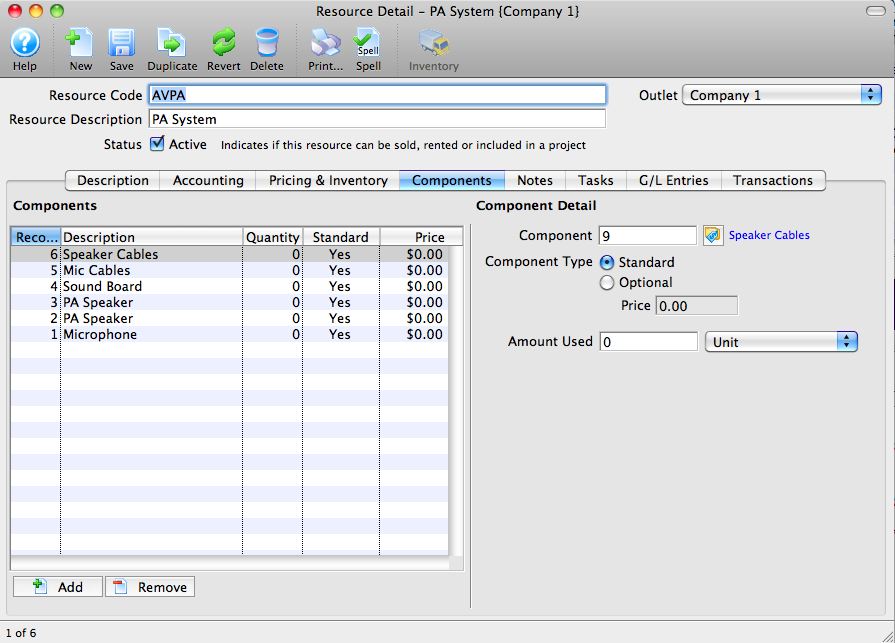
The Components Tab can be used for those resources which may require the use of various components (a PA System in the example). It is not a required tab for resource setup.
Parts of the Pricing and Inventory Tab
| Components List | Add or remove components to/from a resource here using the  Add or Add or  Remove buttons at left under the list. Remove buttons at left under the list. |
| Component Detail | This section on the right side applies to the currently selected component resource on the component list on the left. In the example, the selected component is Speaker Cables, so the items under Component Detail apply to Speaker Cables as they are being used as a component of the PA System (the current selected Resourse) |
| Component | The currently selected component resource. |
| Component Type | Component resources are either a Standard part of the current Resource, or an Optional part of the Resource as designated here. |
| Amount Used | Set here how many units of the selected component resource are to be used in the instance of the current Resource. |
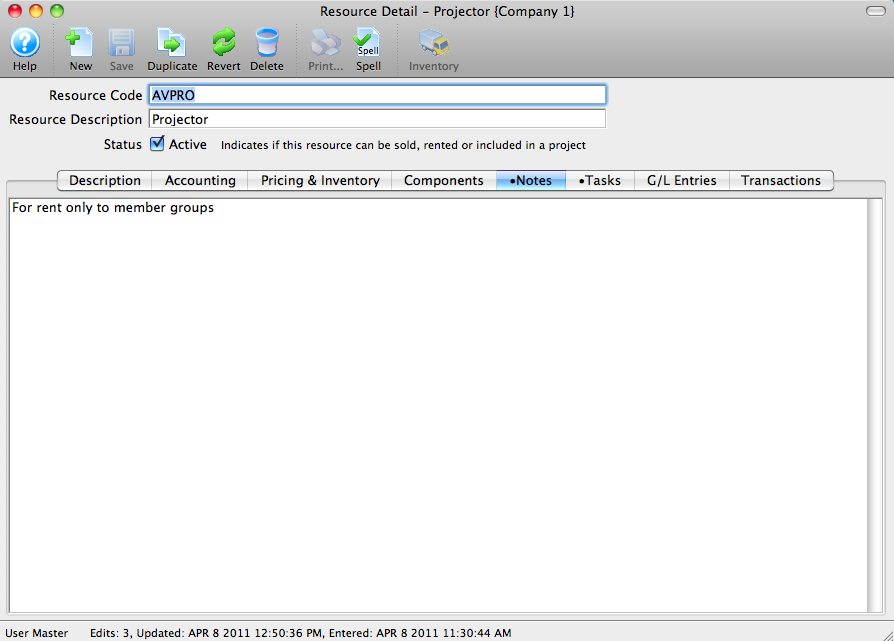
Notes Tab
In the notes tab, you can enter any internal notes about this particular resource. The Notes tab is not a mandatory field to fill out when setting up a Resource.
Usage Tab
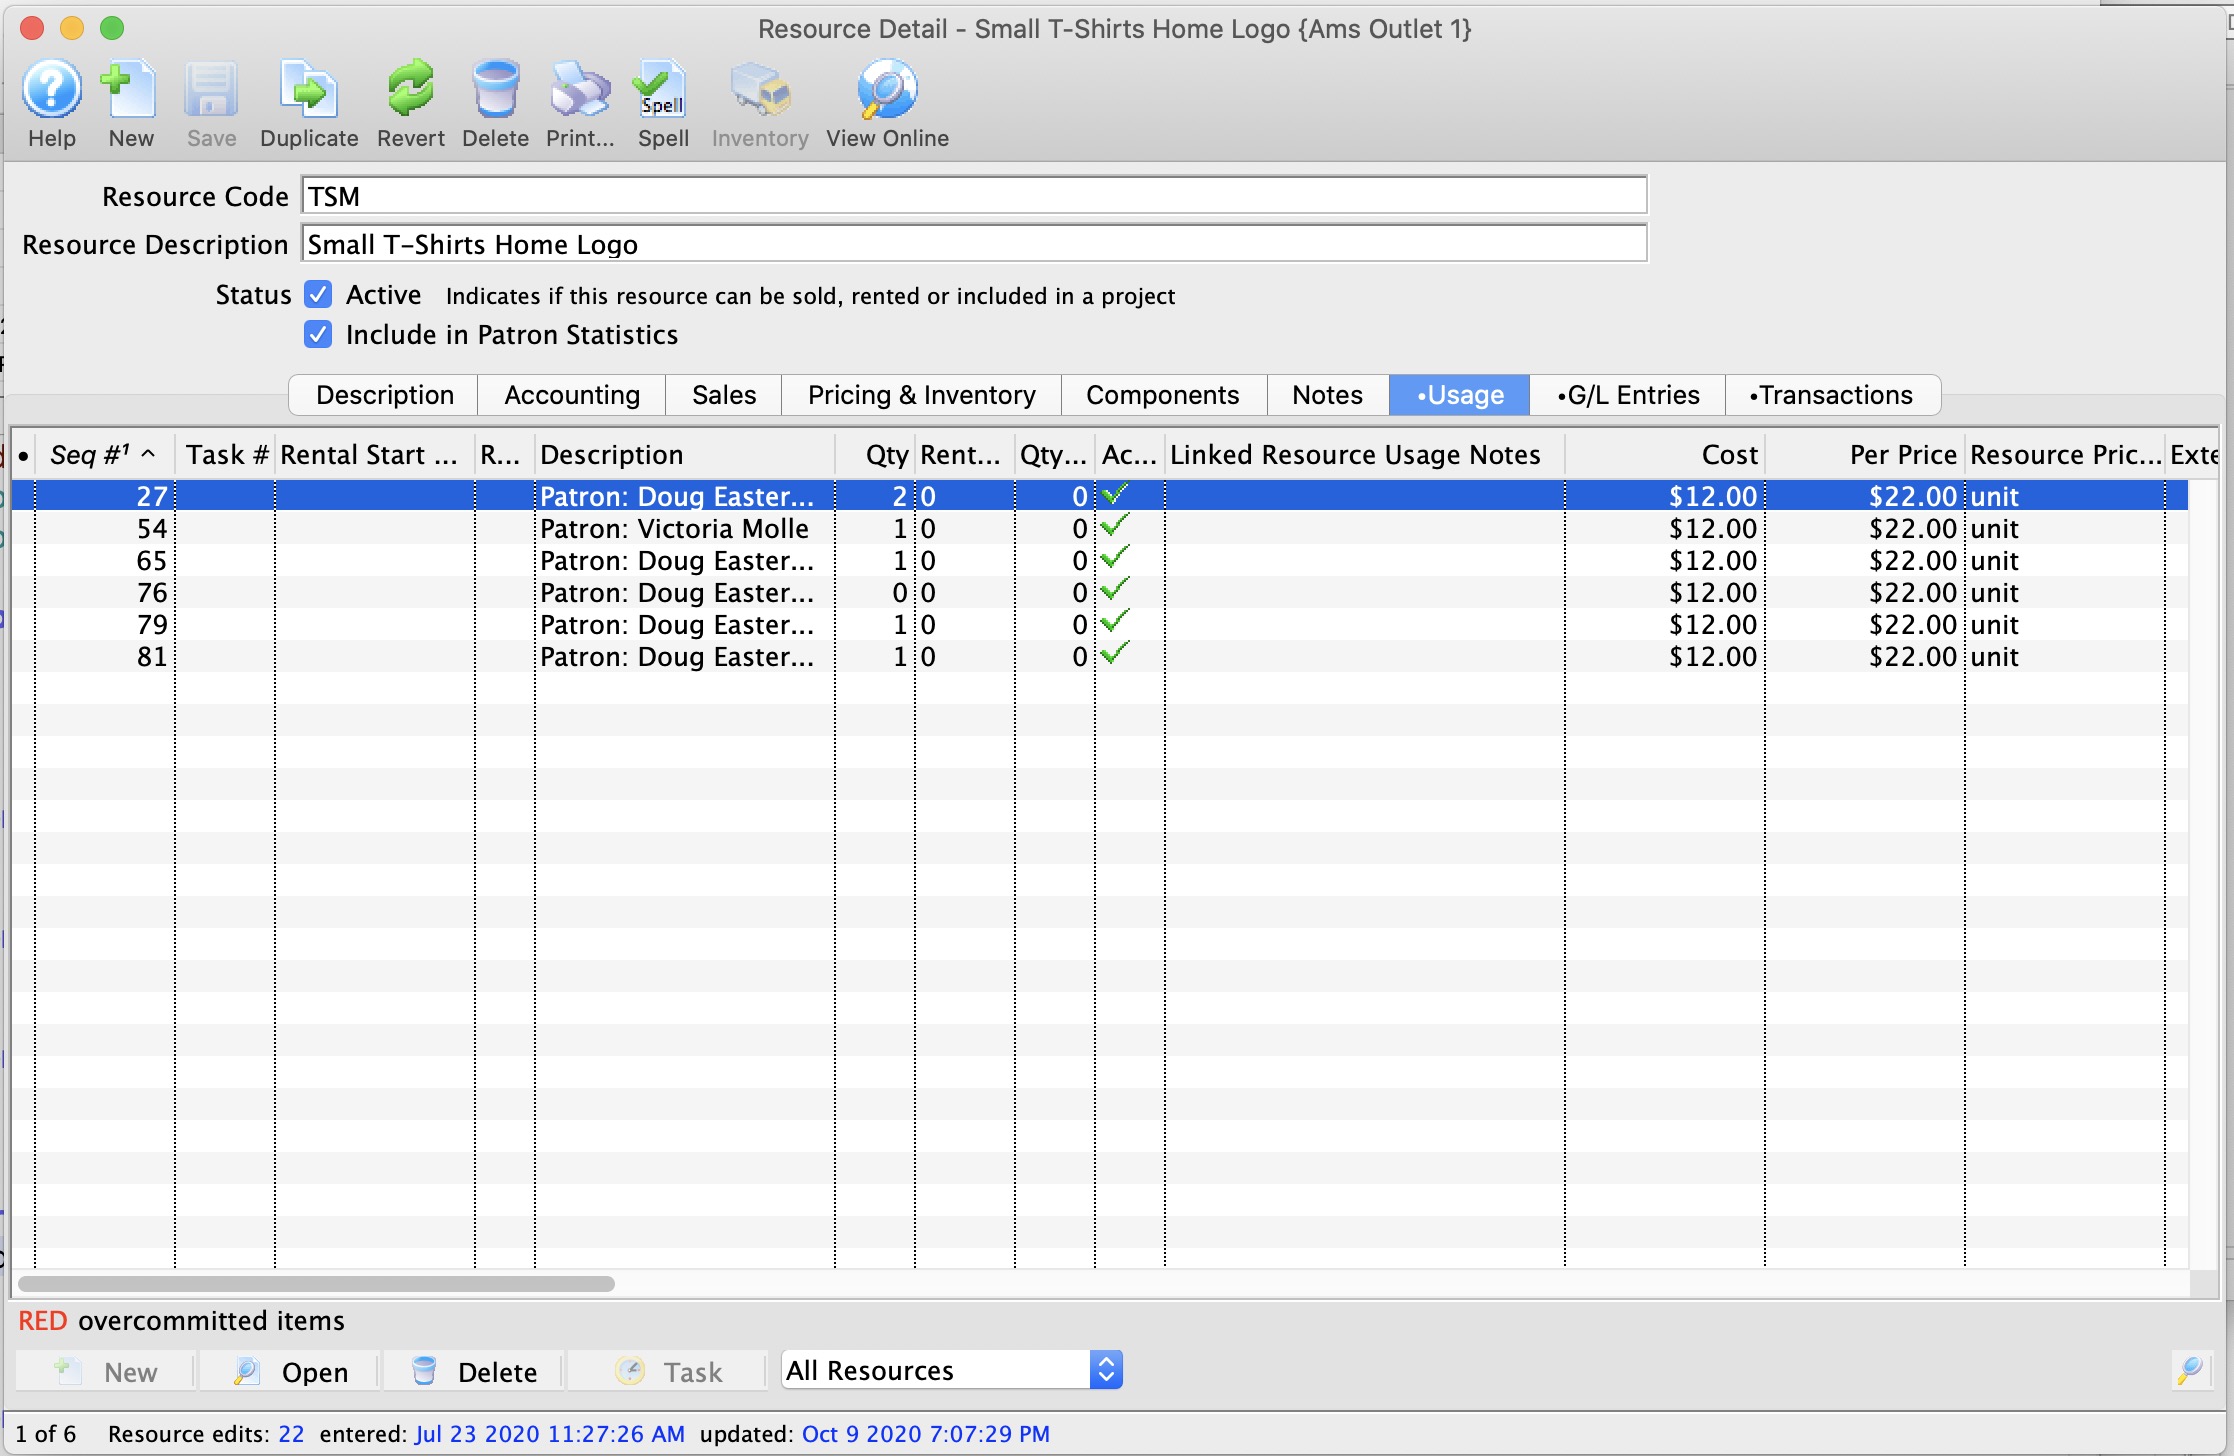
Parts of the Usage Tab
| Task # | The unique number in the database assigned to the particular task. |
| Rental Start Date | The start date for the rental of the respurce. |
| Rental Expected End Date | The ending date for the rental of the resource. |
| Description | The name or description as it appears on the calendar. |
| Quantity | How many of the current resource are set for use. |
 |
The New Button is grayed out on this tab as it is not possible to add usage to a Resource. |
 |
Opens the selected Task Resource Detail window in order to edit the resource details as they pertain to that task. |
 |
Deletes the resource from the Task. |
 |
Opens the selected Task for editing. |
 |
Drop-down that allows searching the Task list for All Resources, by Task Description, or by Task Begin Date. |
G/L Entries
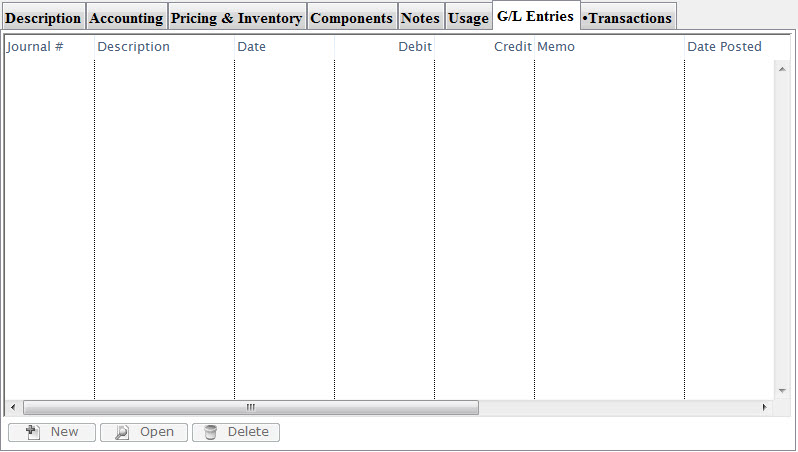
G/L Entries
Transactions Tab
![]()
Transactions
- The Transactions tab shows each transaction associated with the resource. This tab and the G/L Entries tab will be populated as you use the resource and has no set up requirements.