Changing Page Design
Editing Bootstrap Themes
 |
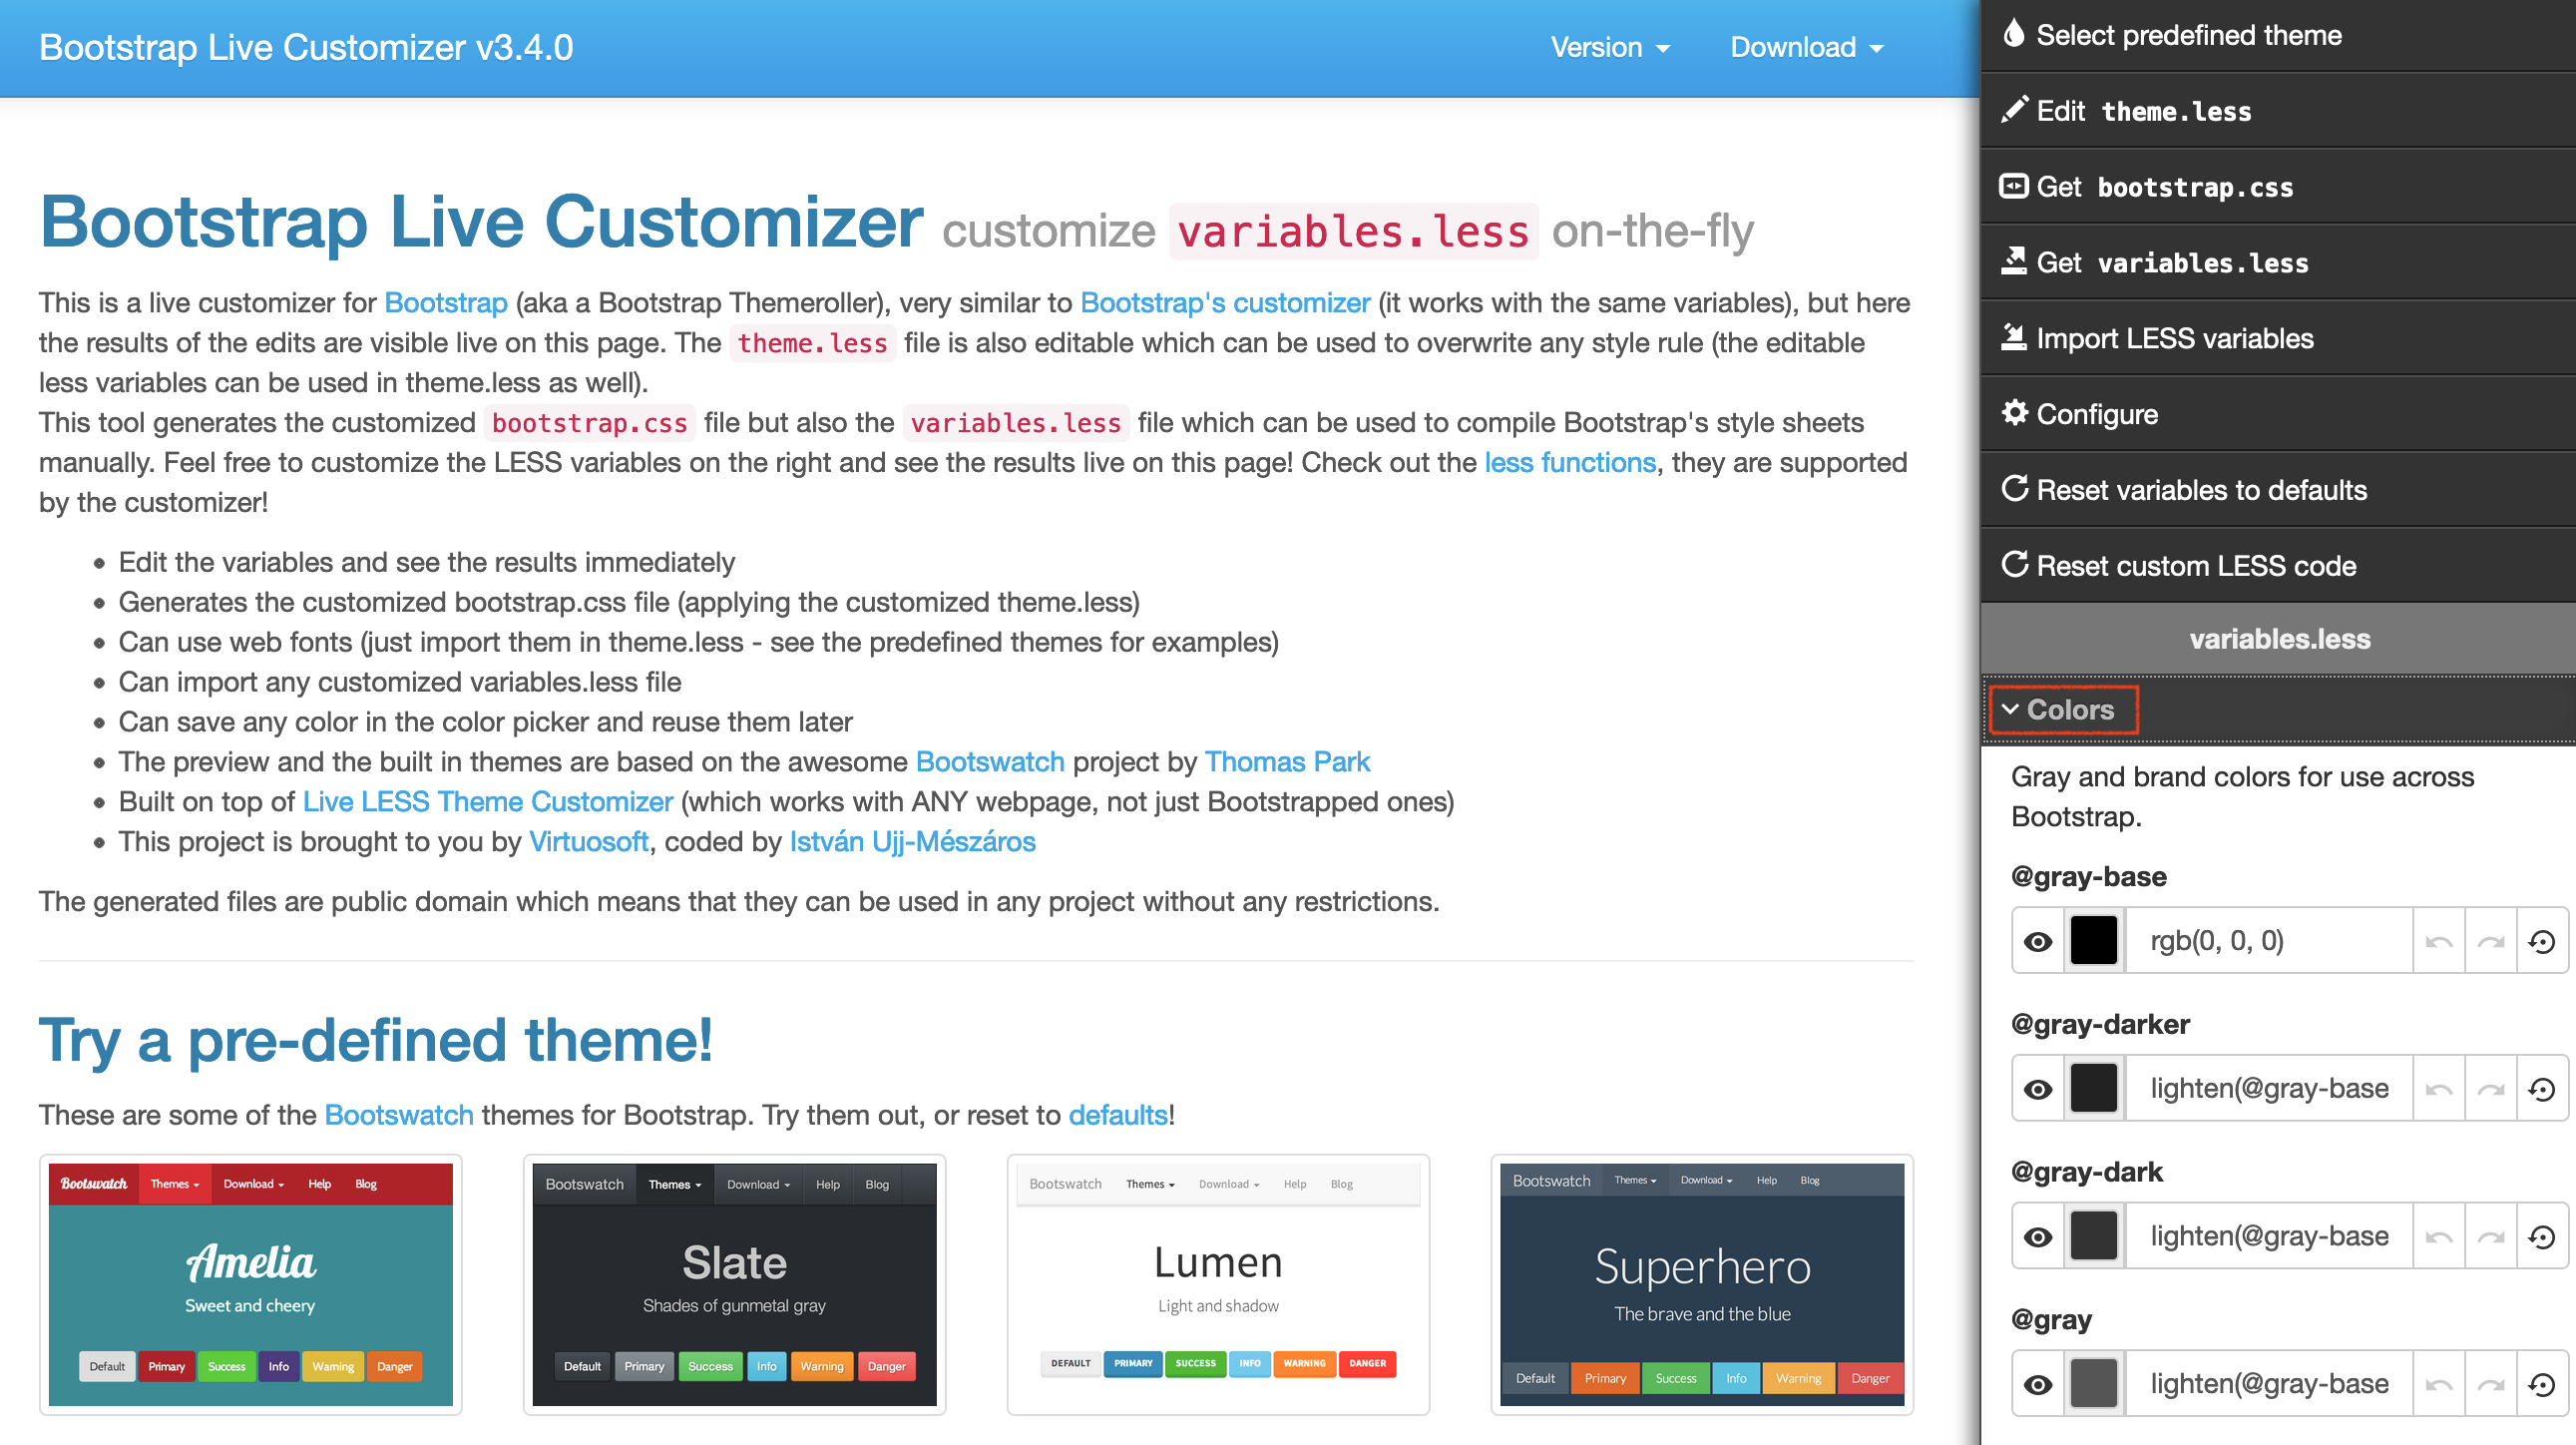
The fastest and best way to completely alter the look of the web pages is to change the theme using a customization tool like Bootstrap Live Customizer.
This can be done in minutes |
Alternatively the custom.css file can be altered to define individual element within the pages.
Location of Web Pages for ticketing site
The web pages for the ticketing site:
- are located in a folder on the Web Listener computer (for those clients who self host) -or-
- are located in a git repository (for clients using Artsman Cloud Hosting).
The web page file structure consists of a WebPagesEN folder containing only those pages previously customized. A full set of the default pages are can be download from
https://gitlab.artsman.com/_public/tmresponsivewebpages.
When making edits to existing pages the latest default page should be downloaded and copied to the corresponding page within the local folder.
Updating the Logo
The logo at the top of the ticketing site in the navigation bar is a company logo. The quickest way to update the image would be to create a tmCompanyLogo.jpg file and place it in the /WebPagesEN/tmGifs folder. This will replace the default image.
Alternatively an image can be added to the /WebPagesEN/tmGifs folder and the tmnavButtons.html page (located in the /WebPagesEN/TMtemplages folder) can be updated with the image name.
Additional Edits
Other commonly edited web pages are:
- tmEventAdDefault.html - the ad at the bottom of the print at home ticket
- tmEventBannerDefault.html - the banner at the top of the print at home ticket
- tmContactHours.html - to include the hours that the box office is typically open
- tmnavButtons.html - add or remove buttons in the navigation bar to reflect the kind of items you sell online
- tmSocialMedia.html - to provide the complete URL's of your venue's social media links
- favicon.ico - to provide a customized icon for your venue in the browser URL bar.
Removing Crimson Navigation Buttons
In the default stylePages.css, the buttons within the online sales will appear red when using an Internet Explorer browser. For some clients, this works with their default pages. Others would prefer not to have the buttons appear in red. Please see the steps below on how to alter the buttons.
- On the Apache machine navigate to the /WebPagesXX/tmGifs folder.
- Open the styleButtons.css page using an html editing tool.
- Locate the following line:
filter:progid:DXiMageTransform.microsoft.Gradient(GradientType=0,StartColorStr='#ff800000',EndColorStr='#ff333333');
- Add a /* before the line.
- Add a */ after the line but before the } symbol.
- Repeat the above two steps for all four filter lines within the styleButtons.css file.
- Save the changes.
- Clear the cache on the web listener to reflect the change.
GitHub Desktop
GitHub Desktop is one of many third party tools that can be used for accessing web pages hosted on the Artsman Cloud in a git repository. Git is a distributed version-control system. It's great at tracking who made changes to what and when.
To setup access to your specific company web pages via Git, email support@artsman.com with the full name of the employee who will be allowed to make changes to your pages, and their company email address. For security and tracking purposes, only employee specific email addresses are accepted, like "johnsmith@example.com".
To use GitHub Desktop simply download and install the program. Clone the git repository pages to your computer for editing locally. After edits are made Commit and Push to the master branch of the repository directly through GitHub Desktop.
|
Only previously customized web pages will appear in the Artsman Cloud git repository for your organization. If the page you wish to edit does not appear on your local machine it may not have previously been edited. You'll need to download the default responsive pages and move that desired page to the corresponding folder on your local machine before making edits. Your repository should only contain customized web pages.
Remember to download the latest responsive pages each time before you begin making edits. |
Inital Setup
- Copy the Repository URL
- Clone the repository to local machine
Using GitHub Desktop
- Pulling recent changes
- Committing Changes
- Pushing Changes
Copy GitLab Repository URL
The GitLab Repository URL is needed when cloning the repository locally. The steps below should only need to be done once per repository during the initial setup.
Copy GitLab Repository URL
- In a browser navigate to https://gitlab.artsman.com
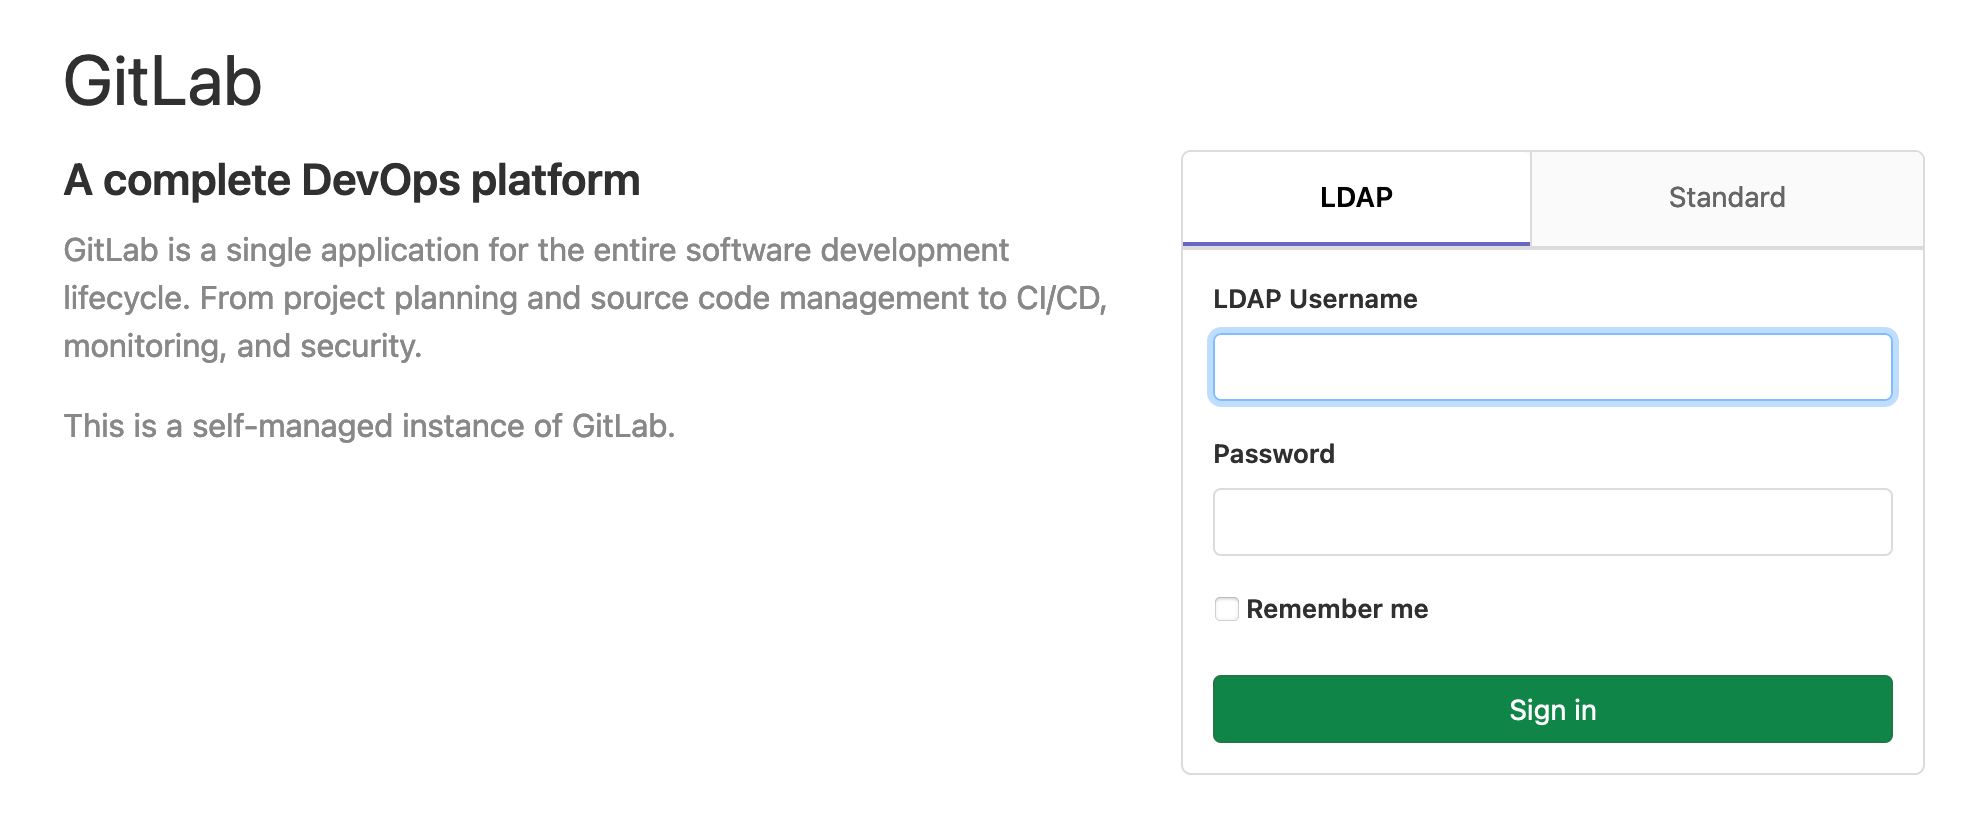
- Select the Standard tab
- Enter your Email Address and Password
Login information is requested through the Artsman Support team. If you have not previously been provided access please email the support team. When access is granted an email will be sent directly from GitLab to your email with steps for setting a password and logging in.
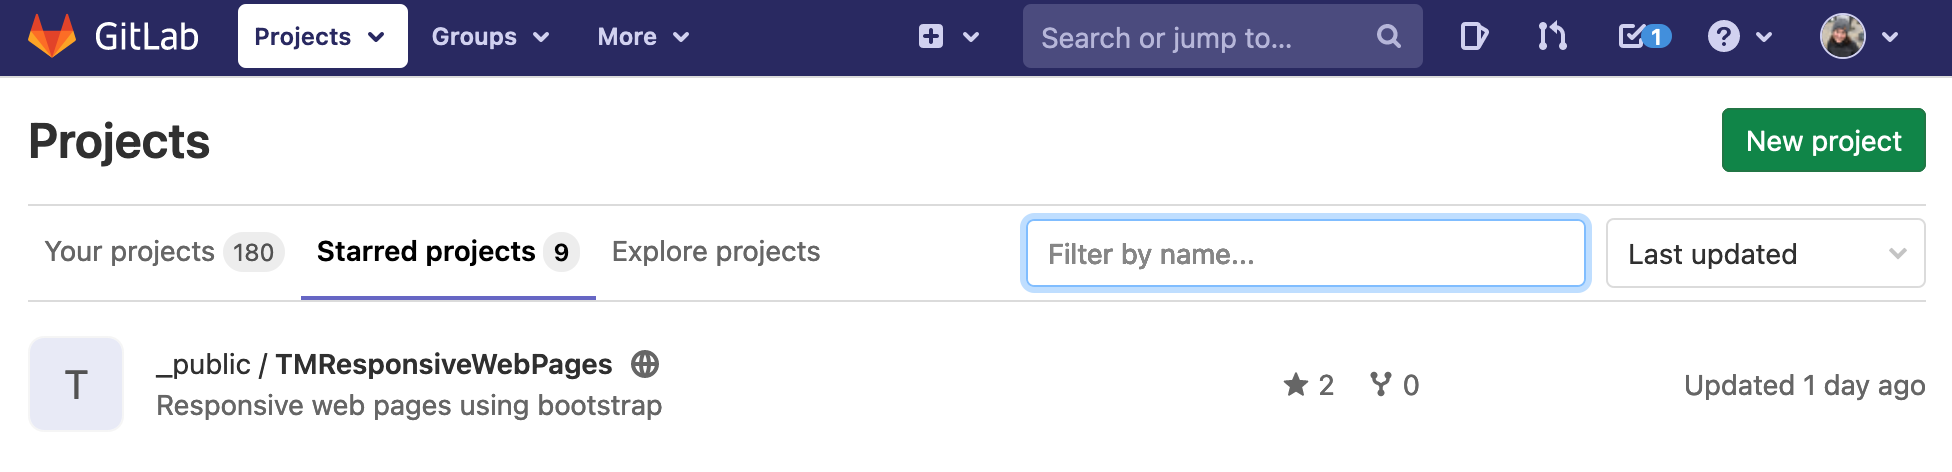
- Click the repository you wish to clone
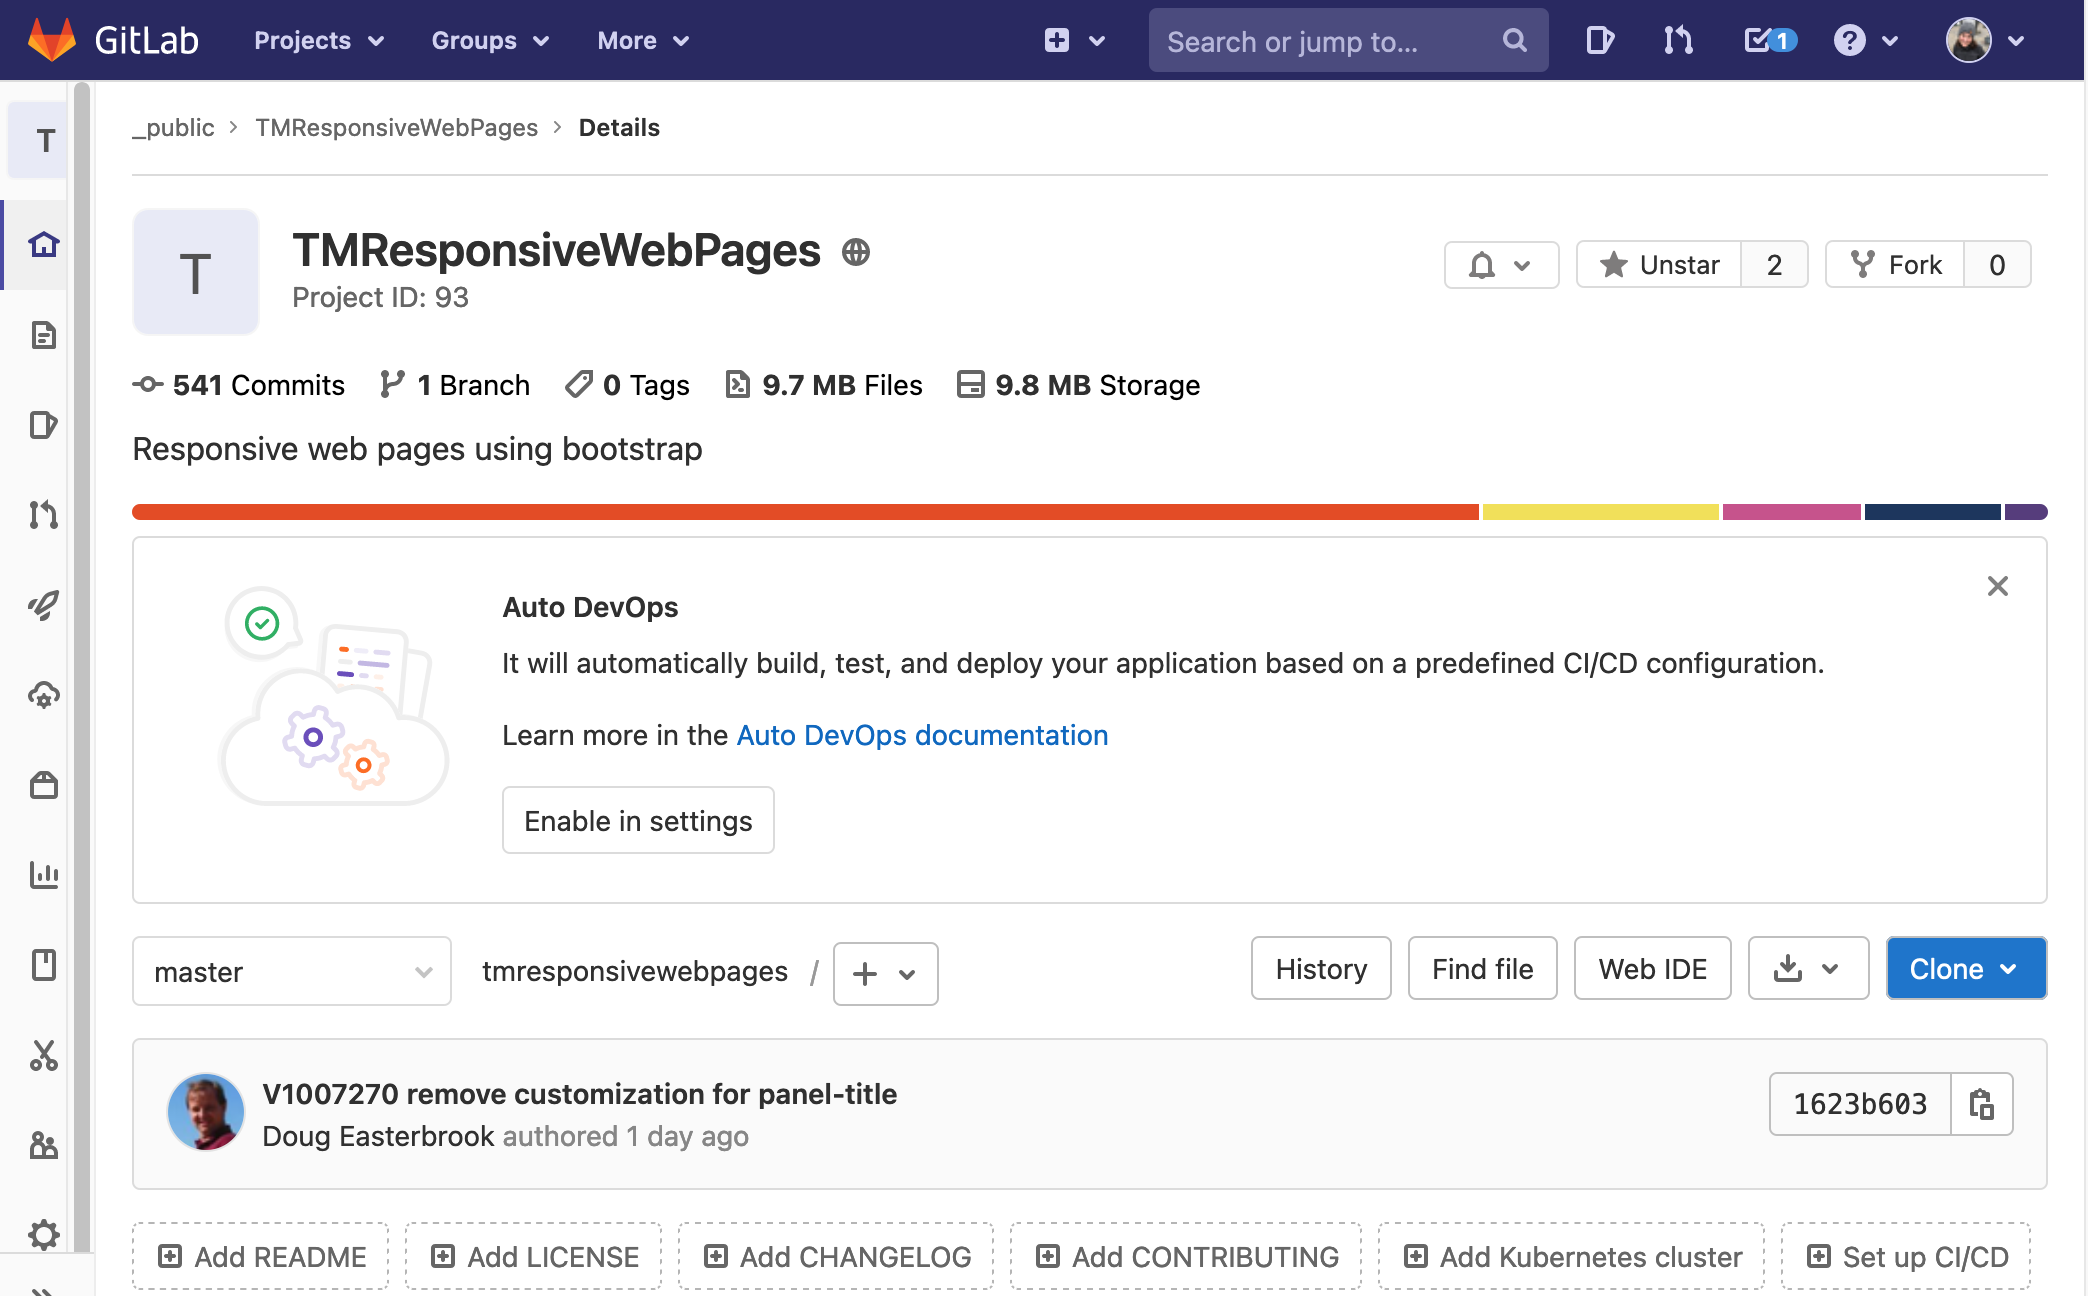
- Click the blue Clone button
- Click the copy button next to the Clone with HTTPS URL

This will copy the URL for the repository to your computers clipboard making it ready to paste into GitHub Desktop for cloning.
Cloning Repository to GitHub Desktop
Cloning a Repository to GitHub Desktop
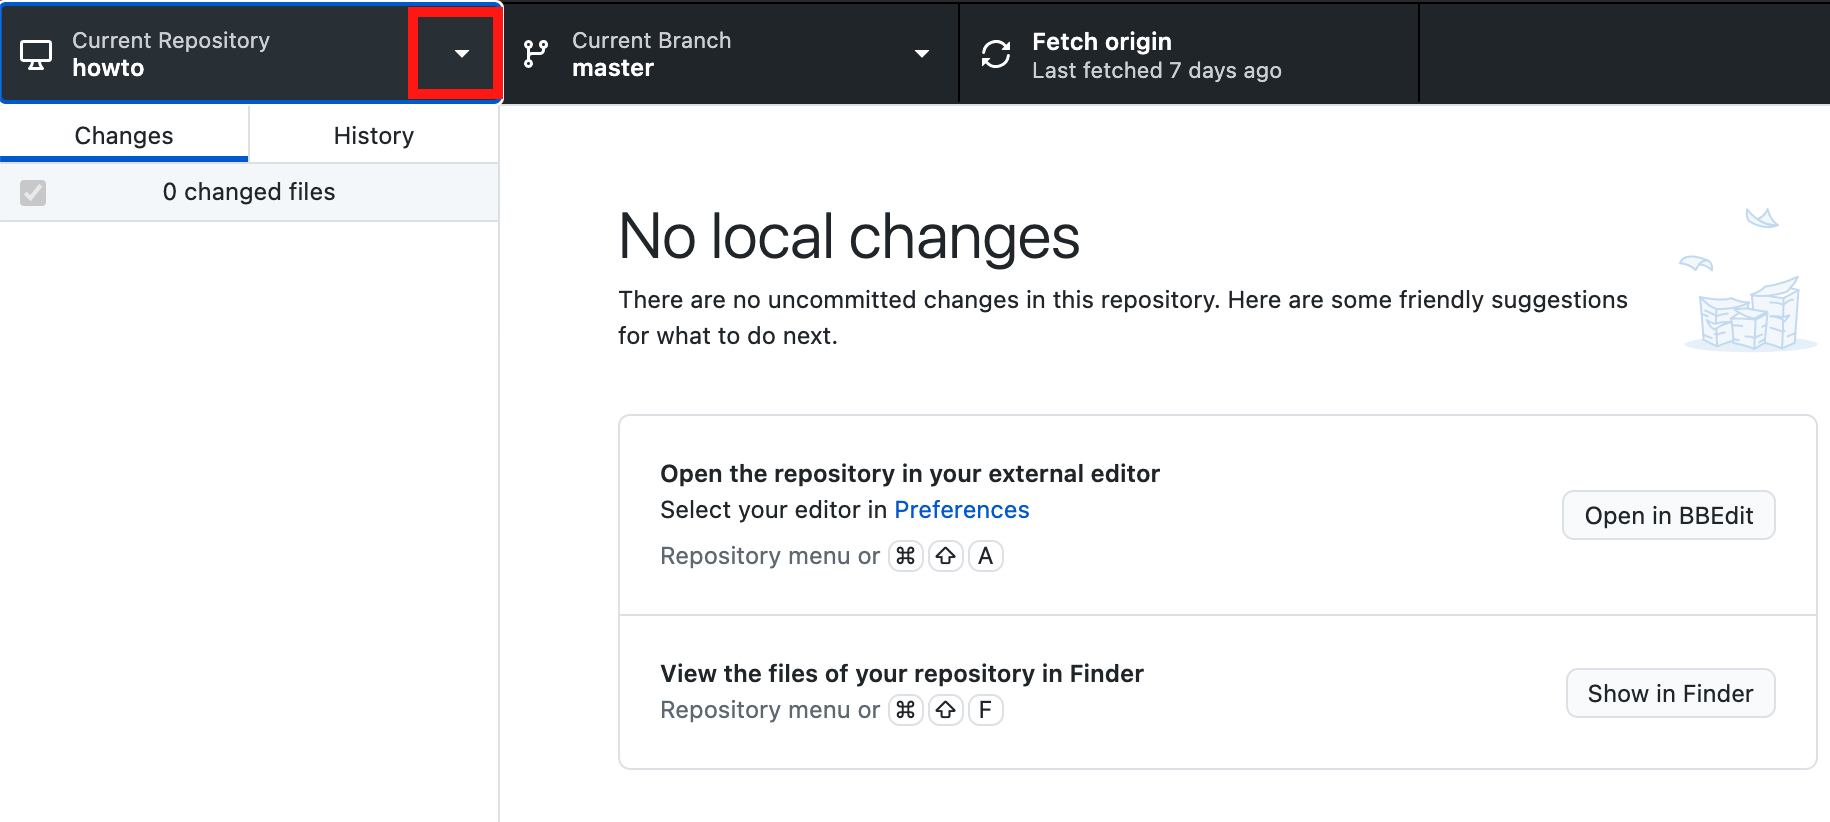
- Open GitHub Desktop
- Click the arrow next to Current Repository to expand the menu
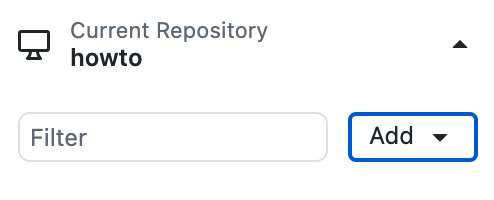
- Click the Add button
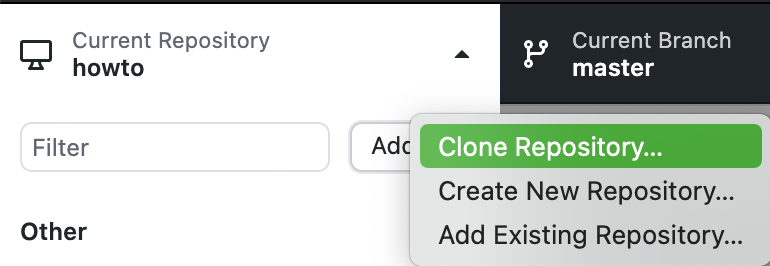
- Select Clone Repository...
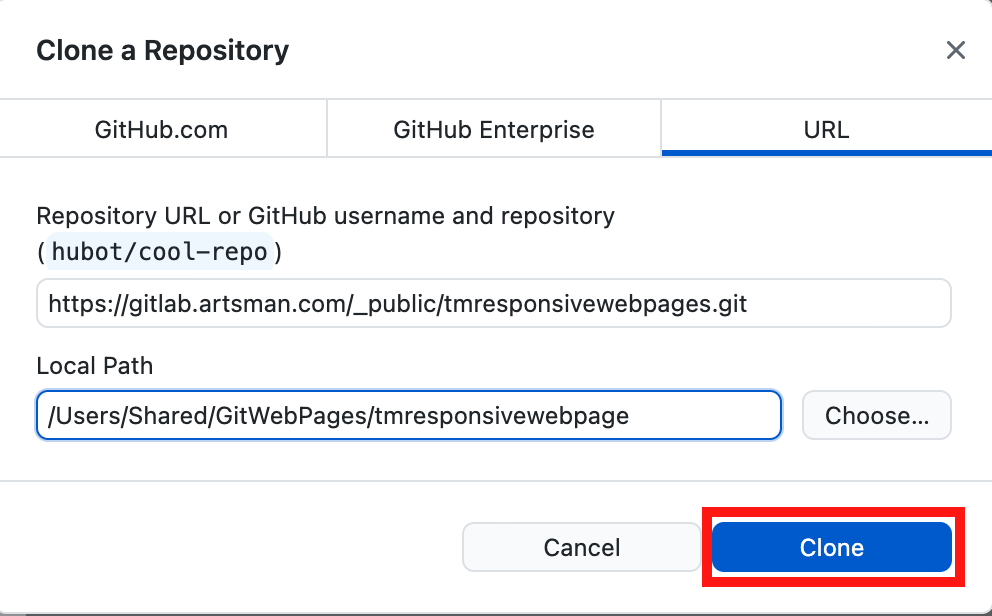
- Select the URL tab at the top of the window
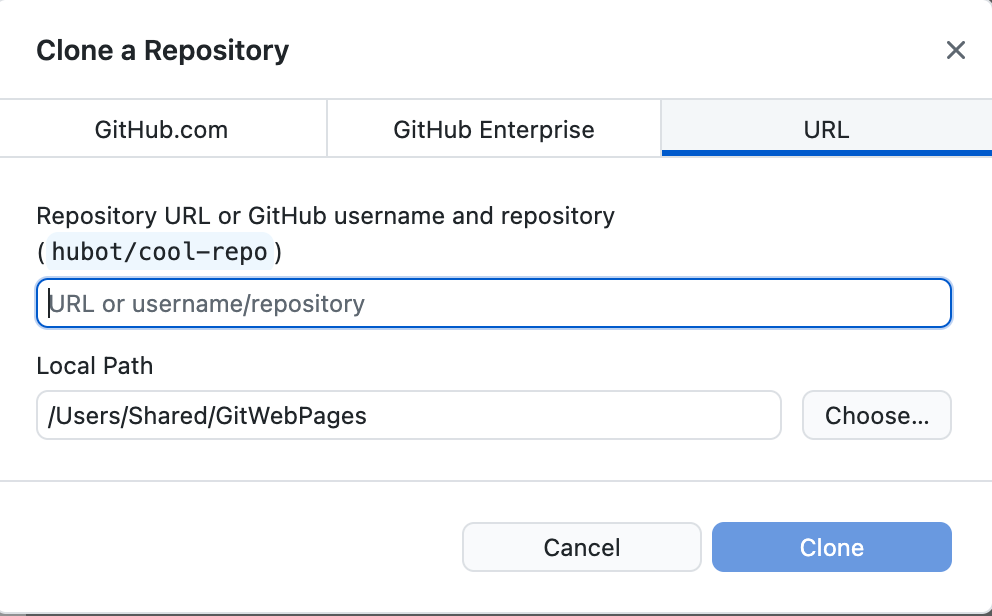
- Enter the URL copied from the git repository
- Select the desired location to save the pages
- Click the Clone button
You may be prompted to enter the your login credentials for the GitLab repository.
The web pages are now copied to your local computer for editing. When editing new pages always make sure to use the latest version of the responsive pages to ensure the page you are working on contains all the latest features.
Pull changes from GitHub Desktop
It's important to always start any web page editing by Pulling changes from the existing repository. This ensures any changes made that are not currently in your local repository are pulled to your machine before you begin making edits.
Missing the step of Pulling means you may need to Rebase before completing the process of adding your changes to the repository. Rebasing a repository with conflicting changes requires a deeper understanding of git. For further information please see GitHub online documentation for assistance.
Pulling Changes from GitHub Desktop
- Open GitHub Desktop
GitHub Desktop is great at picking up when new pages are available in a repository. Changes are often detected within moments of opening the program and notifications can be seen in the main display.
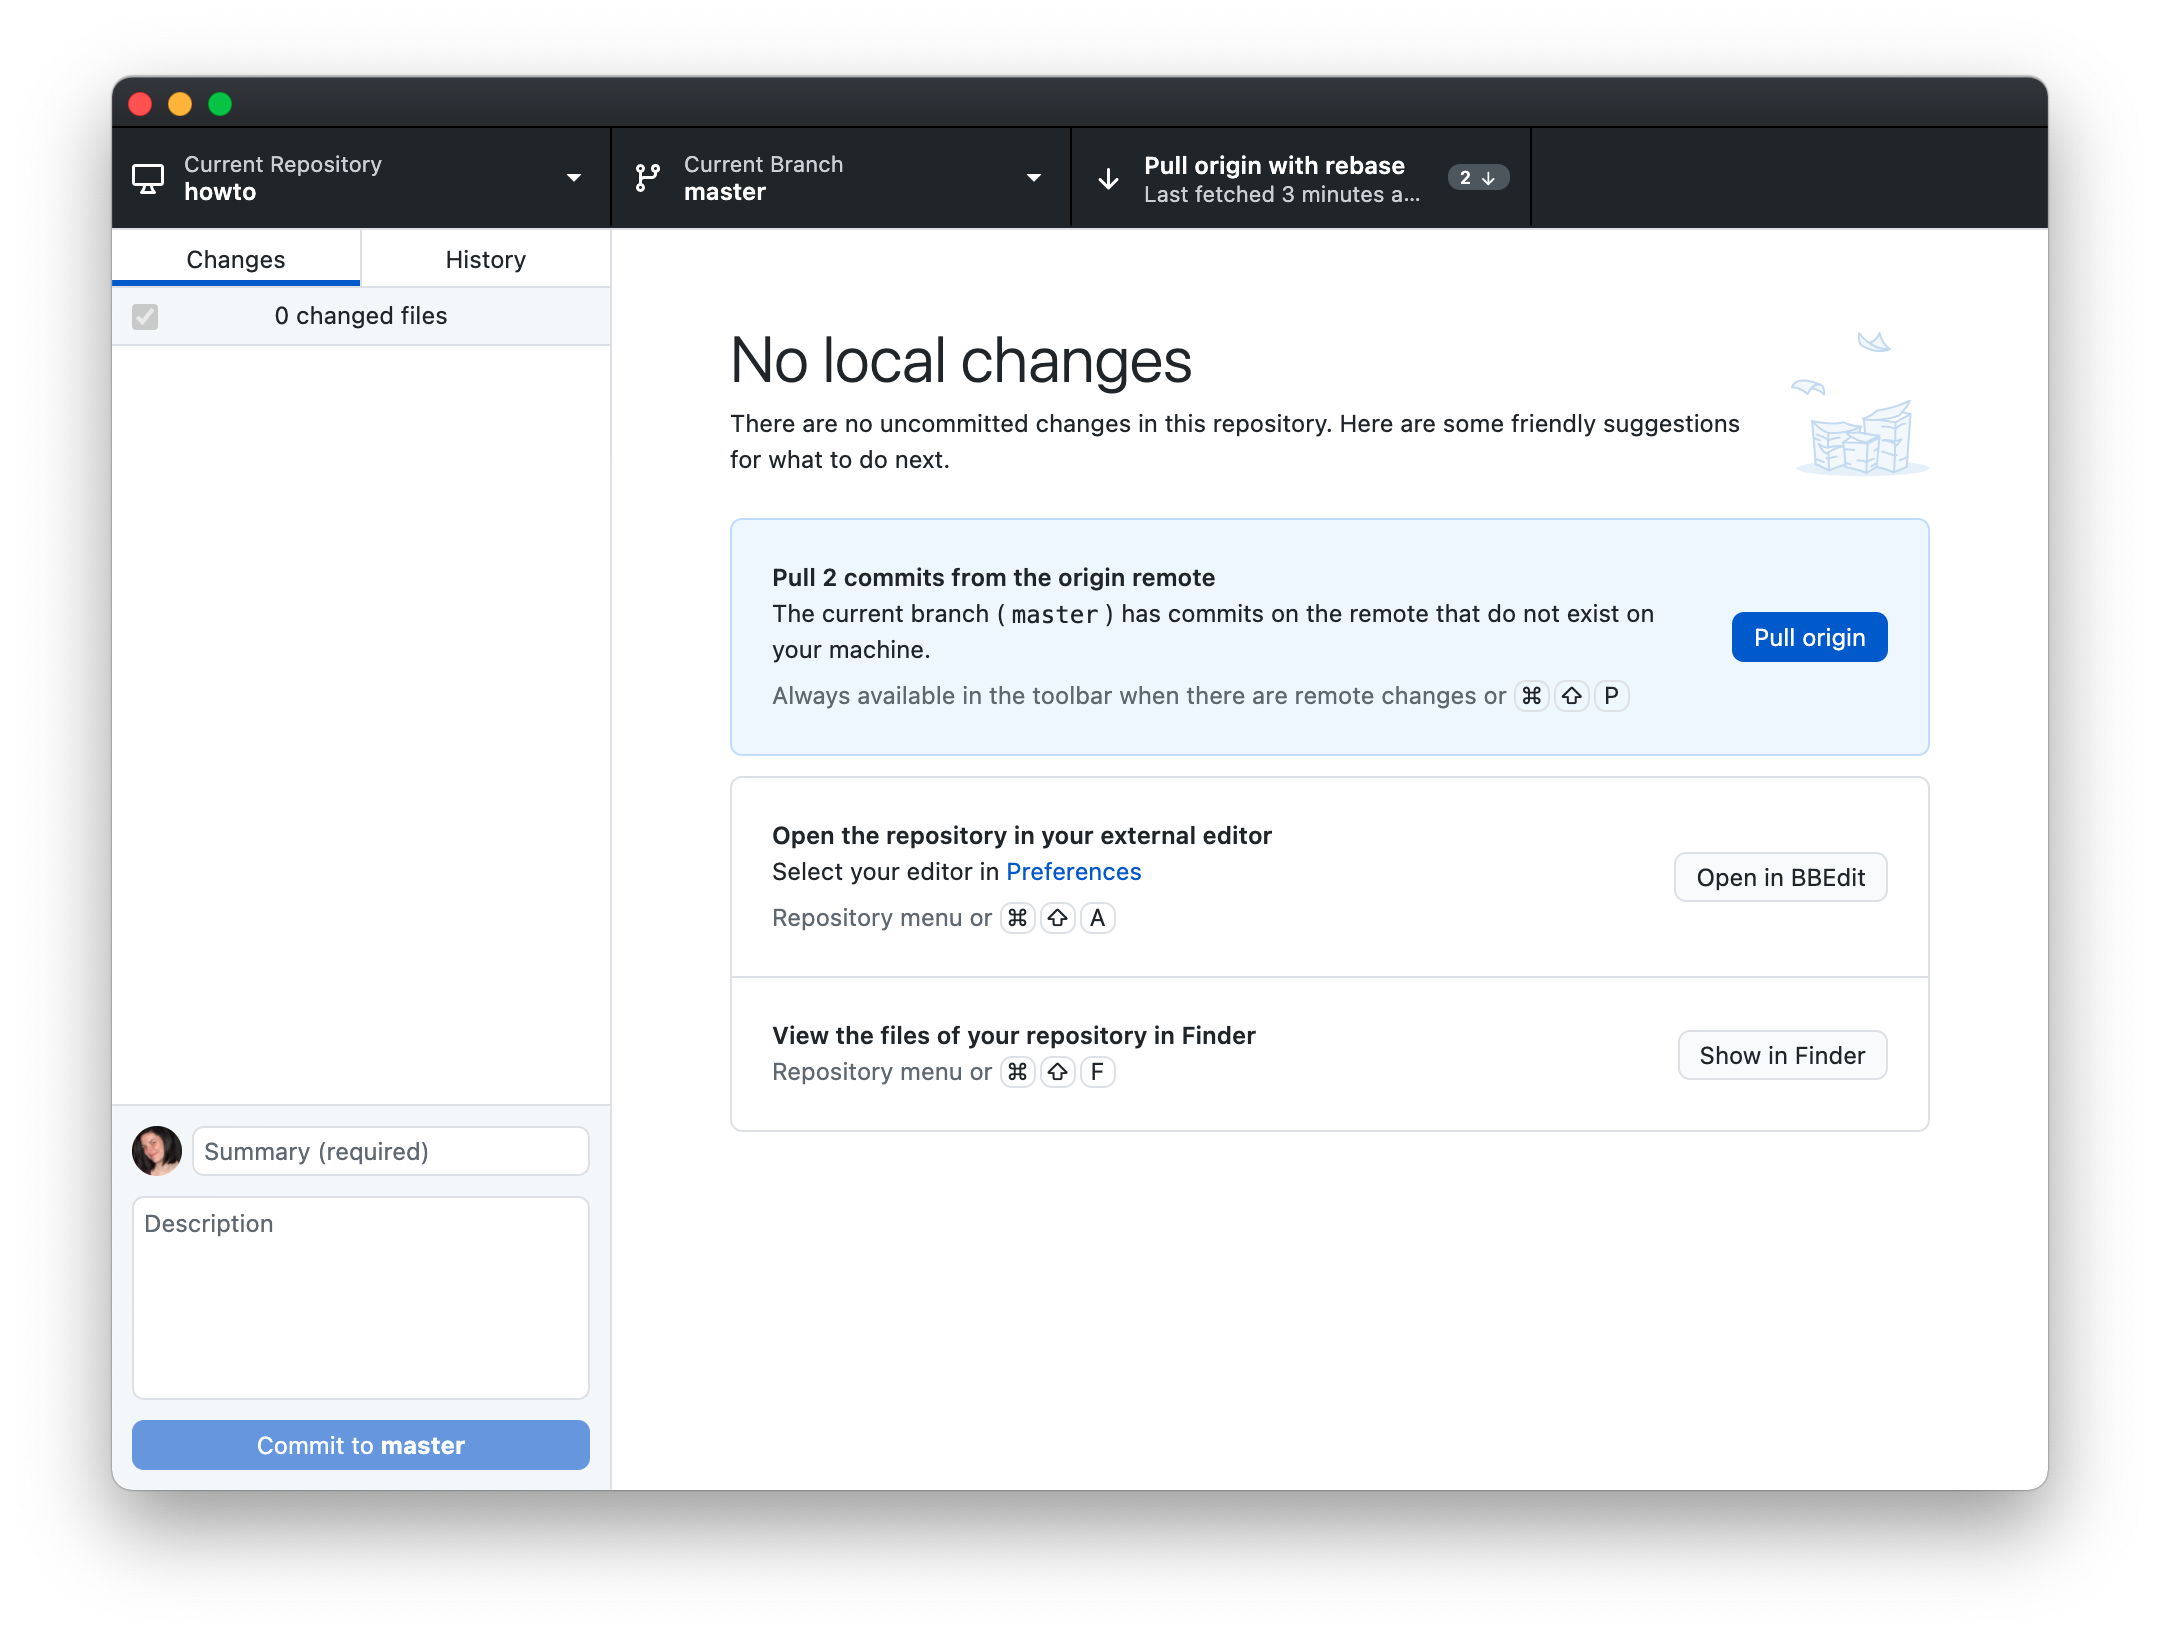
- Click the Pull Origin button to pull changes to your local repository
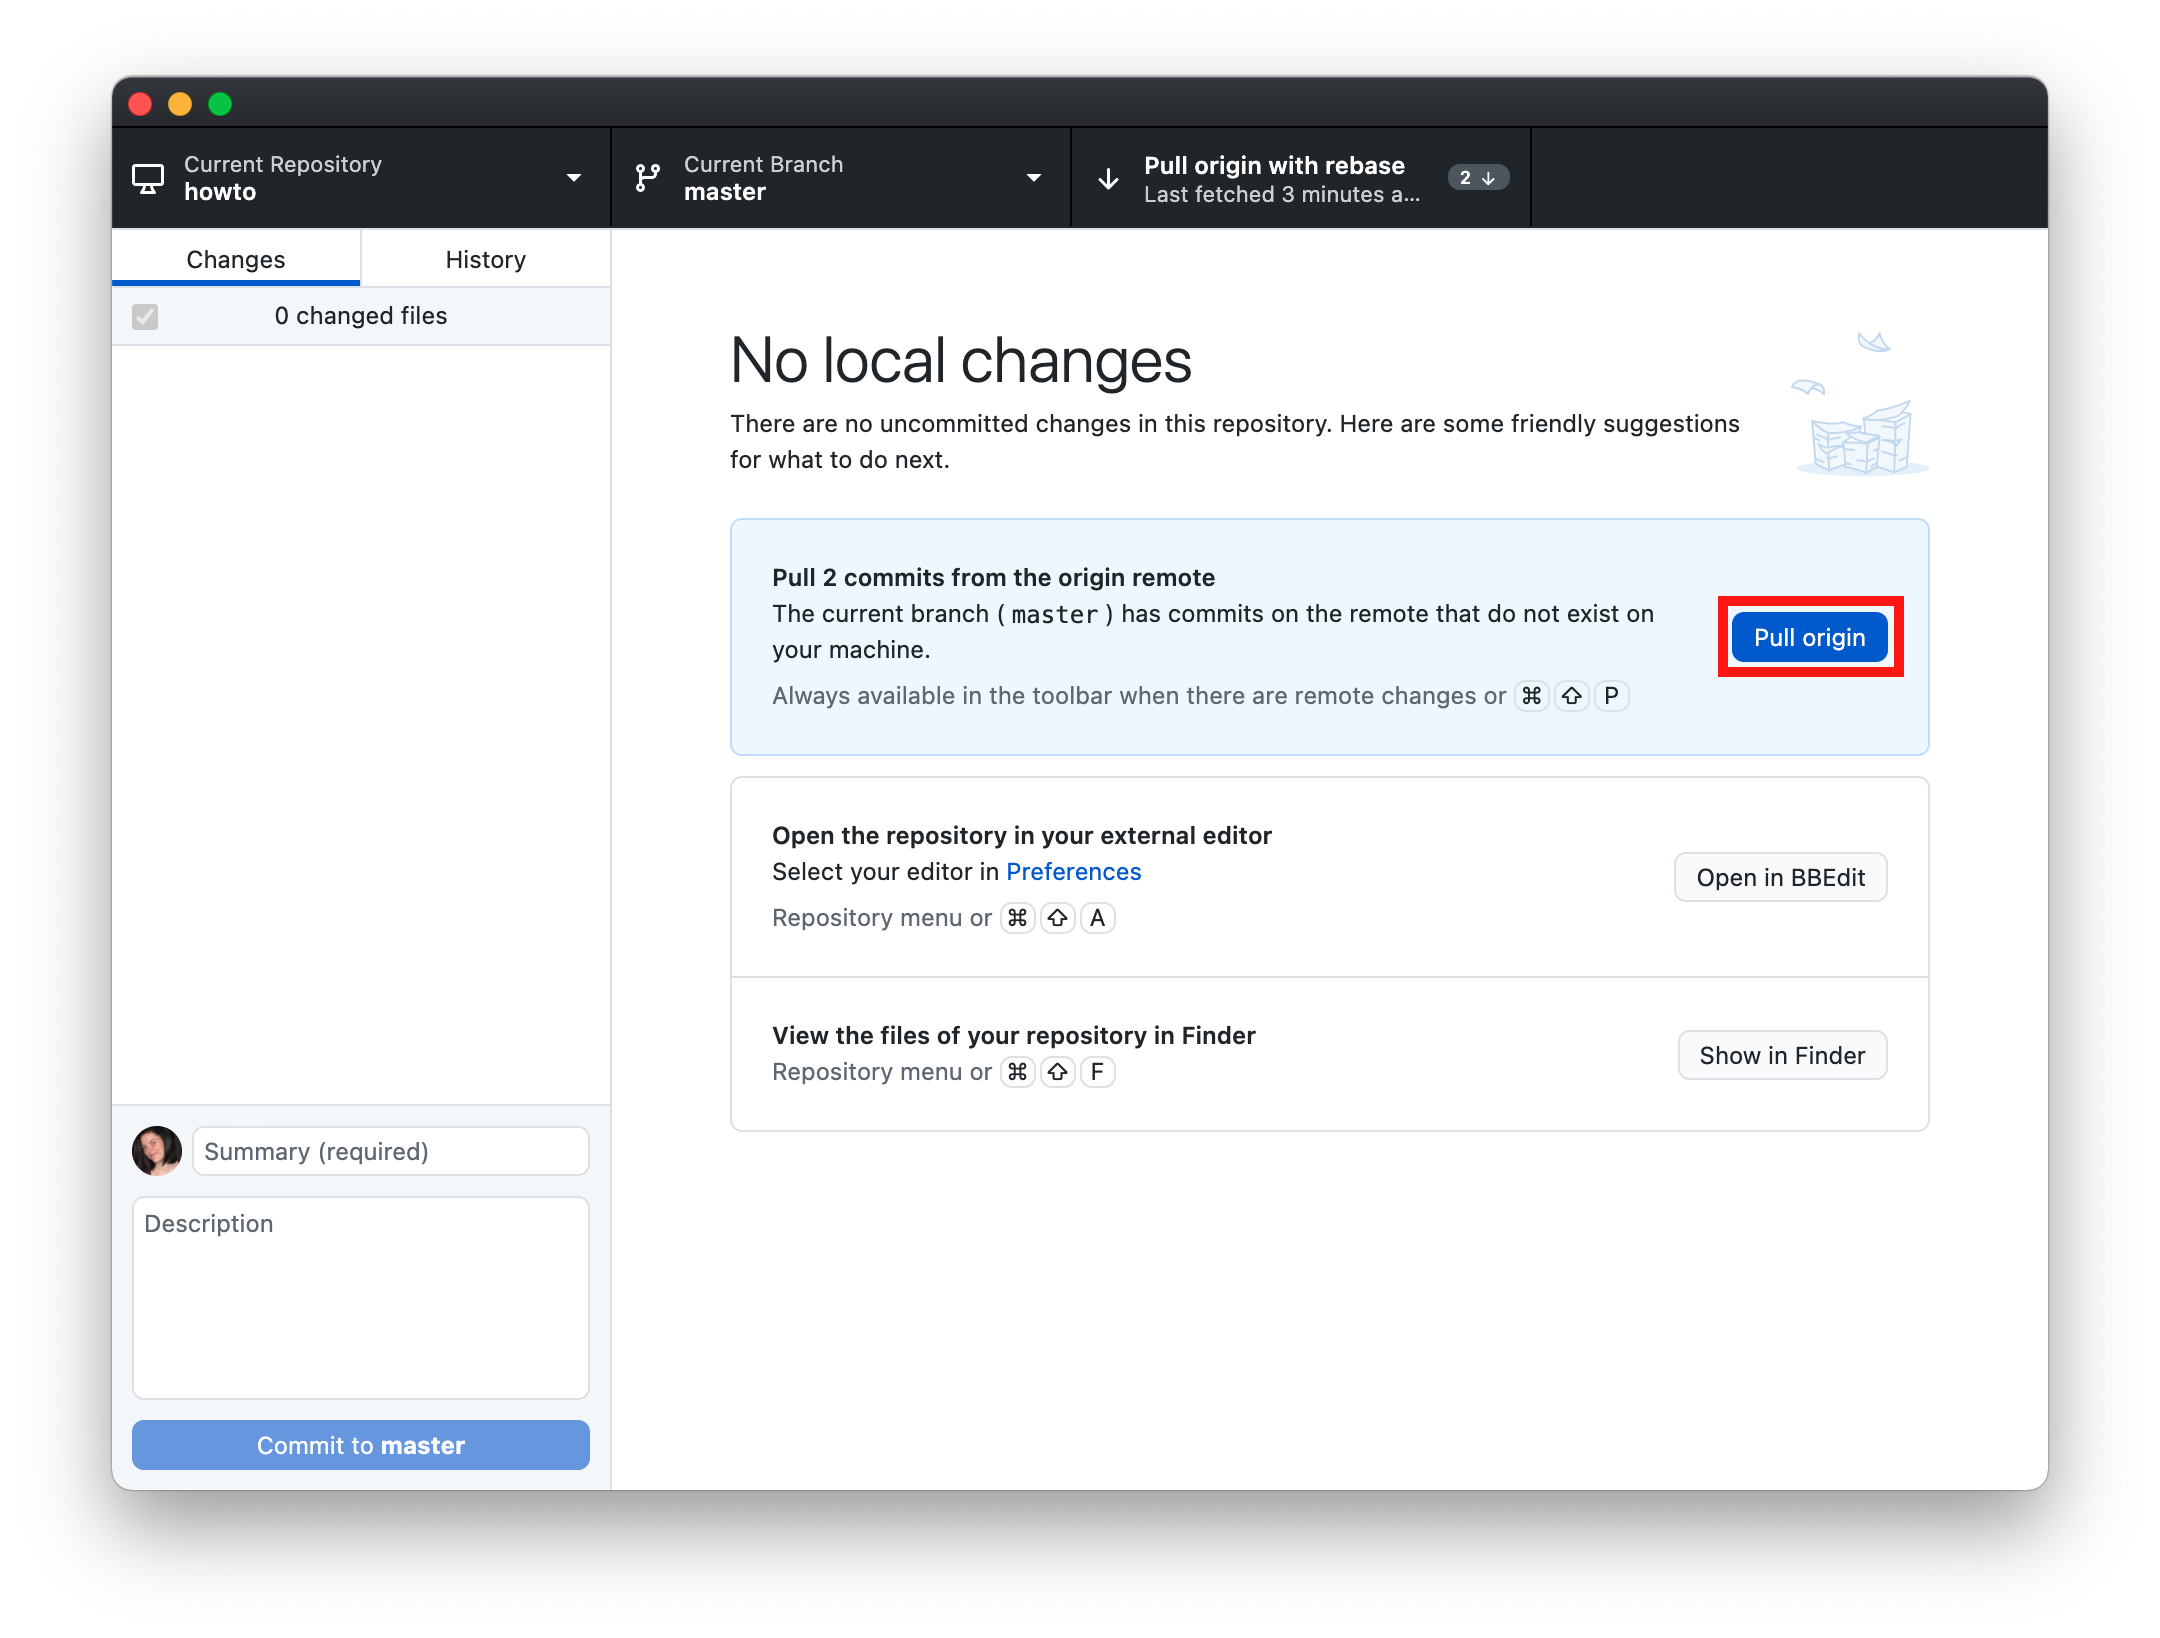
Any changes previously waiting to be pulled will now be in the folder on your local machine. The web pages are ready to be edited.
Committing changes to GitHub Desktop
Once web pages have been editing locally they need to be Committed before they are Pushed to the Artsman cloud repository. This allows you to add select changes while continuing to make edits.
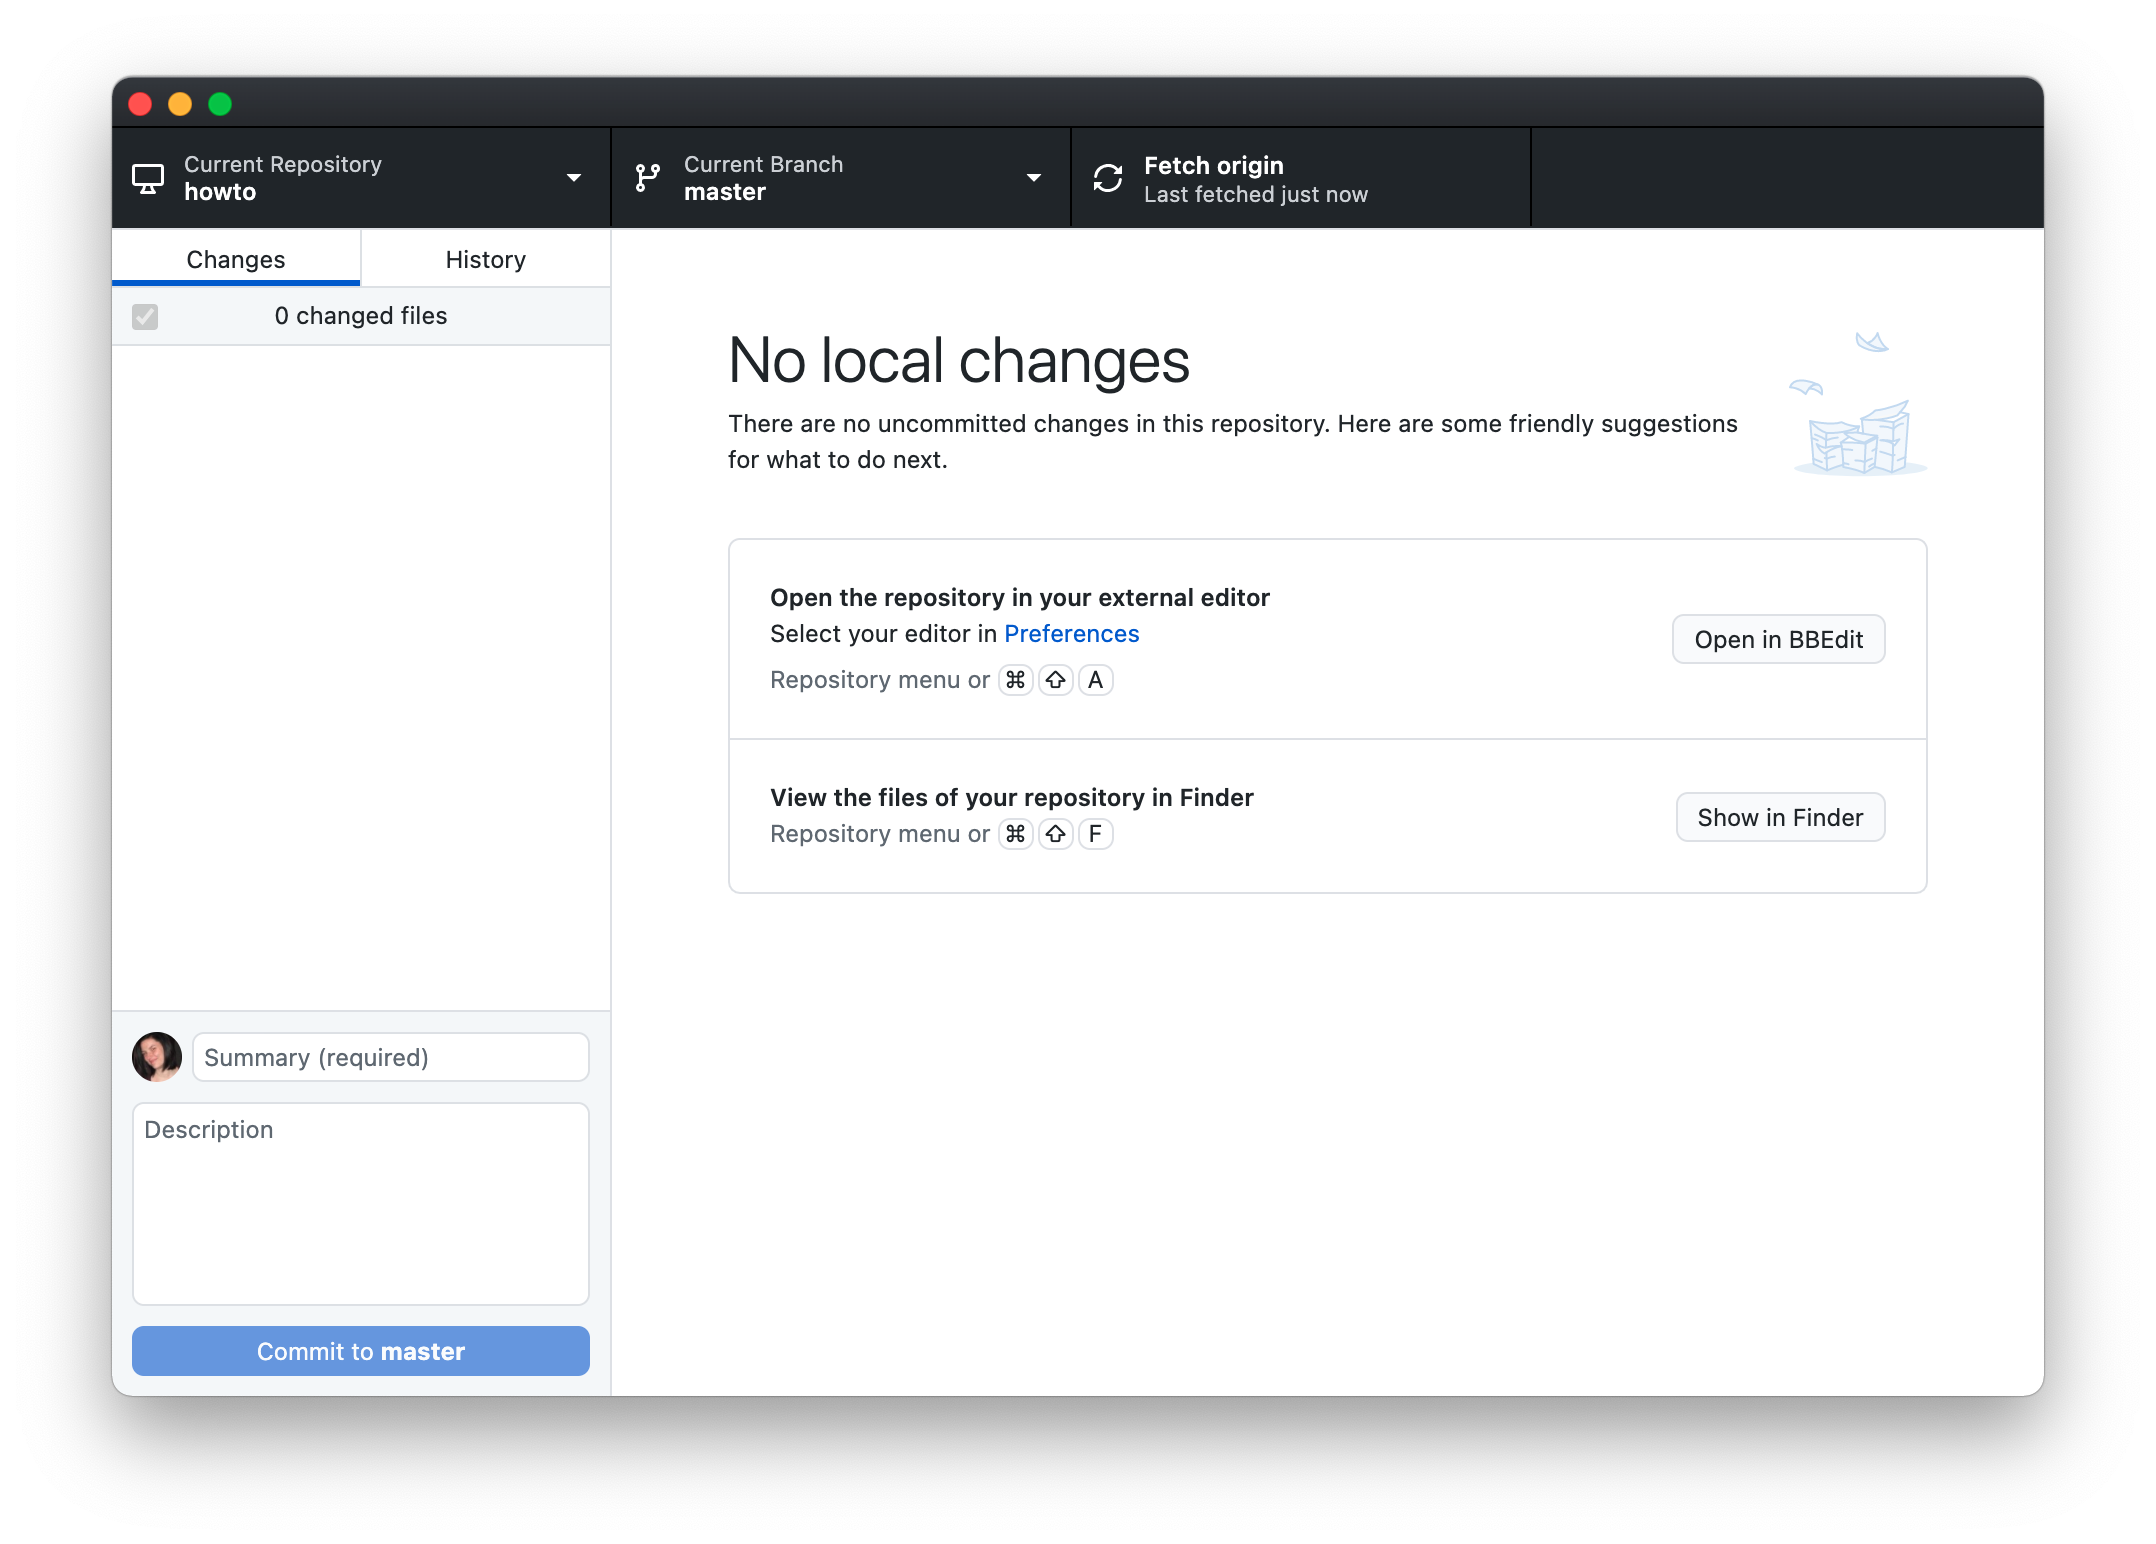
Committing Changes to GitHub Desktop
- Ensure pages that have completed edits are selected
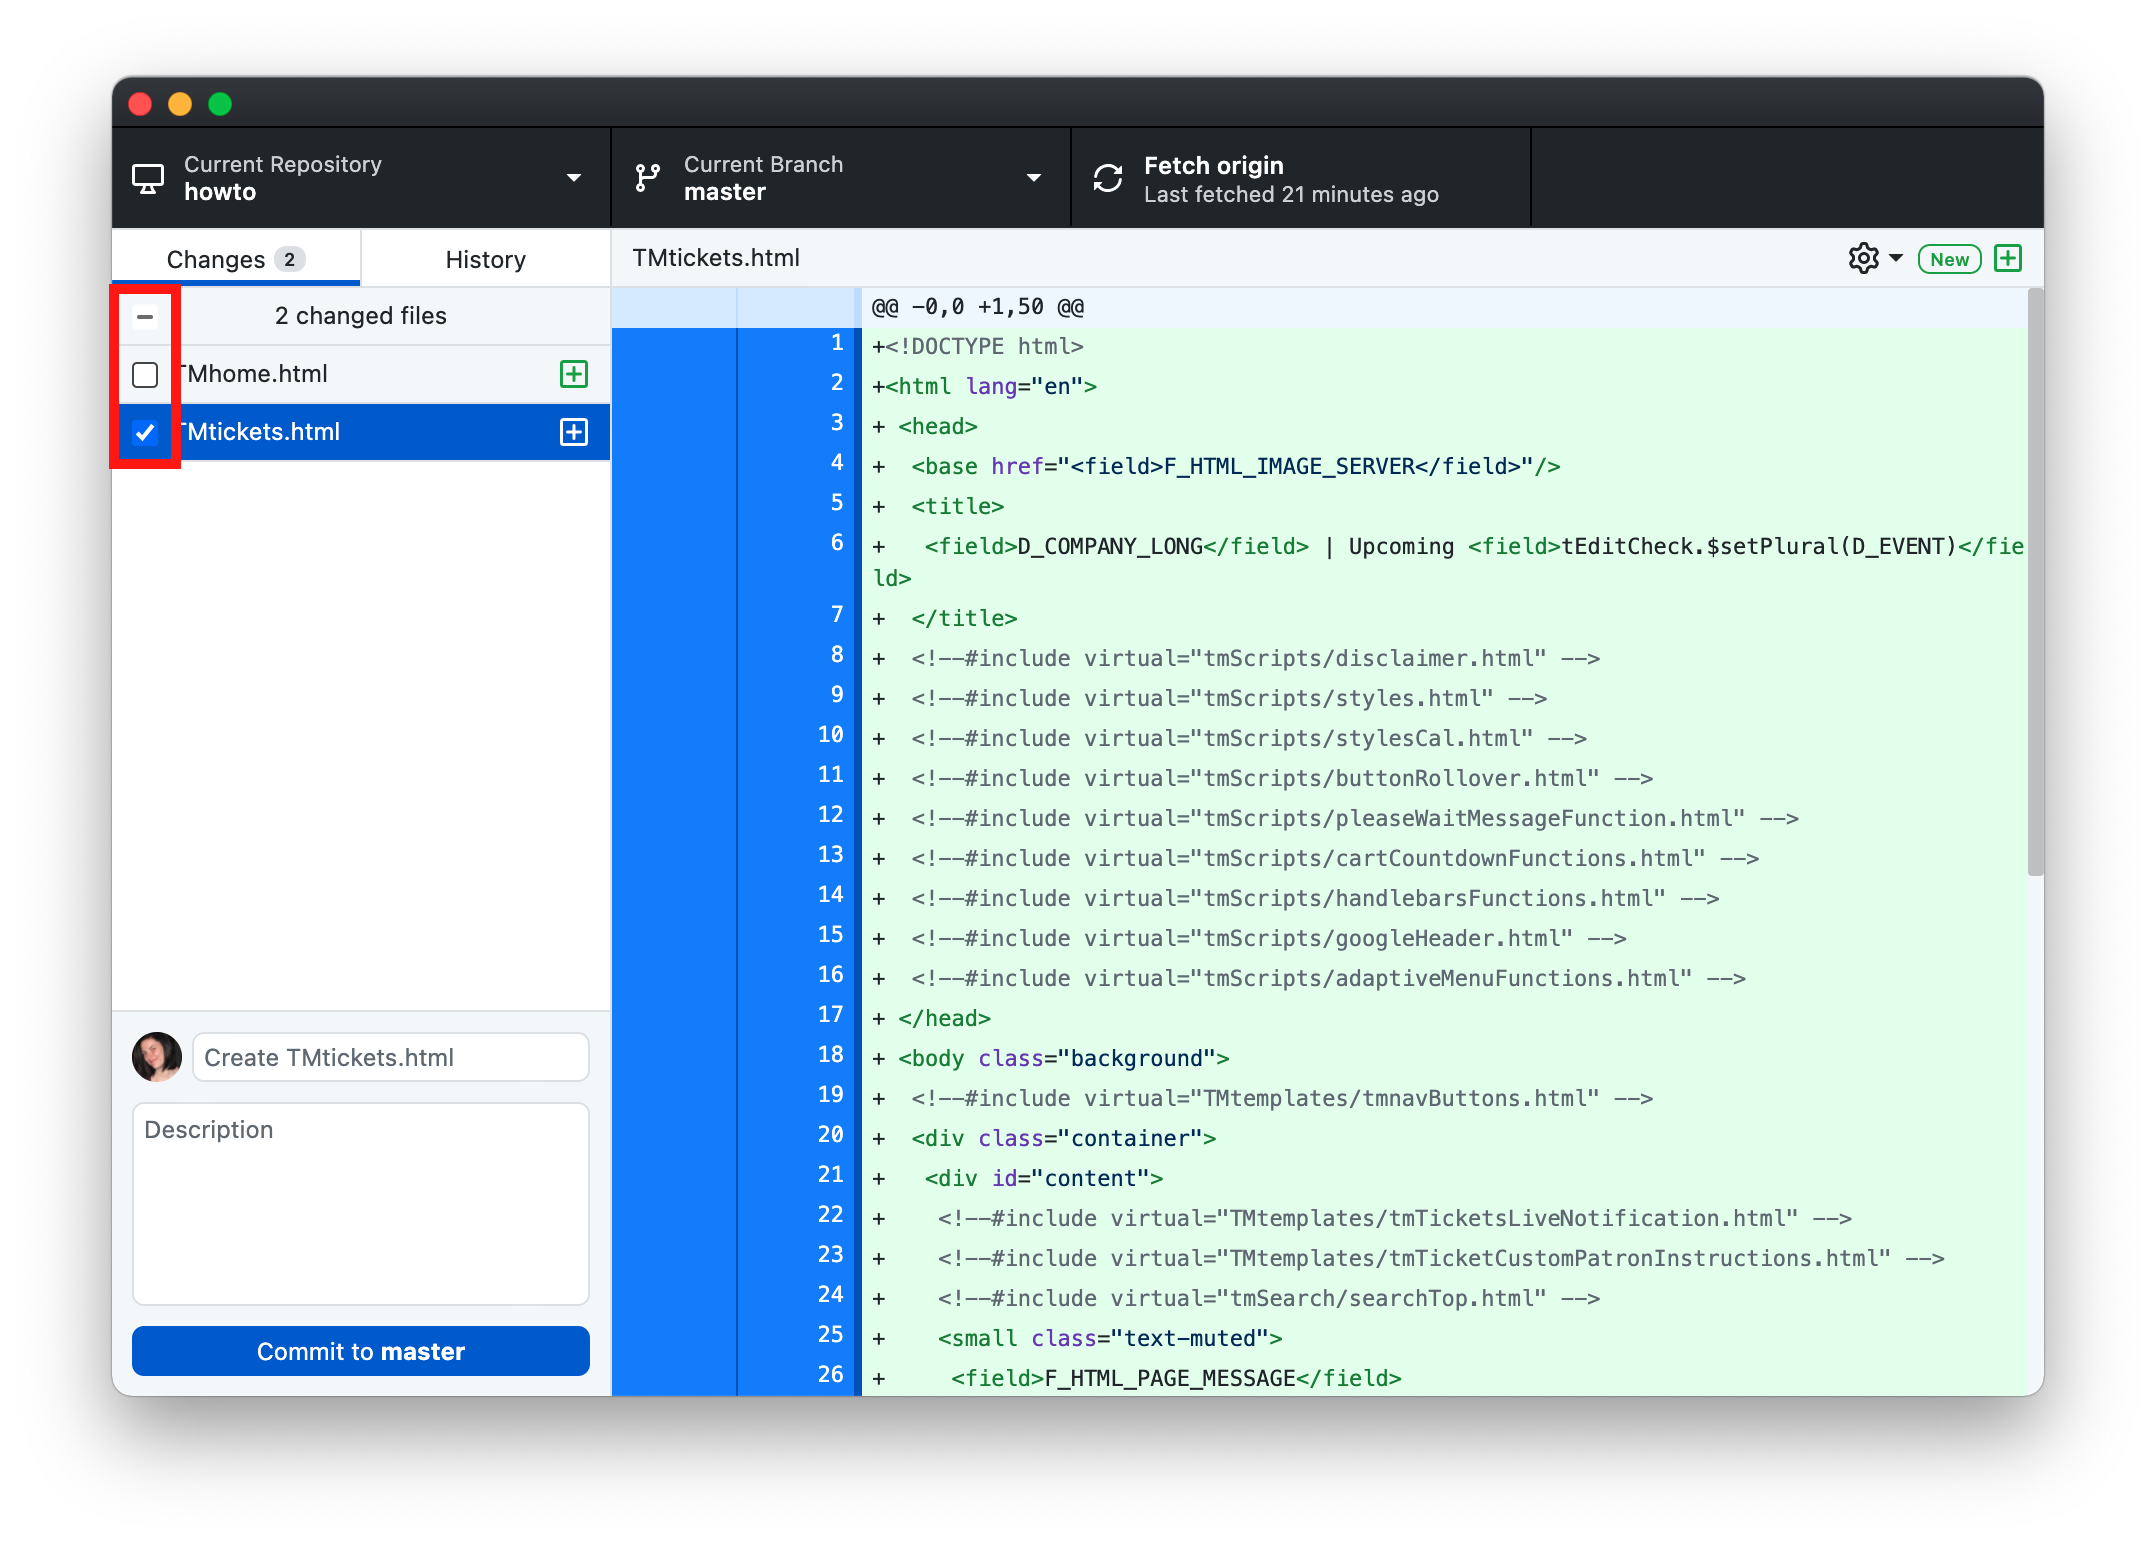
- Enter a title and details for the commit
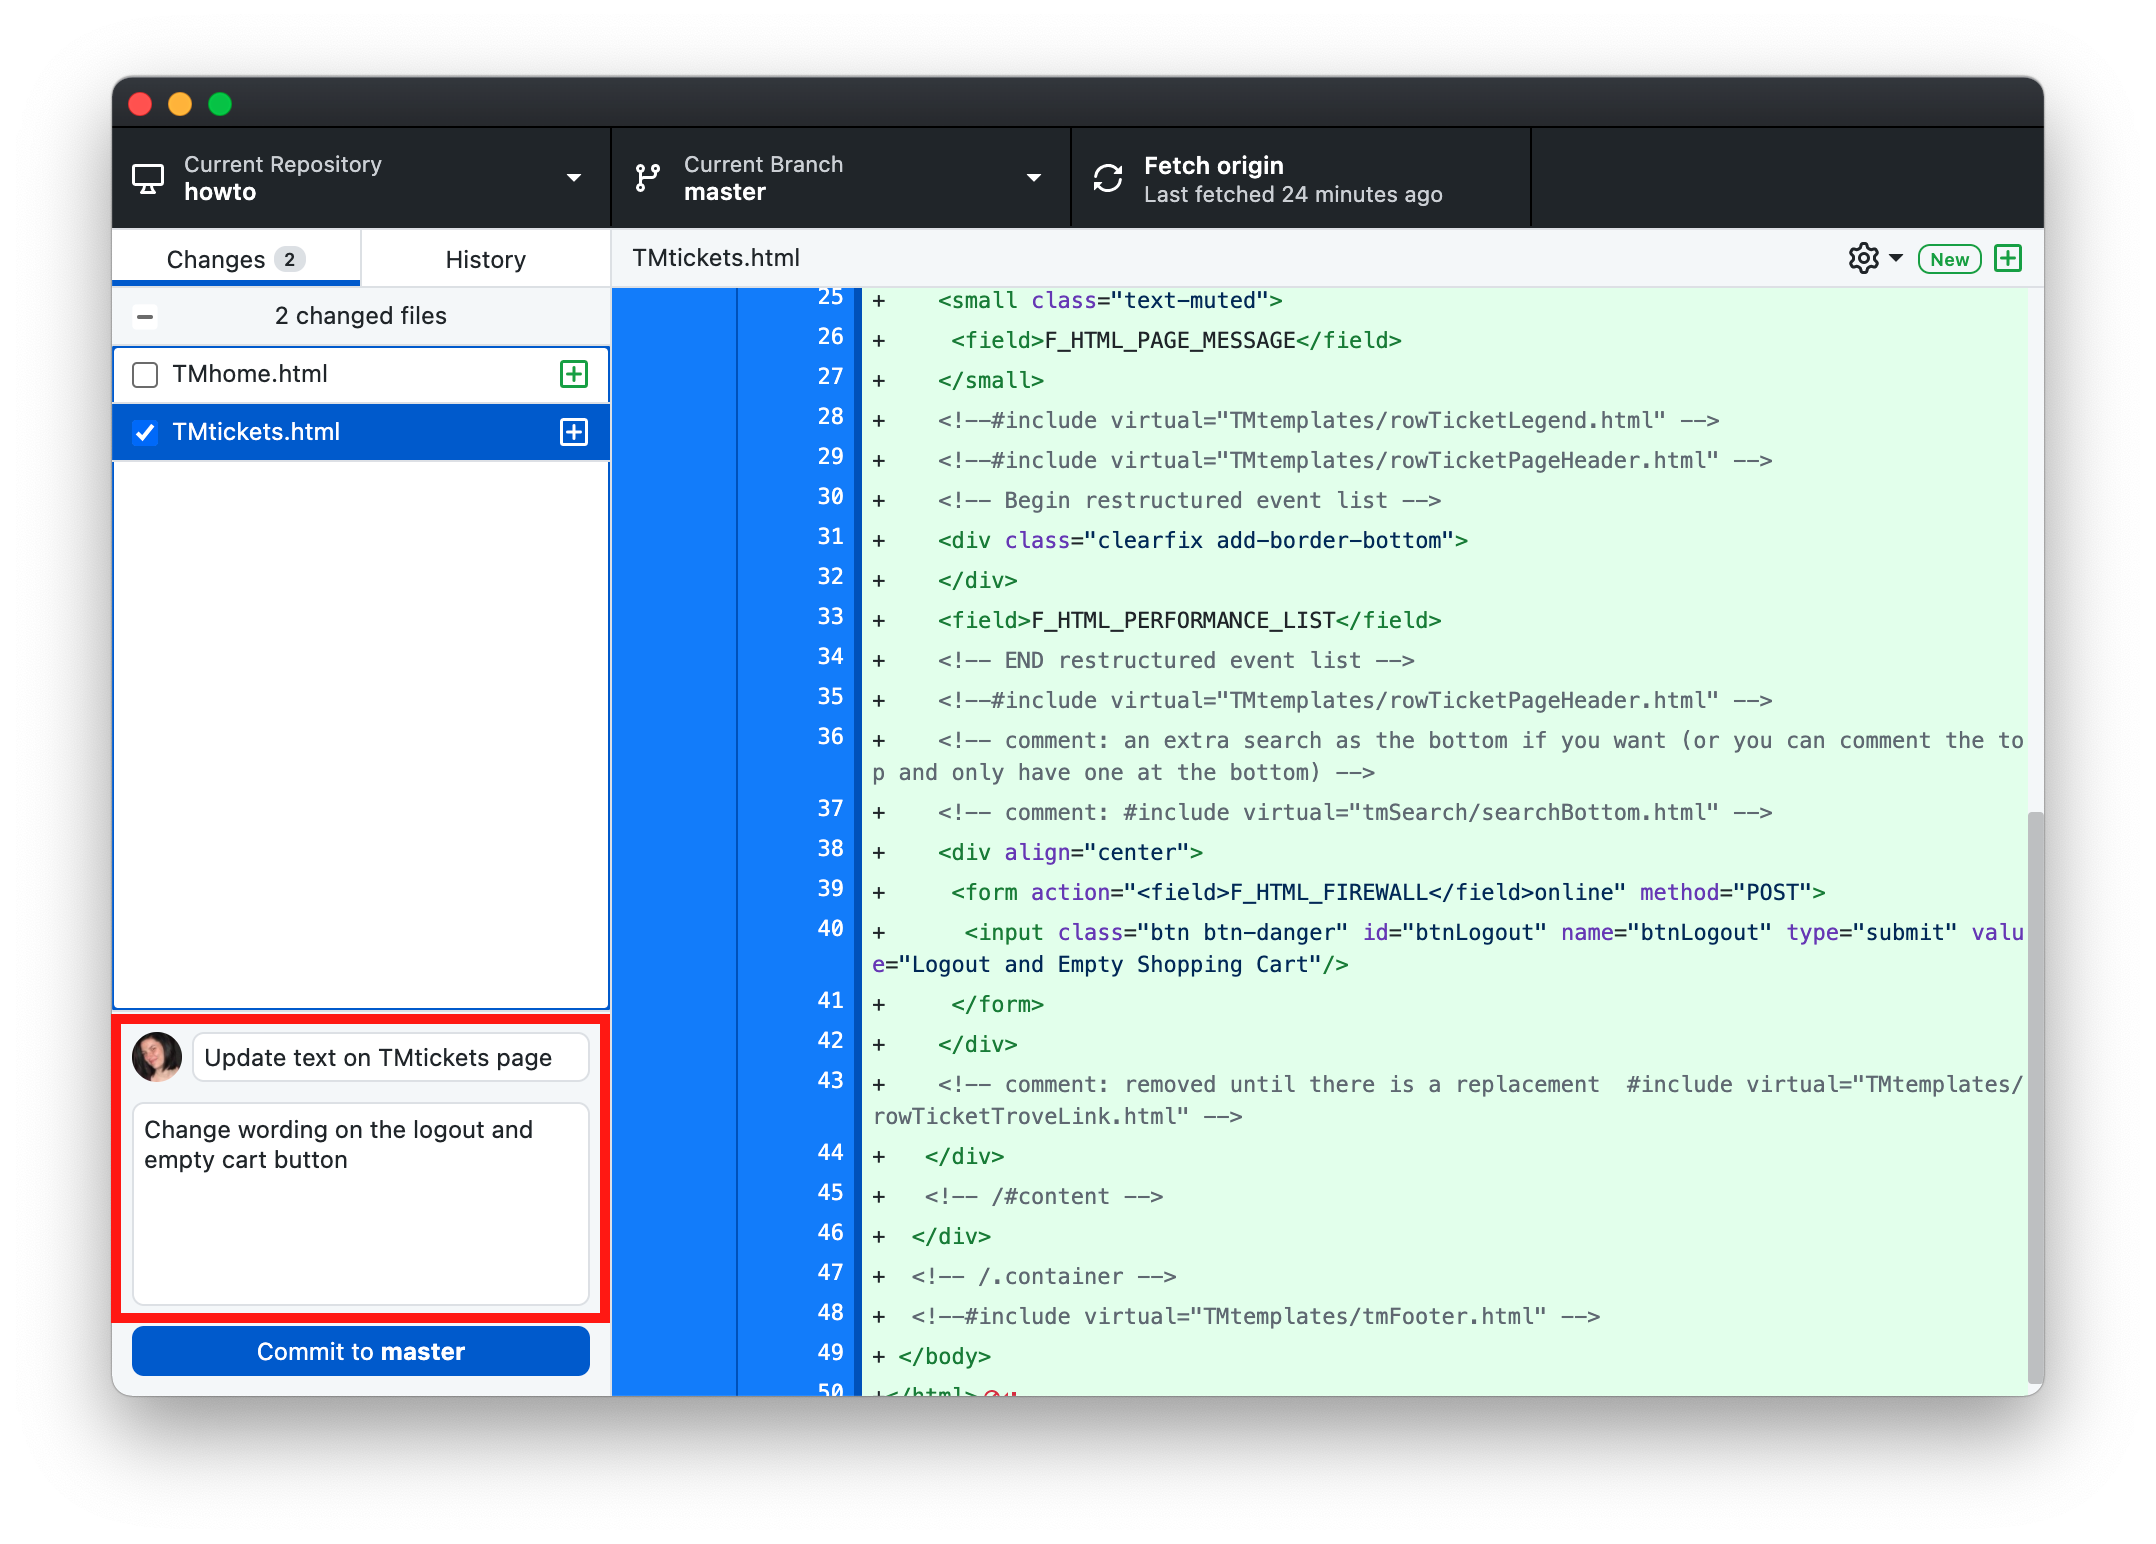
- Click the Commit to master button
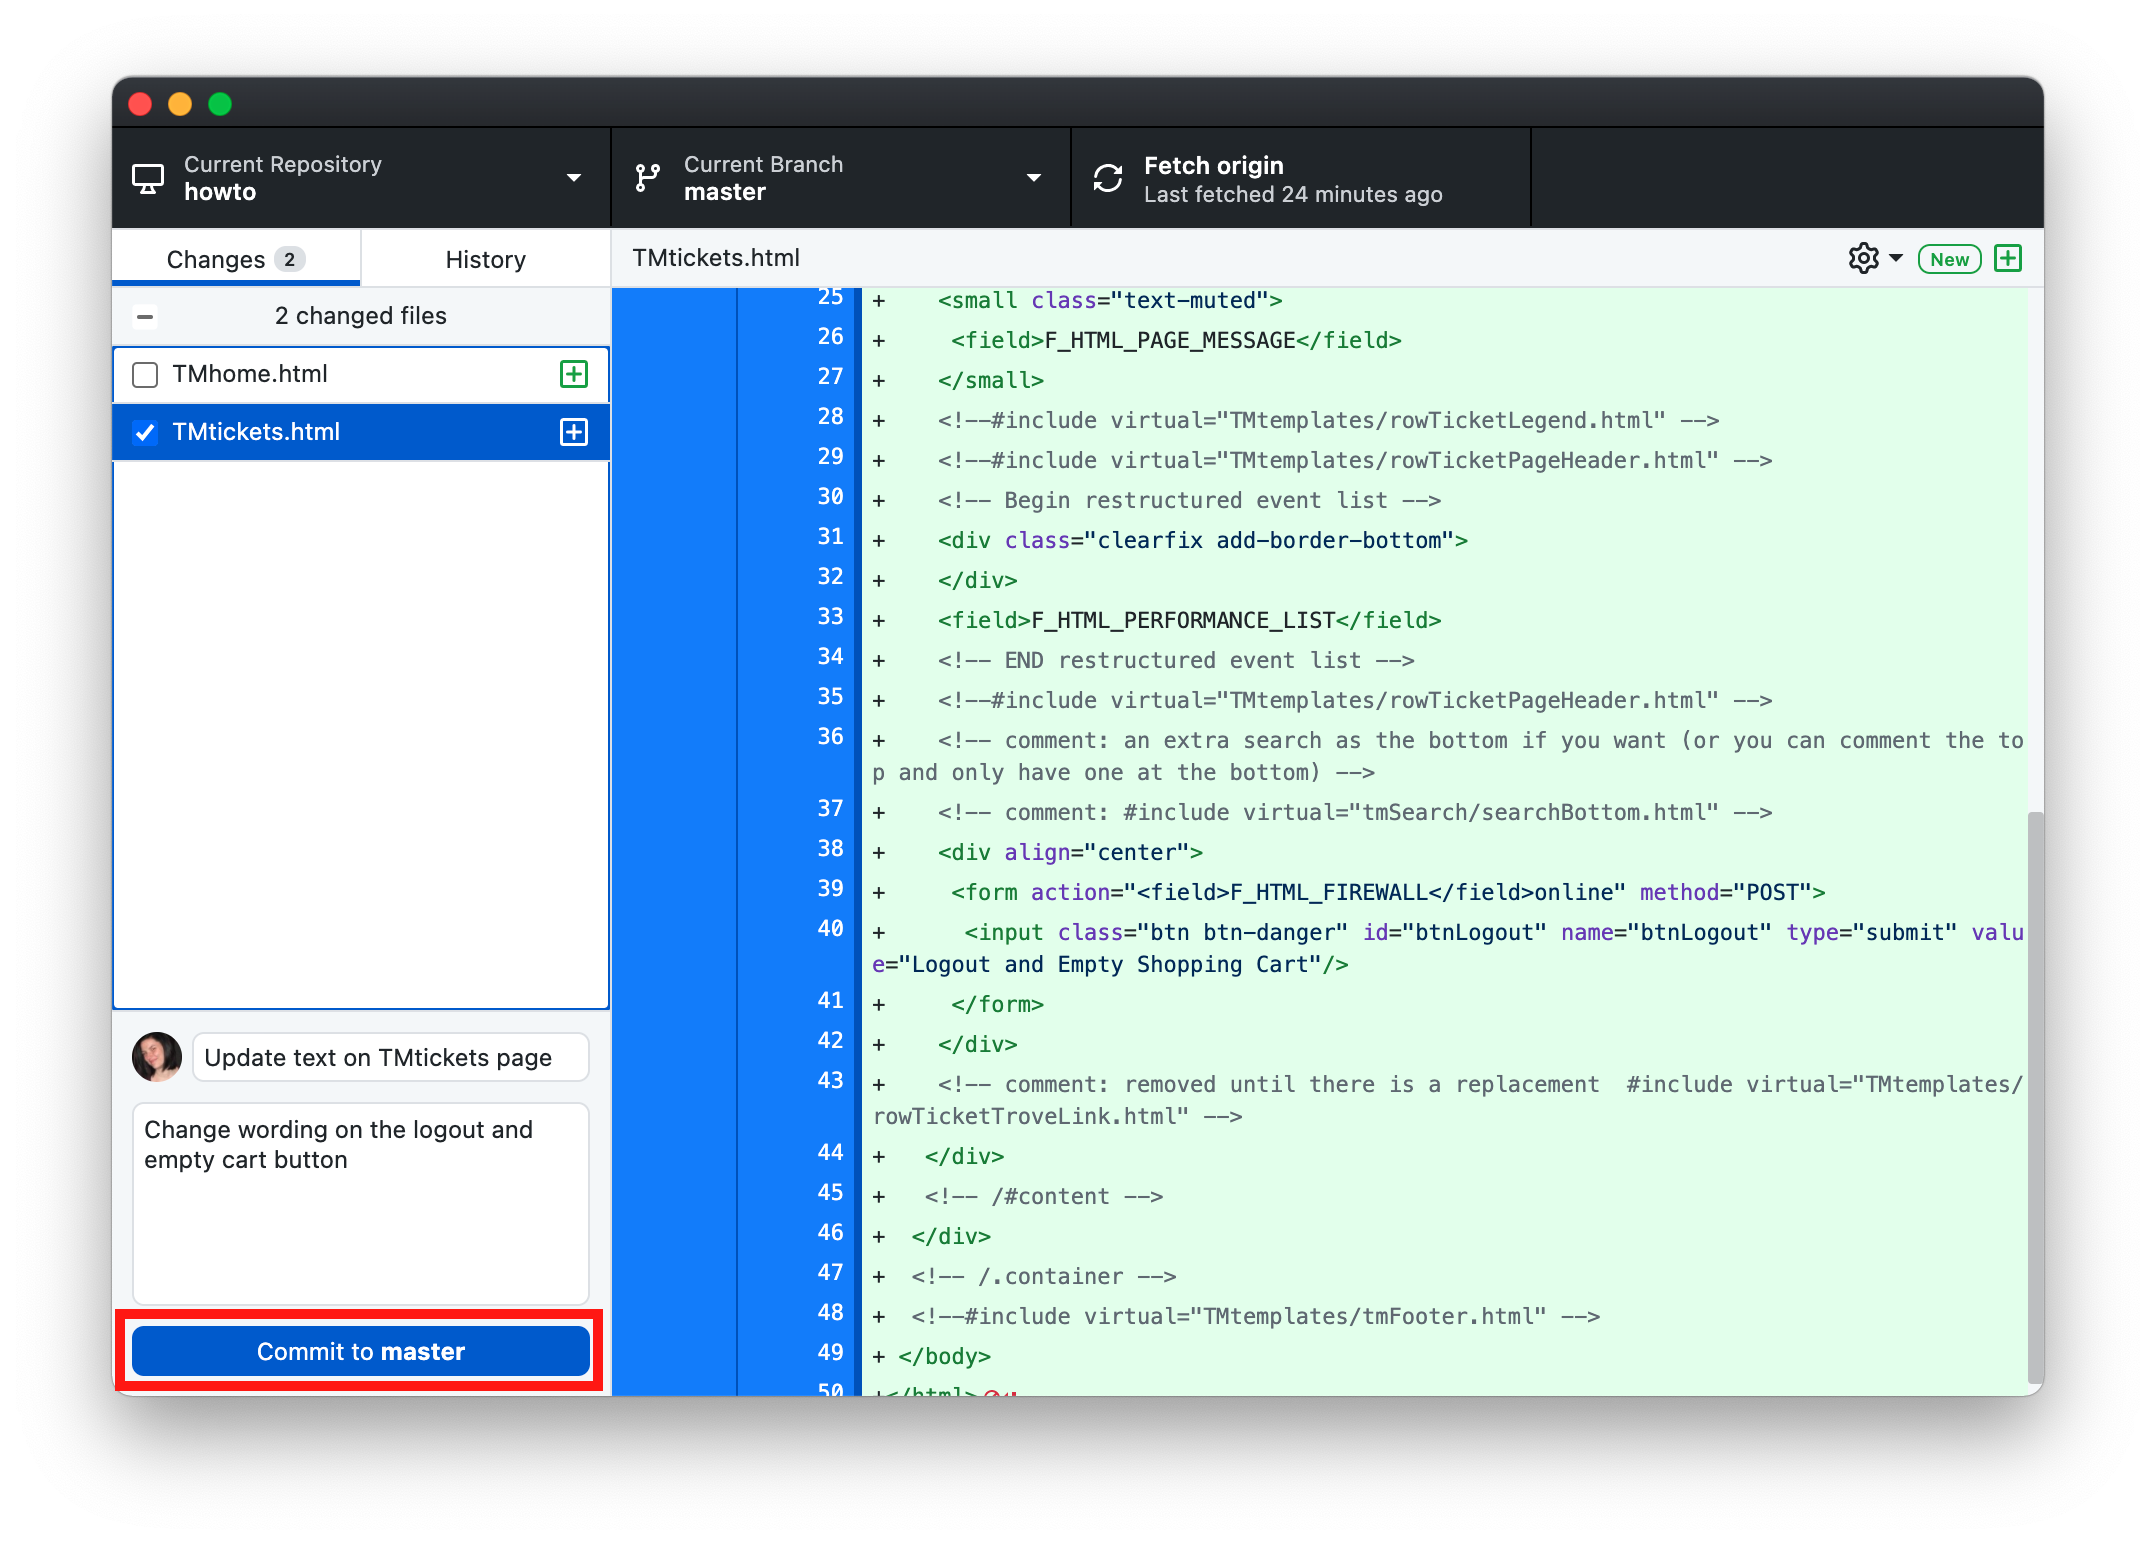
These changes are now ready to be pushed to the repository.
Push Changes to GitHub Desktop
Pushing changes moves the pages up to the Artsman git repository. Only pages that have been Committed can be Pushed. Once the pages have been pushed they run through a series of tests before they are available to be accessed by the web listener. To see edits following the test process you many need to clear the cache on the web listener.
Pushing Changes to GitHub Desktop
- Click the Push origin button
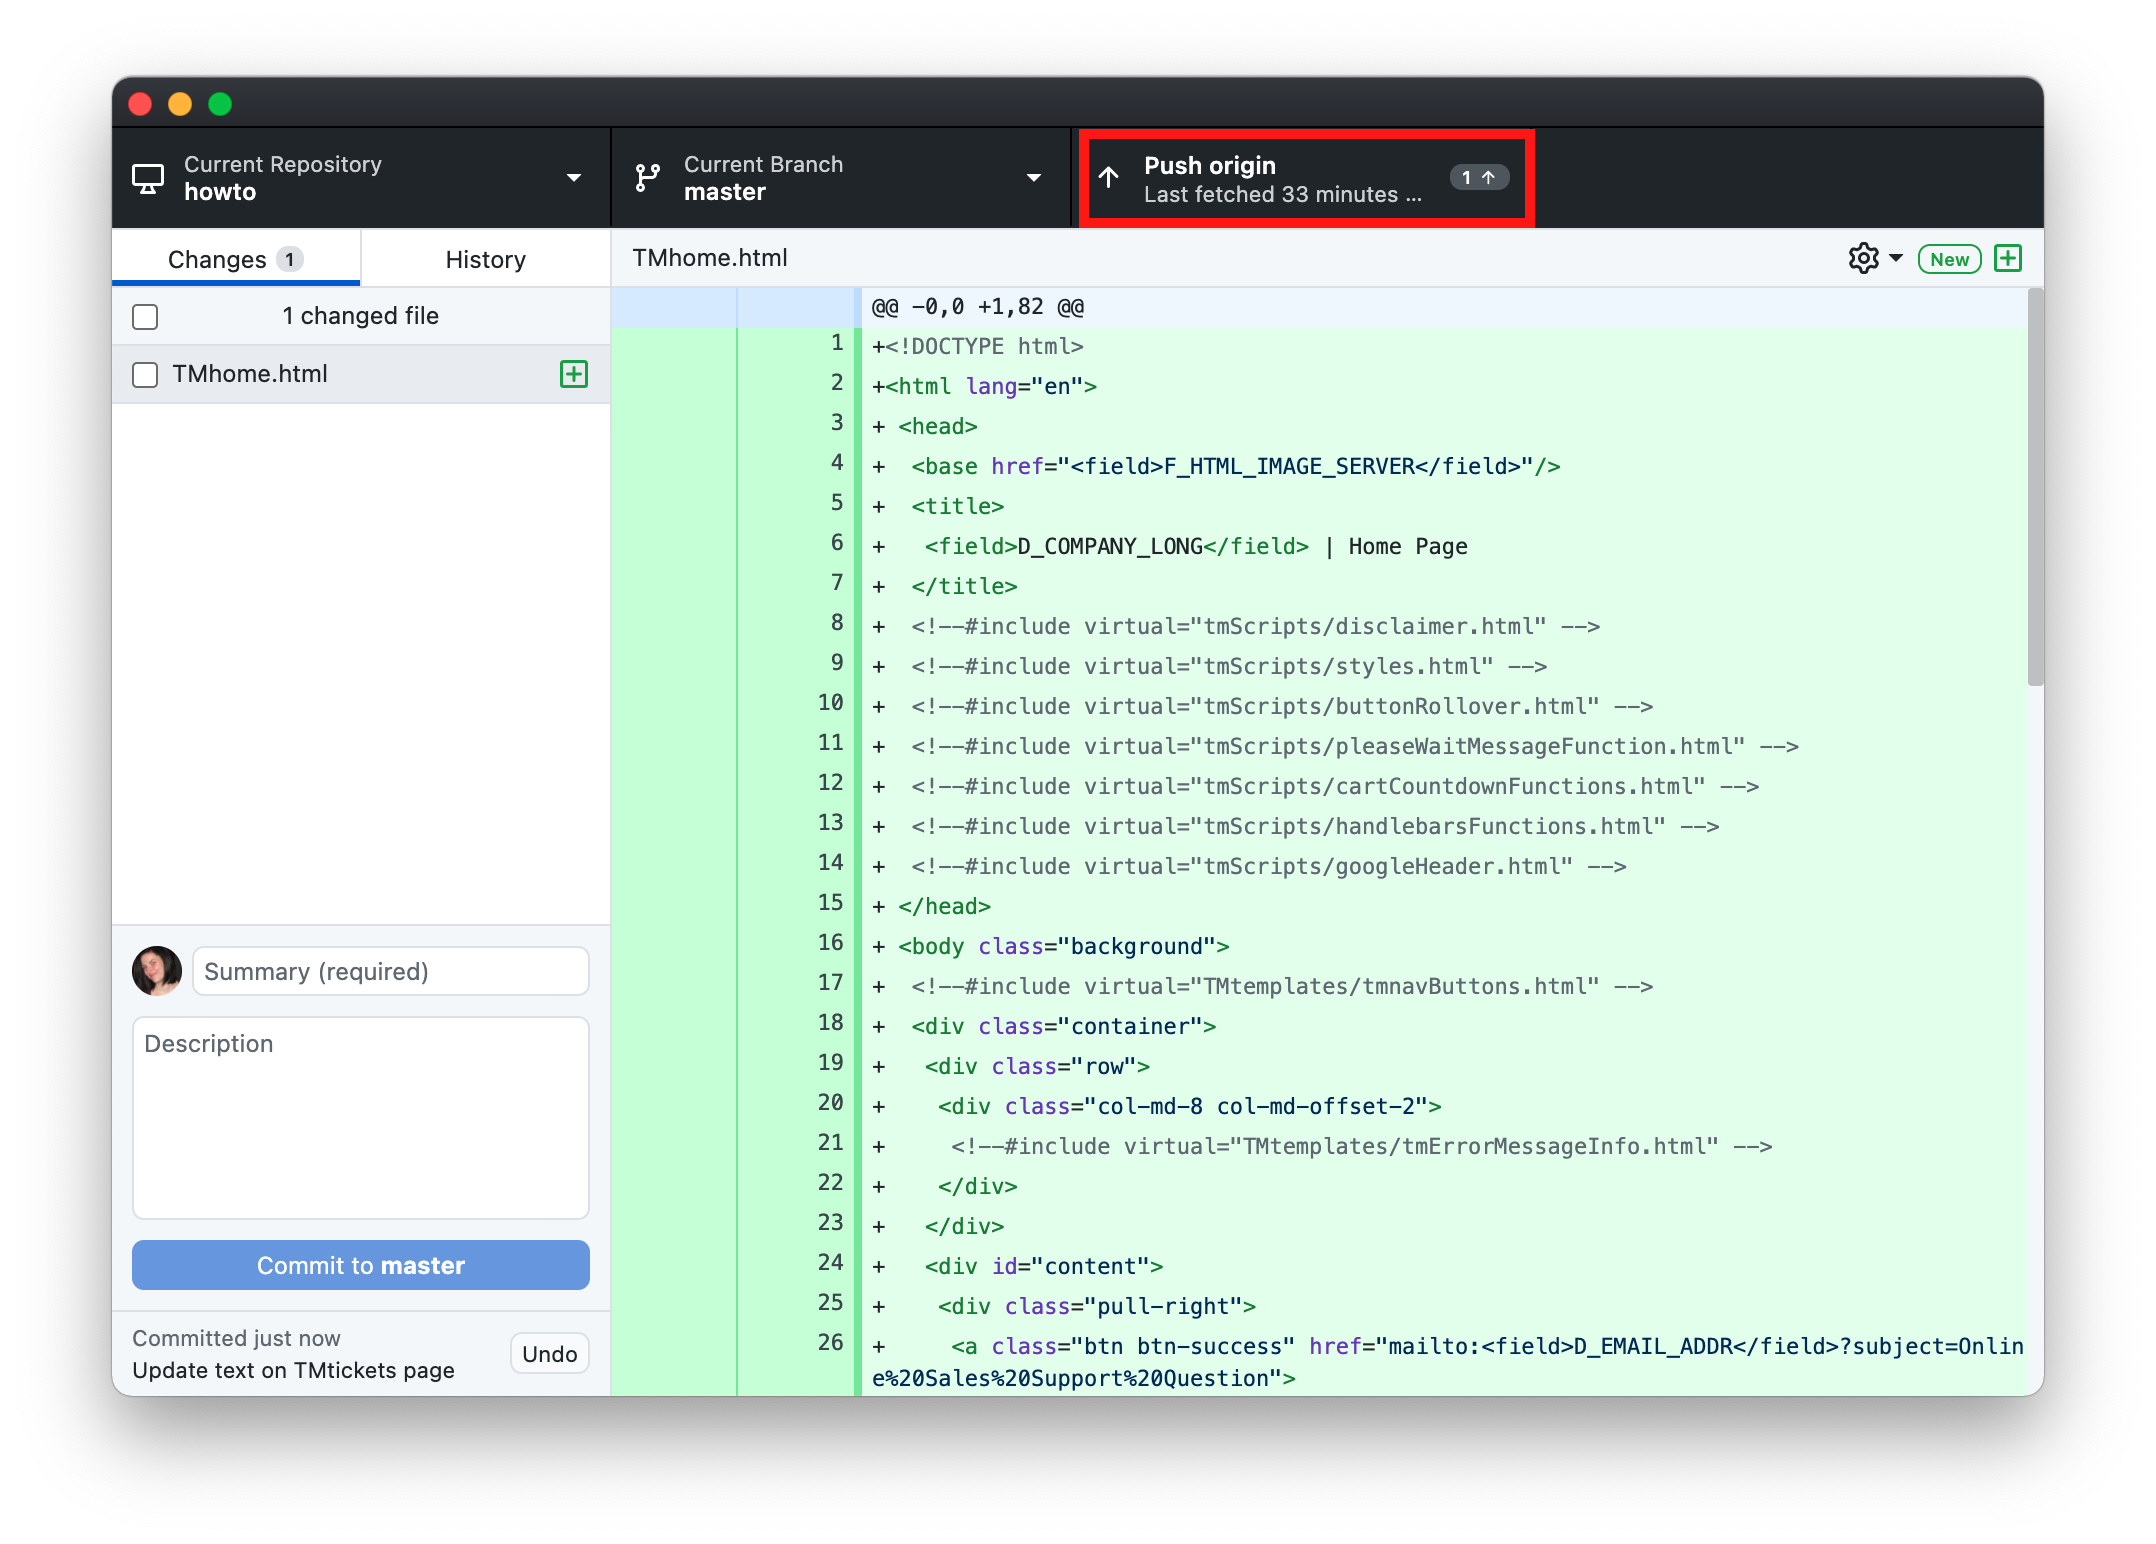
Changes have now been added to the online repository. Most changes will appear online within moments of editing. Items that are more deeply cached may require a clear cache and occasionally a restart of the Theatre Manager server. If you do not see your changes after clear the cache in Theatre Manager please contact the support team assistance.
Bootstrap Live Customizer
- use the bootstrap live customizer page,
- download the customized theme/CSS files, -and-
- how to implement the changes.
Choose a Starting Theme
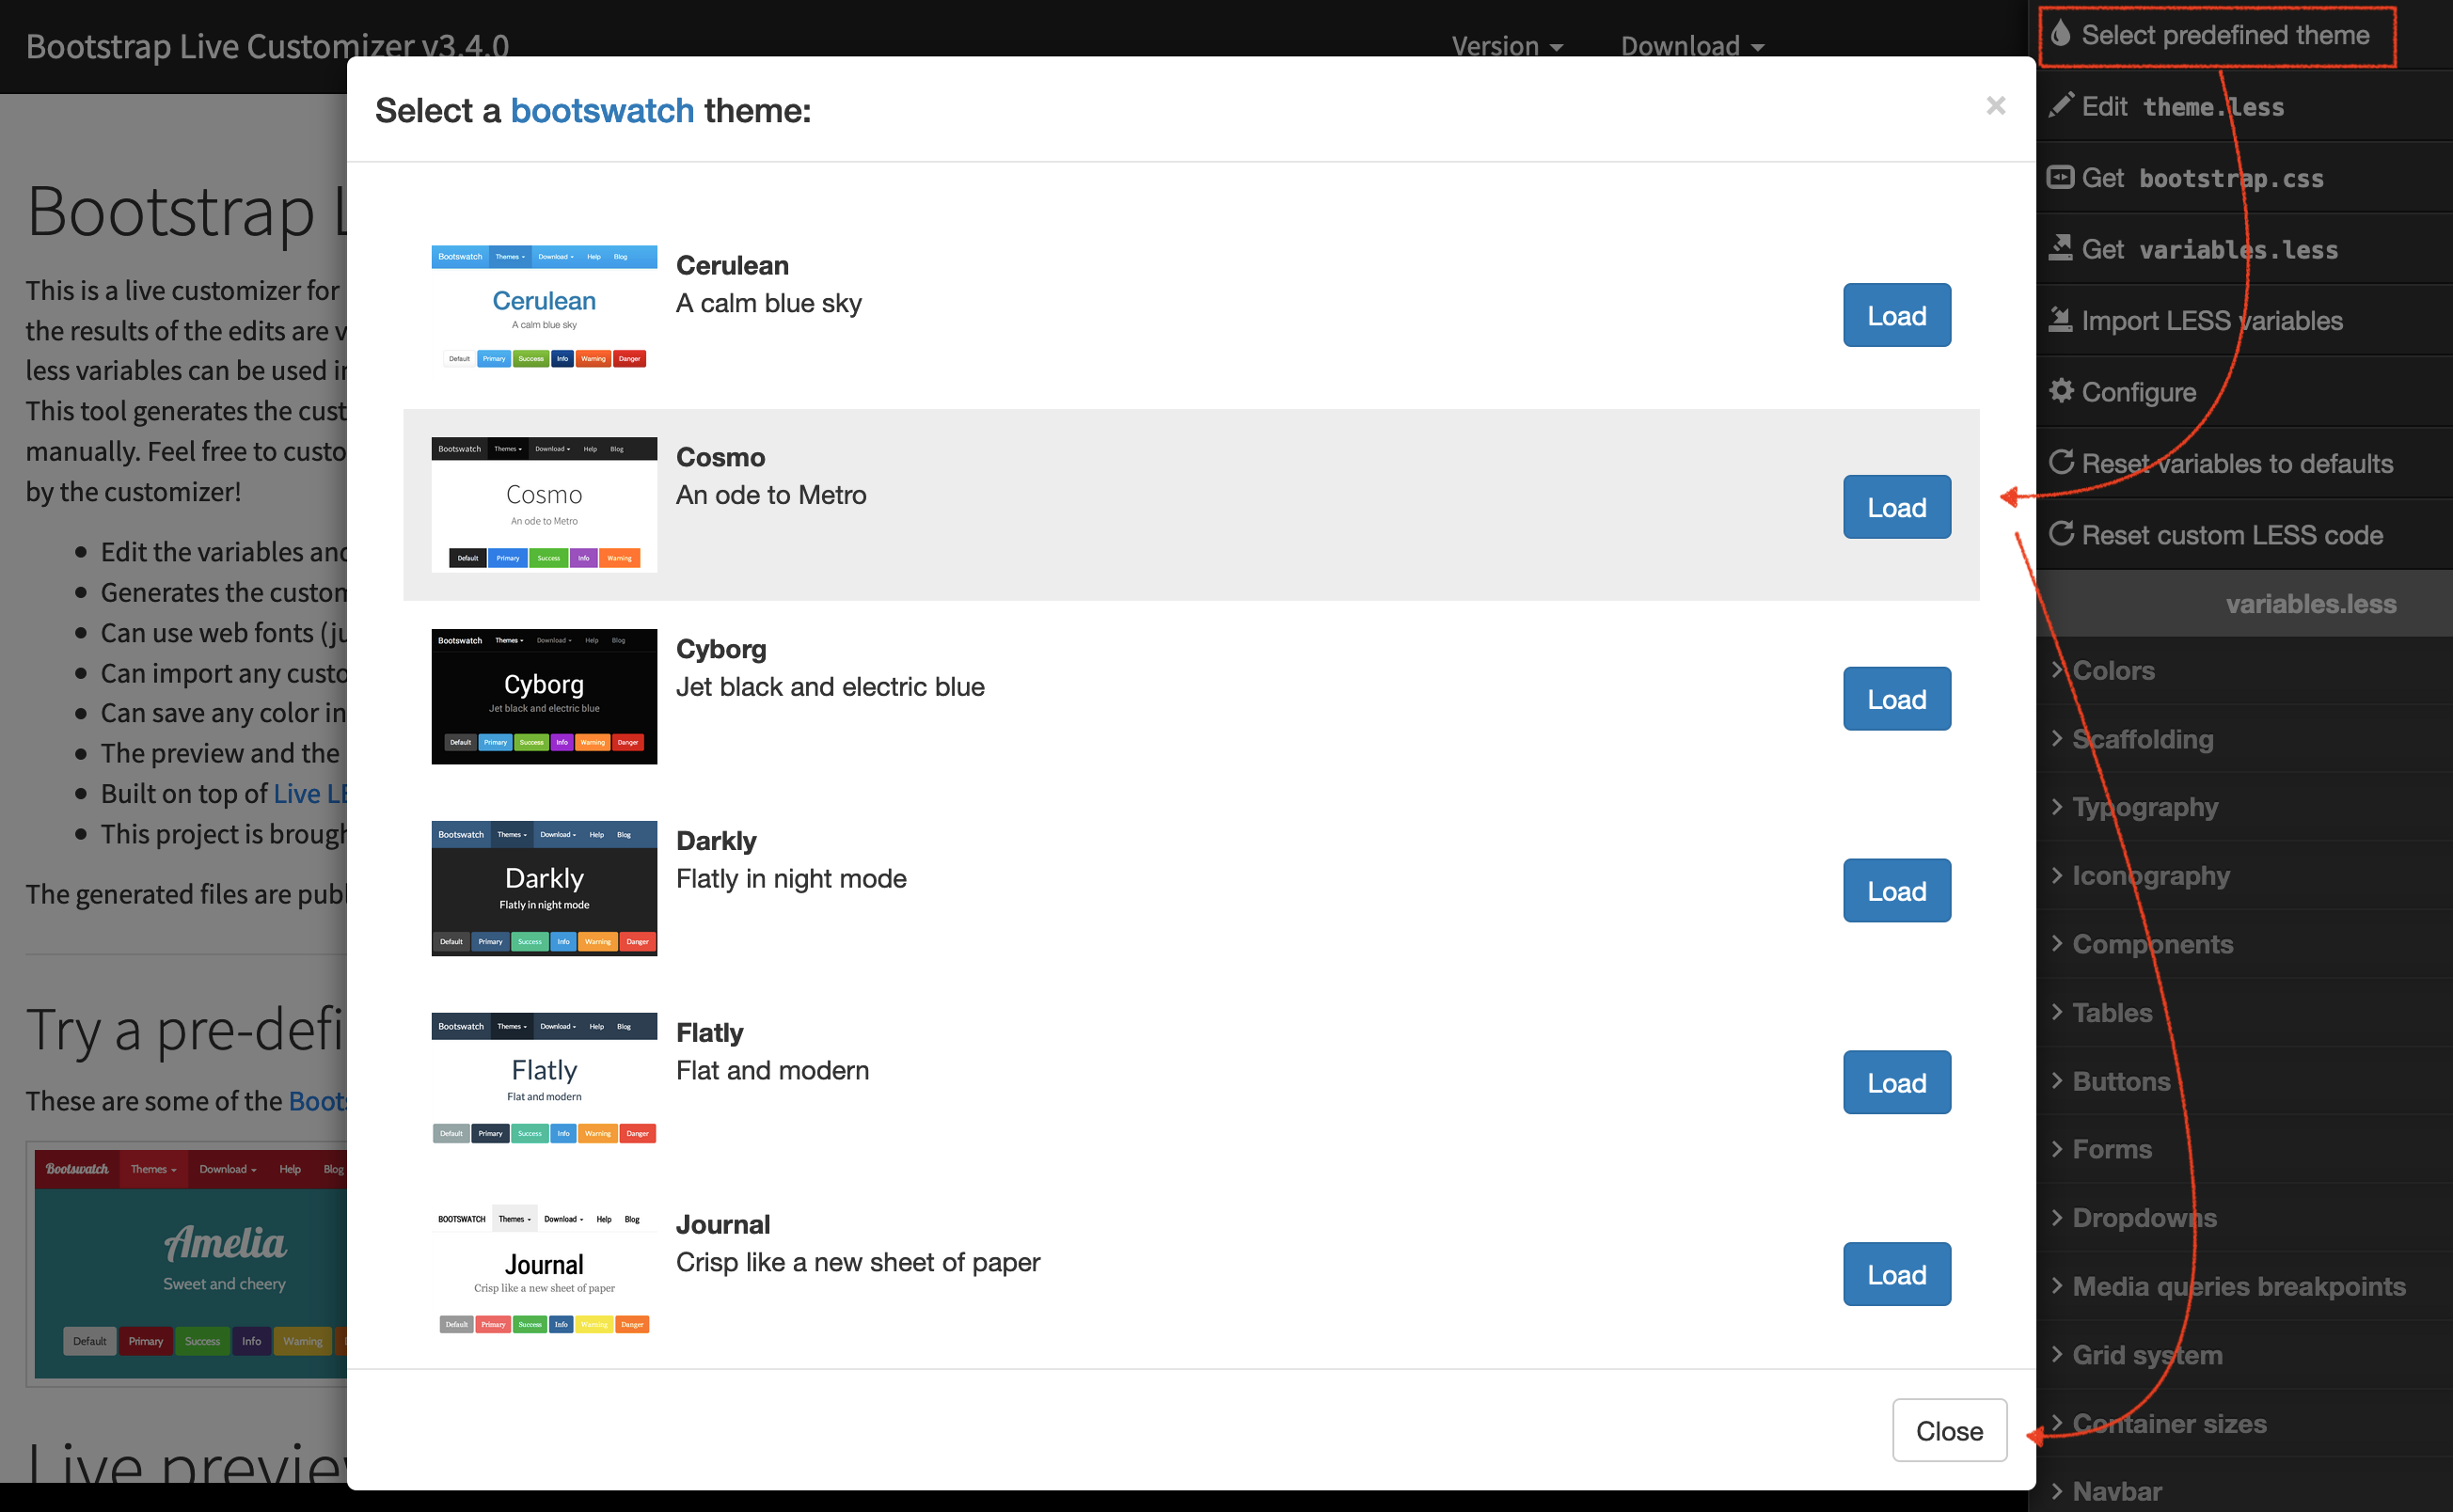
- Open the Bootstrap Live Customizer web site.
- In the top right corner, click Select predefined theme.
- Select a predefined theme and click Load
- Click the Close button in the lower right hand corner of the popup window to confirm the theme.
Customize the Theme
- Click Colors in the right column.
- Enter the RBG or HEX value color for each of the default Brands.
- In the body of the page Hover over a Button/Tables/Forms/Alerts/etc. and click the related variables button pop up to the right side of the window.
- Update the colors for the related variables in the fields on the right of the page.
Download Customizations
- Click Download at the top right of the page.
- Select bootstrap.min.css.
- The bootstrap.min.css file will download to the designated browser downloads folder.
The Download button can also be used to save the variables.less file, which can be used in the future to further change the theme in the Bootstrap Live Customizer
Placing the Customized Theme
- Create a new folder at /WebPagesEN/tmScripts/theme
- Create a new folder at /WebPagesEN/tmScripts/theme/css
- Copy the fonts folder at /WebPagesEN/tmVendor/bootstrap-3.4.1/fonts in the default web page templates to /WebPagesEN/tmScripts/theme/fonts in your customized web page templates
- Place the theme.min.css in the /WebPagesEN/tmScripts/theme/css folder on the Web Listener computer.
- Place the variables.less in the /WebPagesEN/tmScripts/theme/css folder on the Web Listener computer. (To save for future customization changes)
- Update the /WebPagesEN/tmScripts/themeLocal.html and /WebPagesEN/tmScripts/themeCDN.html pages:
- Comment out the current style reference and
- add the following link to the bottom of the page to use your personalized style sheets:
<link href="tmScripts/theme/css/theme.min.css" rel="stylesheet" />
- After putting the new theme in place, clear the web listener cache and your web pages should display the new design.
|
If your web pages are hosted on Artsman Cloud and you do not have access to the git repository, please send the customized bootstrap.min.css and variables.less file to support and we'll put the customized theme in place for you. |
Correcting Crimson Navigation Buttons
This page is under construction.