Installation - Motorola MC50, MC55, MC55A, MC5590
 |
As of 2019, these scanners are no longer supported (5 years after original notice). Refer to Linea-Pro IOS based scanners
In early 2014, the MCxx family reached a technological end of life after many years of being the standard for scanning in the industry. They do not support any of the latest end to end security and the windows mobile operating system is defunct Recognizing this, we added support for Linea-Pro IOS based scanners (far easier to set up on networks, use and offer more capability). If you have existing MCxx scanners, we can provide support and replacement parts on as-available basis. |
Following are the key functions of the scanner and how to set it up.
- Description of the Motorola MC50 and the buttons on it.
- Downloading and Installing the AMS Ticket scanning program on the scanner using Active Sync.
Note: he link on this installer has been removed as it is no longer supported
- Setup of the scanner and mating of the scanner with your router and network.
- Setup of the login information and some key communication parameters before scanning can occur
Description of the Motorola MC50/MC55/MC55A/MC5590 Buttons
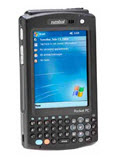
Theatre Manager supports the MC50, MC55, MC55A or similar wireless scanners for tracking people entering and leaving a venue.
The scanner operation buttons are:
- The yellow scan buttons are on both sides at the top of the scanner. They are interchangable so you can use either for scanning.
- When you are using the Theatre Manager AMS Ticket program, all functions are accessed by clicking on the touch sensitive screen using a stylus or your finger.
- The orange button at the bottom left of the keyboard is the numlock button. Pressing it once allows entry of a number. Pressing it twice turns on num-lock. Pressing it again, turns the keyboard back to alpha. It is handy when entering information to set up the device.
Active Sync for Windows
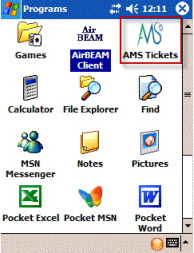 If the AMS Tickets program is not on the scanner, you will need to install it. You can determine if it is in the scanner by clicking the start menu at the top of the scanner and looking down the list for the Programs' menu item. When you pick Programs, you will see a list of applications loaded on the device.
Look for AMS Tickets.
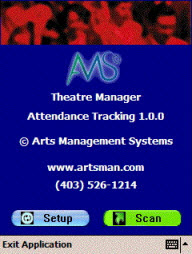
In the screen at the right, you can see the 'AMS' logo with the name 'AMS Tickets' in the first row on the 3rd Column
If you cannot find the icon the program will need to be installed.
|
Installation must be done on a PC because the connection cables that come with the device are USB and serial. If you have a credit card server, this is an ideal machine for this purpose. Installation only needs to be done once because the program is placed into nonvolatile ram, so even if you run out of battery power, it will still be there. |

Prerequisites
You need:
- The Windows Mobile software and the AMS Ticket program. You can download all you need from our web site.
- If you have Win 2000 or XP, then you must install Active Sync 4.5.
- For Windows Vista, 7, 8 and later, Microsoft Windows Mobile Device Center (WMDC) replaces ActiveSync. WMDC offers device management and data synchronization between a Windows Mobile-based device and a computer and is most often installed on the computer as part of the operatiing system.
- A PC computer with a USB connection.
Installing Active Sync 4.5
|
Active Sync 4.5 only applies to installing software on the Motorola scanners using windows 2000 or XP. If you have Vista and above, Microsoft Windows Mobile Device Center (WMDC) replaces ActiveSync and you may need to download and install that instead (if it is not already on the computer) |
| Step 1 |
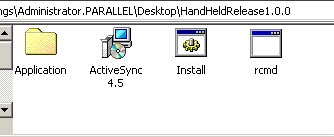
If you have not already done so, download the installers for the AMS ticket program. Expand the zip file to a convenient location and have a look at the folder. You will see some folders and files that look like the image to the right. If you have plugged in the scanner to your USB port, please unplug it. Double click on the ActiveSync 4.5 installer. This is the first step in getting the program installed. This happens once, regardless of the number of scanners you need to install the program on. |
| Step 2 |
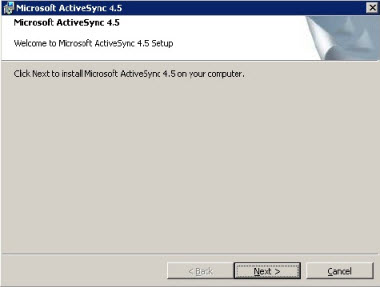
An installation window, similar to the one to the left, opens. Please follow the instructions to Install Active Sync 4.5. Click the Next button. |
|
Step 3 |
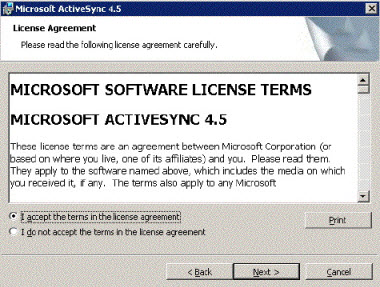
After reading the terms, click to accept the licence terms, then click the Next button. |
|
Step 4 |
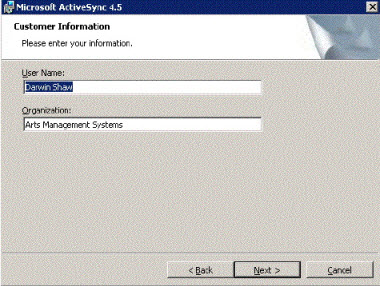
Enter your user name and customer information and click Next. The software will most likely default the information for you. |
|
Step 5 |
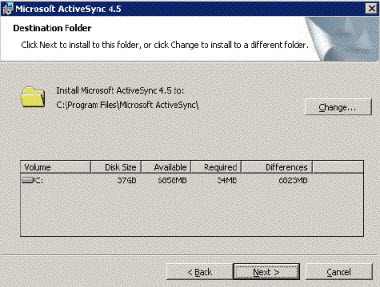
Again click Next. |
| Step 6 |
Click the Install button and wait till the installer is finished doing its work. This can take several minutes, depending on the speed of your machine. |
|
Step 7 |
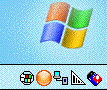
Once you have installed Active Sync, you should see an icon at the bottom left of your computer in the icon tray. It looks like a couple of 'arrows' in a circle. If it is grayed out (like this picture), the device is not in and not connected. |
|
Step 8 |
If the scanner is its cradle and is connected, you should see the the icon is 'green' (indicating a connection). |
|
Step 9 |
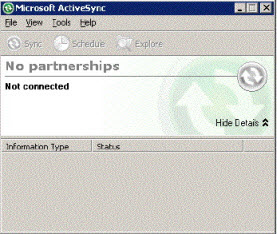
In either case, you can 'double-click' on the icon to open the active sync program. You will see a window like the one on the left. |
|
Step 10 |
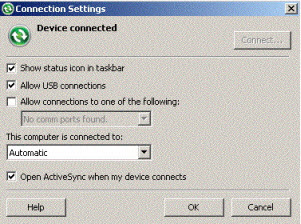
If you have no connection, after plugging the scanner devince and the USB cradle, go to File->Connection Settings. This window has some settings that can be changed and should look like the image on the left. The default setting is to allow USB connections, but if you are having issues, please check to ensure the settings are similar. The important thing, is to get the Device Connected message. |


Installation the Scan Ticket Application
|
These instructions are based on installation using Active Sync using a windows XP computer. If you have Window vista or later, Microsoft Windows Mobile Device Center (WMDC) replaces ActiveSync. You can skip the install of Active Sync 4.5 |
|
You will also need to know the scanner type you have (MC50, MC55, or MC55A) and select the latest version of the software from the appropriate folder in the installer archive. |

|
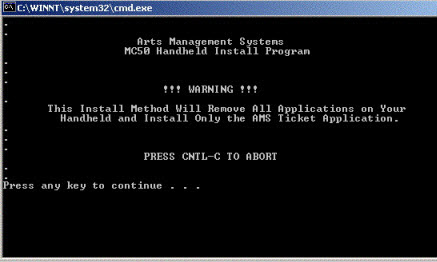
Step 1 |
Once connected to active sync or equivalent (the window does not have to be open):
|
| Step 2 |
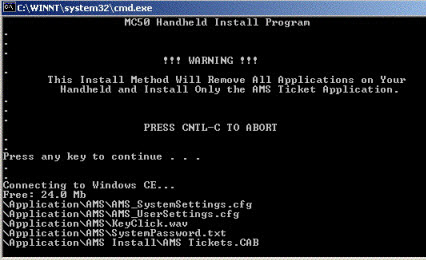
As the install progresses, you see the results of dos commands and file copy. This step can take a while (perhaps 10 minutes) as it moves the data onto the hand held device. Do not unplug the hand held device during the installation. |
|
Step 3 |
While the sync is occurring, the scanner device will show items are being transferred with a set of left/right arrows on the screen near the time. There is no animation of the arrows while the transfer is happening. |
|
Step 4 |
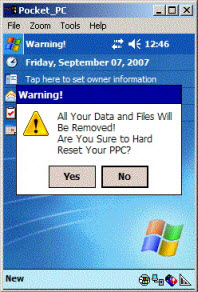
At the end of the install, the DOS screen will close on your computer and the screen on your mobile device will ask if you want to reset the computer. Although the messages 'all data and files will be removed', it really means the data that supported the installation of TM or other programs. Click Yes |
|
Step 5 |
After the restart of the device, you need to follow through with the device initialization. This includes: |
Mating the Scanner to Your Network
Click the icon to down load a PDF instruction sheet of this page.
Setting up a scanner requires two things to be done.
- The first is mating the scanner to your network and making it acceptable to your routers (all routers if you have multiple and if necessary).
- The second is getting the communication and parameters set up.
Mating the scanner with your network
We expect you are running a closed network - where you cannot log on unless your router has the mac address of the scanner entered into it and your scanner is set up to connect to that network using the SSID and WEP password for the wireless router.
You will need to involve your network support people to complete some of this part of the setup. Once done, it should not have to change again.These instructions focus on the part of the setup relating to the scanner.
| |||
 |
| ||
 |
| ||
 |
| ||
 |
| ||
| |||
 |
| ||
 |
| ||
 |
|
MC55A addendum for Settings
The MC55A has Windows Mobile 6.5 (r) installed and has a few quirks as the interface is far less intuitive. Please adjust communication settings from within the Ticket Scanning program using the following general steps starting from the 'Theatre Manager Setup' window.
|
|
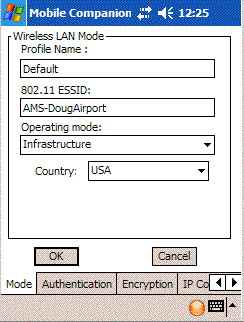
Create and Managing a profile |
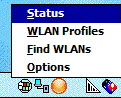
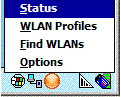
Using the wireless button, select Manage Profiles
| ||
| Now that you have a profile, time to select it and use it. Press and hold on the profile until the popup appears and click 'Connect'. The icon changes if you have active connection. You may need to 'x' out of this window to continue. Before you do, please refer to for last minute settings that you might need to check. | |||
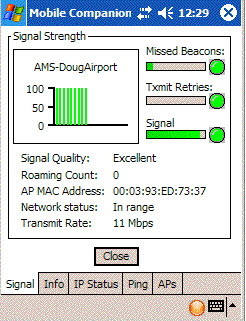
Testing the Signal |
Pressuming you are connected, click the Wireless button again in the ticket scanning program.
| ||
Testing the Network |
| ||
|
Once the network settings are done, then the next step is to try and end to end test. You will need to start at least one Theatre Manager Web Listener. For the purposes of the test, it is better that only one be started. |
|||
Testing a Scan |
On the Web listener window, there is a pop-up at the bottom middle of the screen beside the Show Detail button. This is the log Level selection which is normally set to Error. Change the setting to say Ticket Scanning . The Web Listener will now report more messages, including those sent by a scanner. It is helpful in the diagnostic process.
| ||
Real Life Testing |
The final step in the test process is to take the scanners to locations where you will use them (if you see messages that the scanner is communicating in the previous section).
| ||
Training |
The scanners do work, as there are hundreds in use. However, we recommend that you have a training practice session a few days before using it on your first real event. Have the ushers come in and try it. Help them scan in and scan out people so that they are familiar with the basic operation. Then try the scanners on a small event first - it is almost a certainty that there will be minor problems when real patrons are involved. Patrons bring tickets to the wrong event and your ushers need time to adapt to the controls that a scanner brings. Once you have a few smaller events under your belt and feel comfortable, then you are ready for all events. | ||
Scanner Prefs-Motorola MC50/55
|
Google bought Motorola in may 2012 and subsequently sold it to Lenovo. These scanners are no longer PCI compliant due to low encryption capabilities.
Note: the Motorola scanners are no longer supported. Replacement scanners are the linea pro, which is also more reliable and versatile. |
| Accessing Setup |
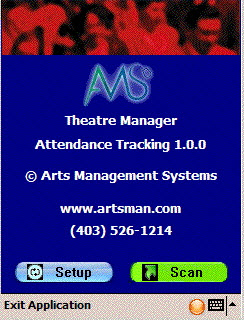 Once the software is installed and the scanner is mated to the network, you can click the start menu, programs and the click on the AMS Tickets application.
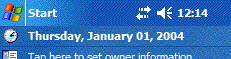
It may take a couple of seconds or so to start as the scan program is synchronizing time with a time server and making sure the clock on the program is set properly. When it does start, you will see the screen at the side. Now we can set up scanning for an event / play. This must be done in advance of each performance that you are scanning tickets for. All that needs to be done is set up some parameters. Click the 'Setup' button on the screen. | ||||
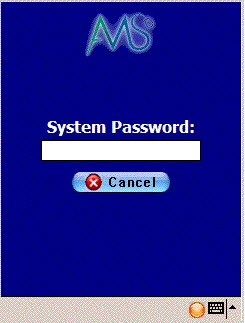 You will be asked for a system password to change the settings for the
performance. Type '123' (this can be changed) and once the password is
right, the next window will automatically appear.
You will be asked for a system password to change the settings for the
performance. Type '123' (this can be changed) and once the password is
right, the next window will automatically appear. | |||||
| Sample Setup |
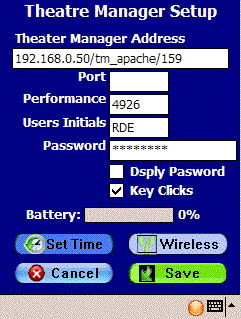 When you open the preferences window using either of the two methods above, you have some fields that must be filled in. These are below (Press the orange button on the keyboard twice to turn the num-lock on mode):
| ||||
|
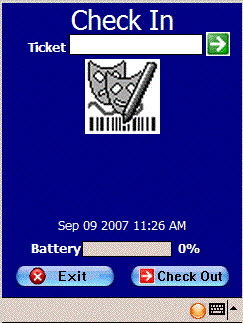
You can access this option directly from the main screen where the scan & setup buttons are. Click the 'Scan' button and you will see a screen like the one on the left. At the bottom is a 'checkout' button with a red arrow. This means the mode is currently 'check in' and you click this button to change the mode to 'checkout'. It will also change the arrow at the top from green (checkin mode) to red (checkout mode) If there is a green arrow with 'check in' at the bottom, then the current mode is 'checkout' mode. Click the 'Checkin' button to change the mode to checkin. |
 There is one other preference that can be set before we begin scanning.
This indicates whether we are scanning the person into the venue, or
scanning them as they leave to indicate that the ticket was not used
There is one other preference that can be set before we begin scanning.
This indicates whether we are scanning the person into the venue, or
scanning them as they leave to indicate that the ticket was not used Theatre Manager Server Settings For Motorola Scanners
The Motorola Scanners rely on port 80 to scan tickets. The Theatre Manager Server, by default, elevates all traffic to Port 443. For this reason additional settings need to be added to the Theatre Manager Server through the Director to allow for scanner communication on Port 80.
Q: Why are there specific settings for the Motorola Scanners?
A: The Motorola scanners do not support secure connections to the Theatre Manager Server web server. The process below outlines how to setup an unencrypted side-entry point to the DMZ web server, while still maintaining a secure connection to the primary web server. If you’d like to have end-to-end security then please email sales@artsman.com for information on the updated, and fully secure, iOS scanners.
Settings
- On the Web Server computer, open the Theatre Manager Server Director in a browser by visiting http://127.0.0.1:3012
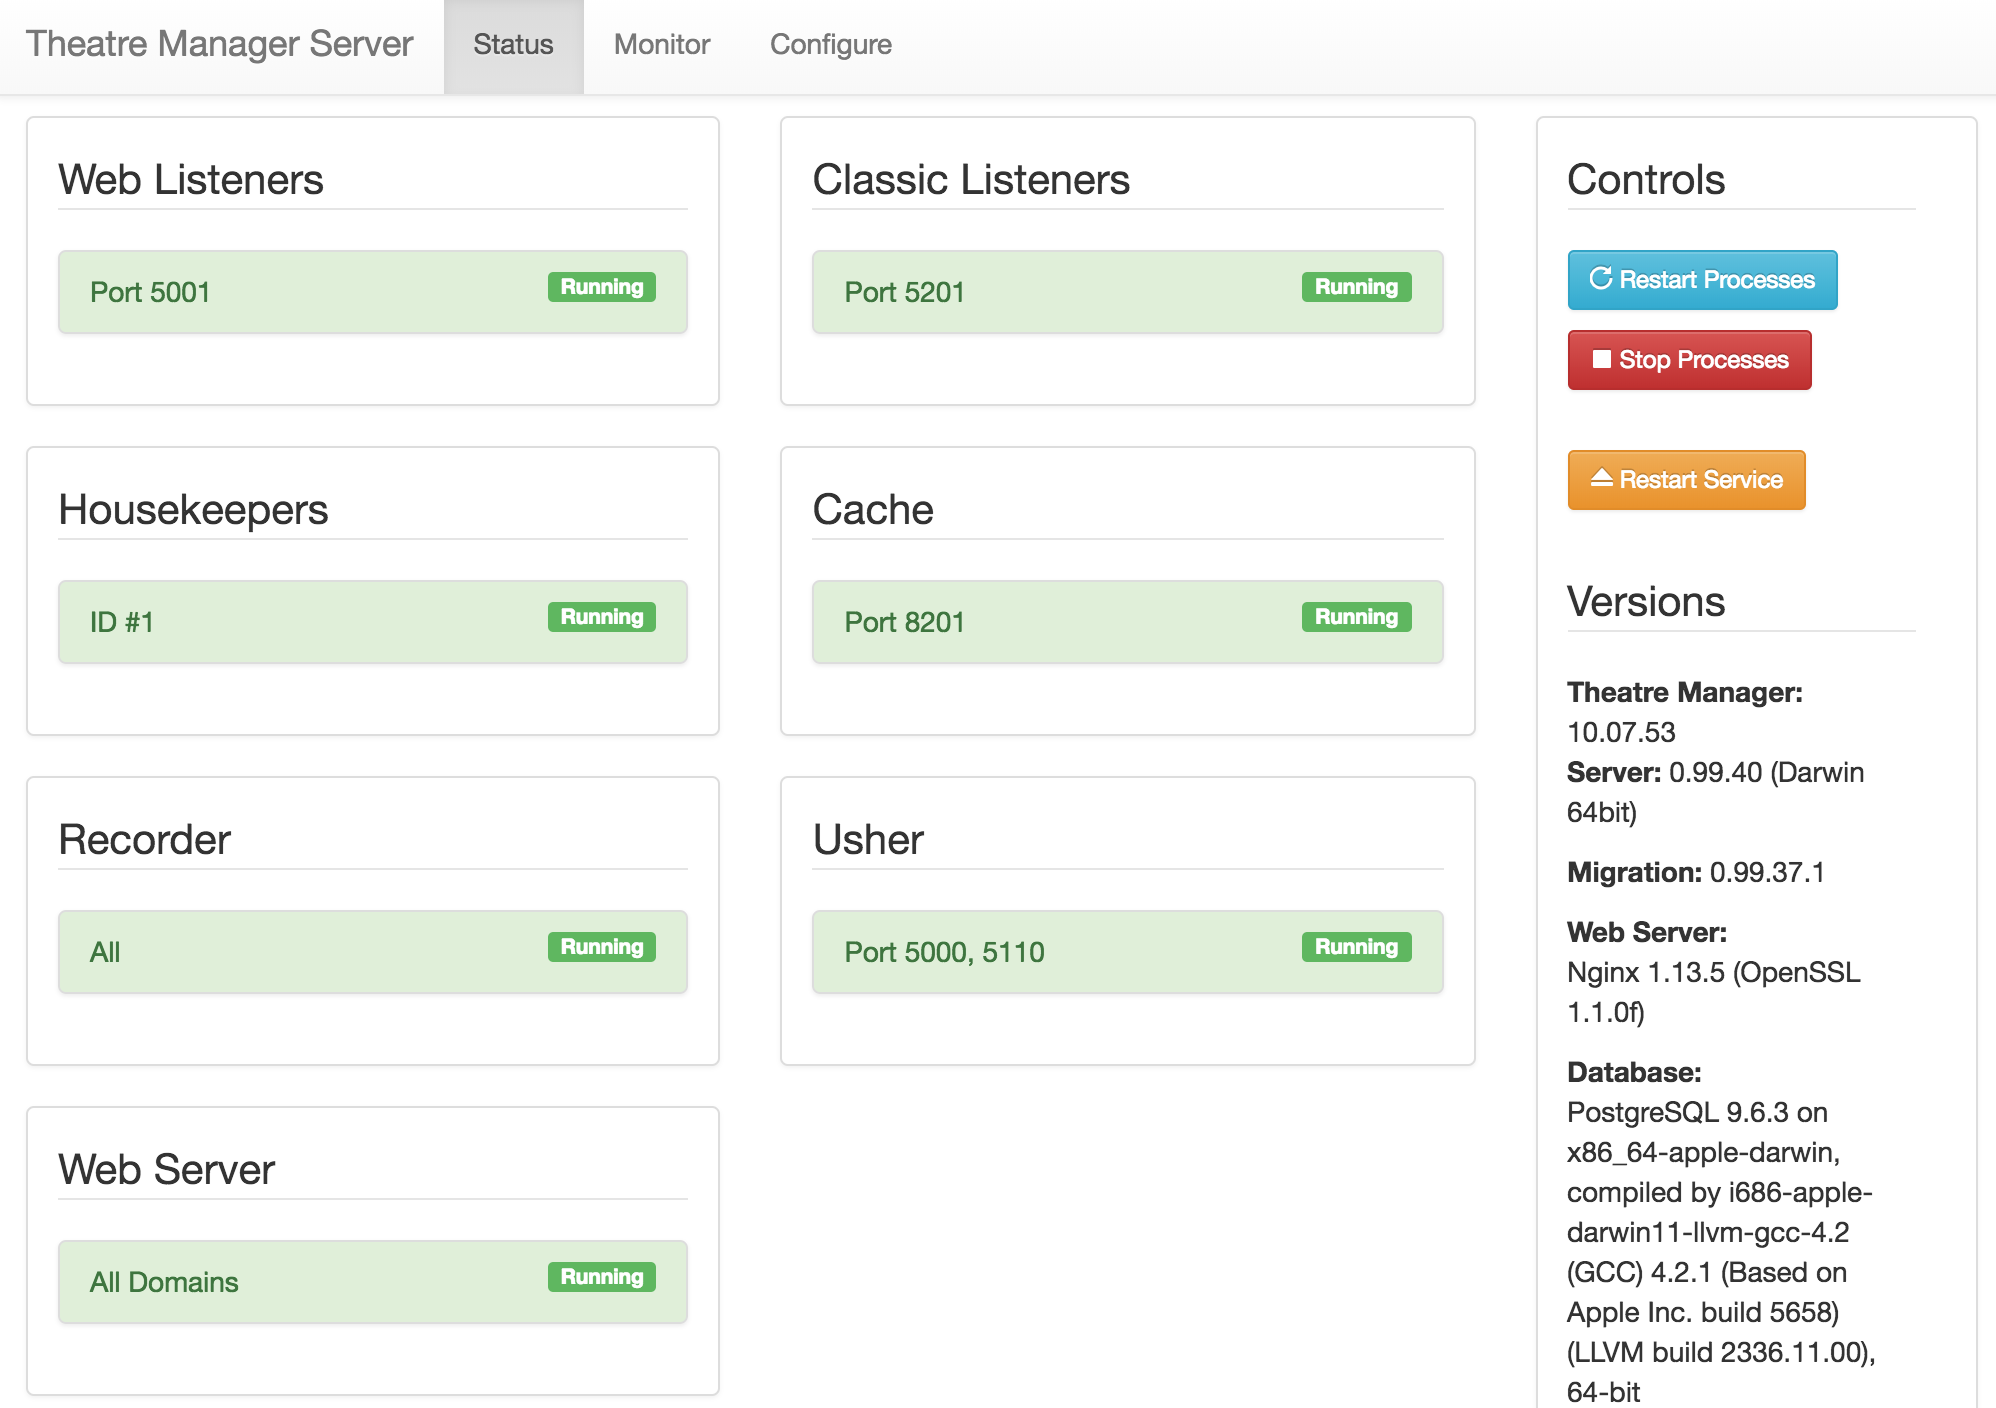
- Select the Configure tab.
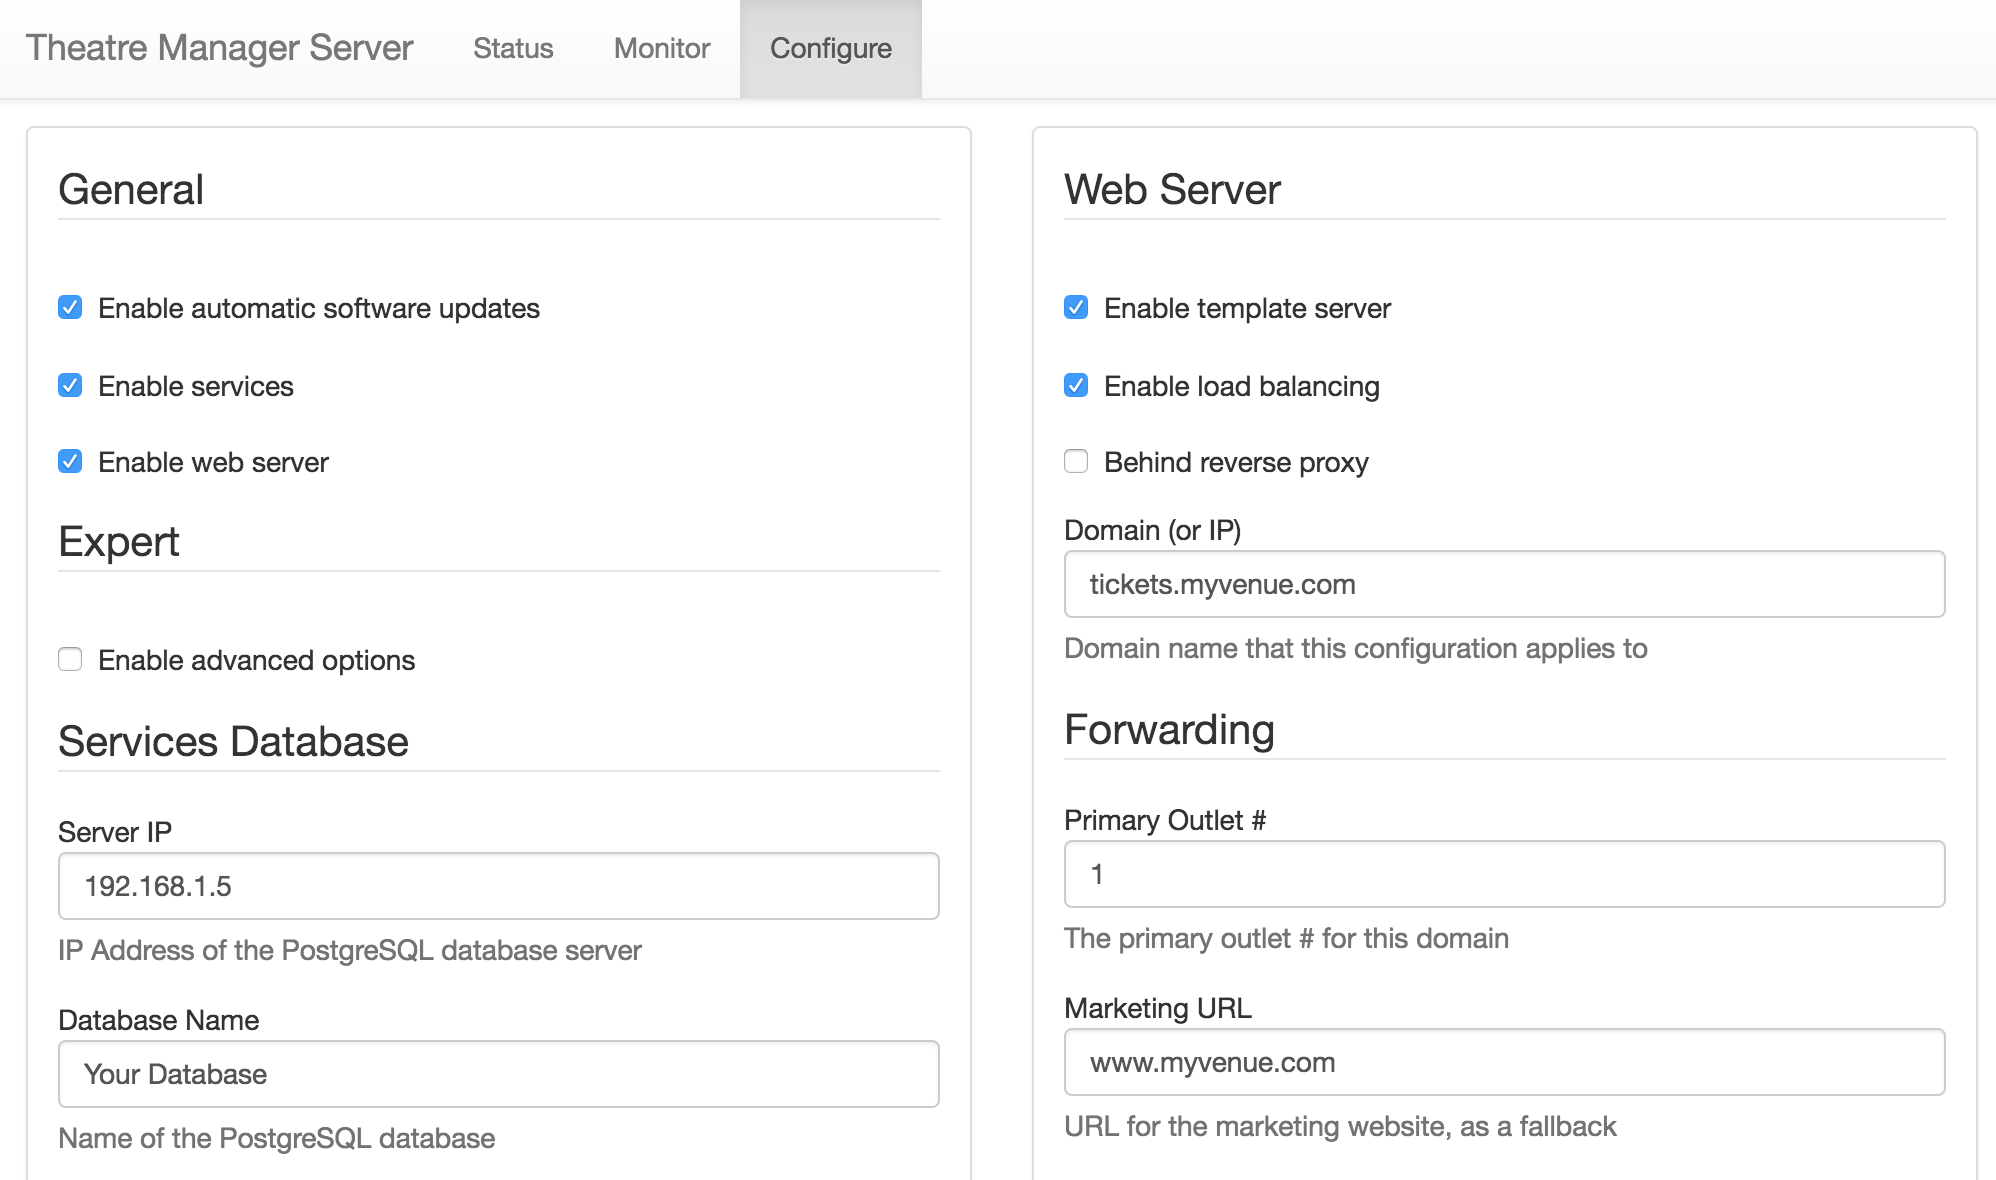
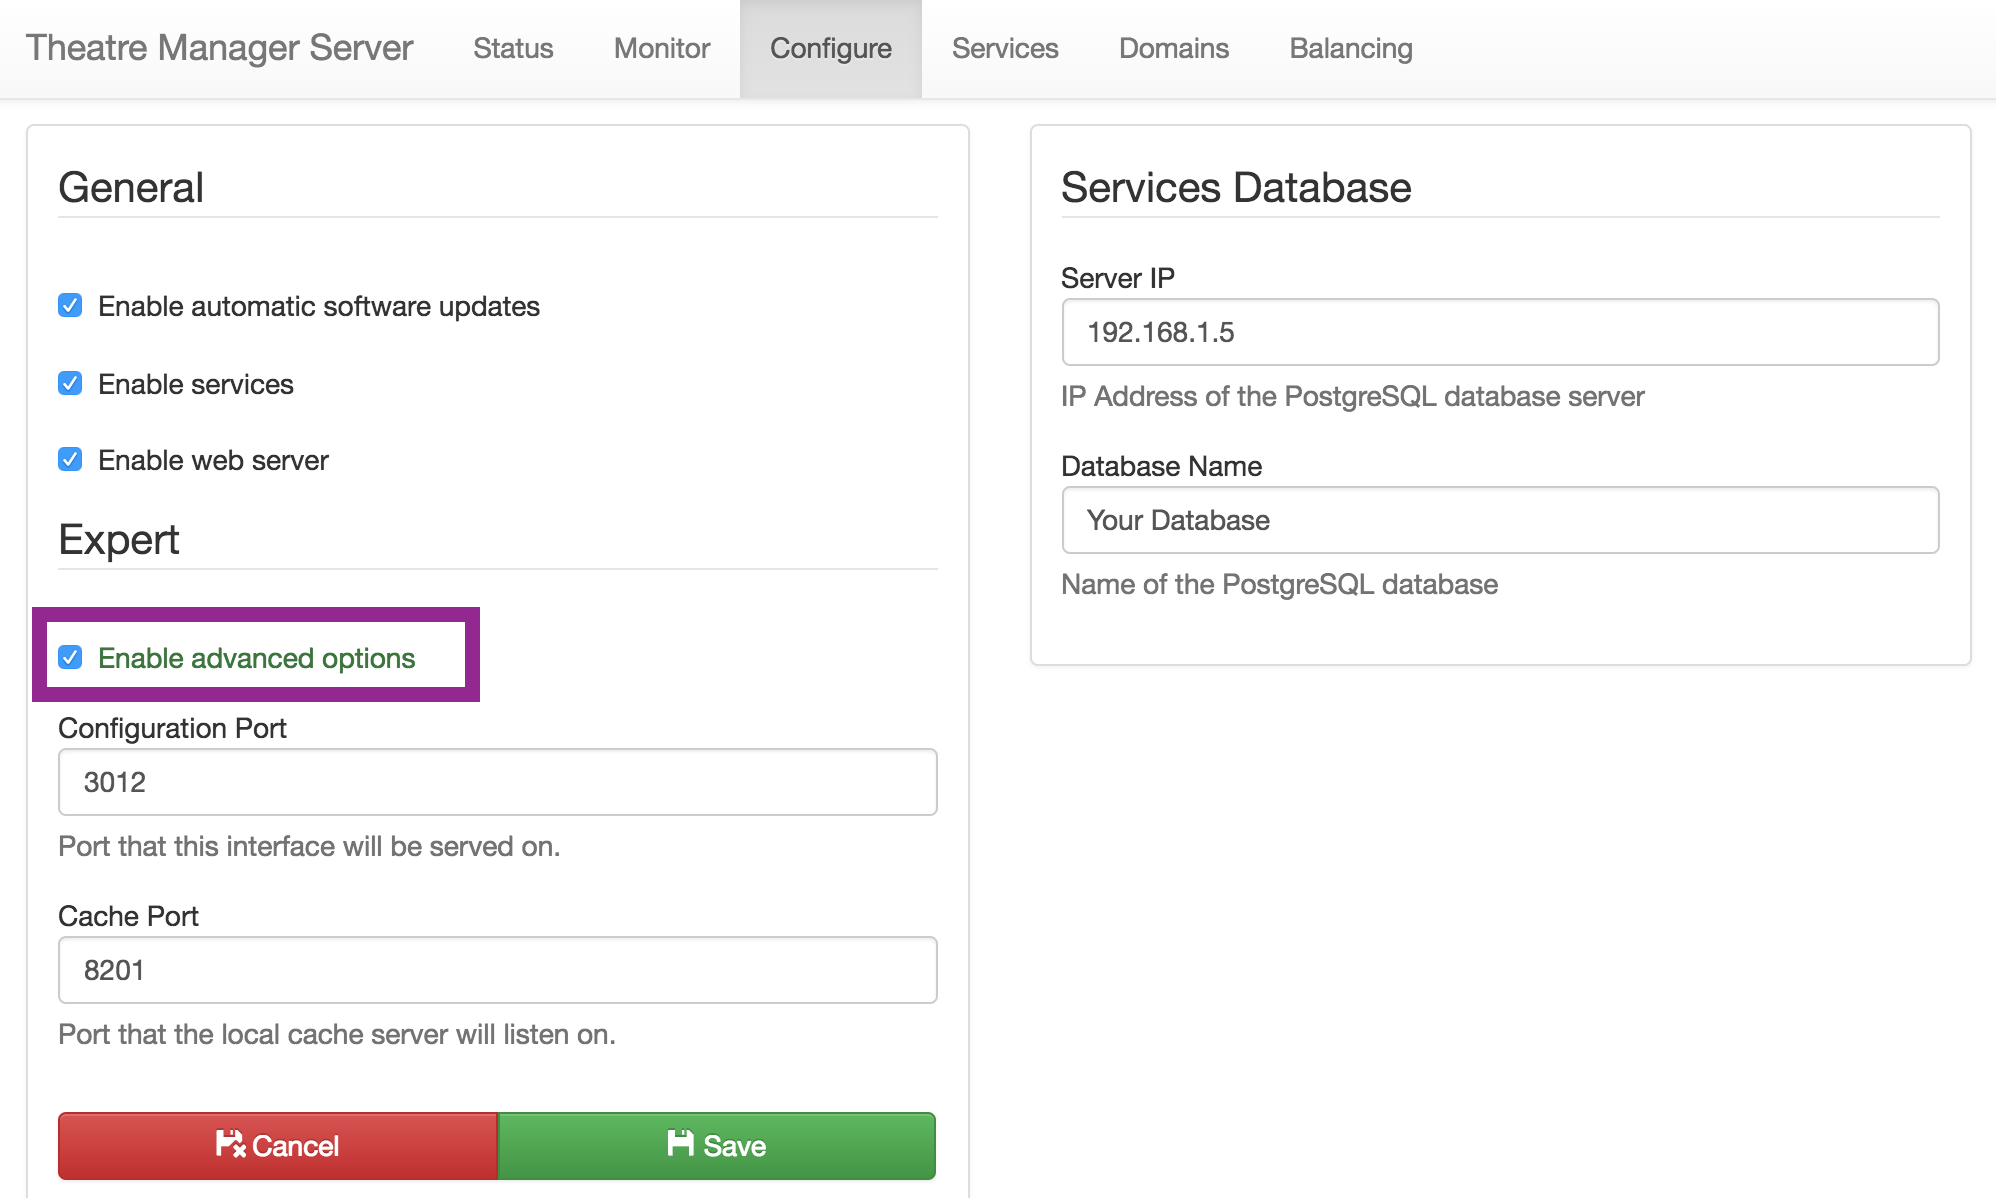
- Check the box for Enable advanced options and click Save at the bottom of the left column. This will open up more tabs within the Director window.
- Select the Domain tab at the top of the Director window.
- Scroll to the bottom of the window and click the Add Another Domain button.
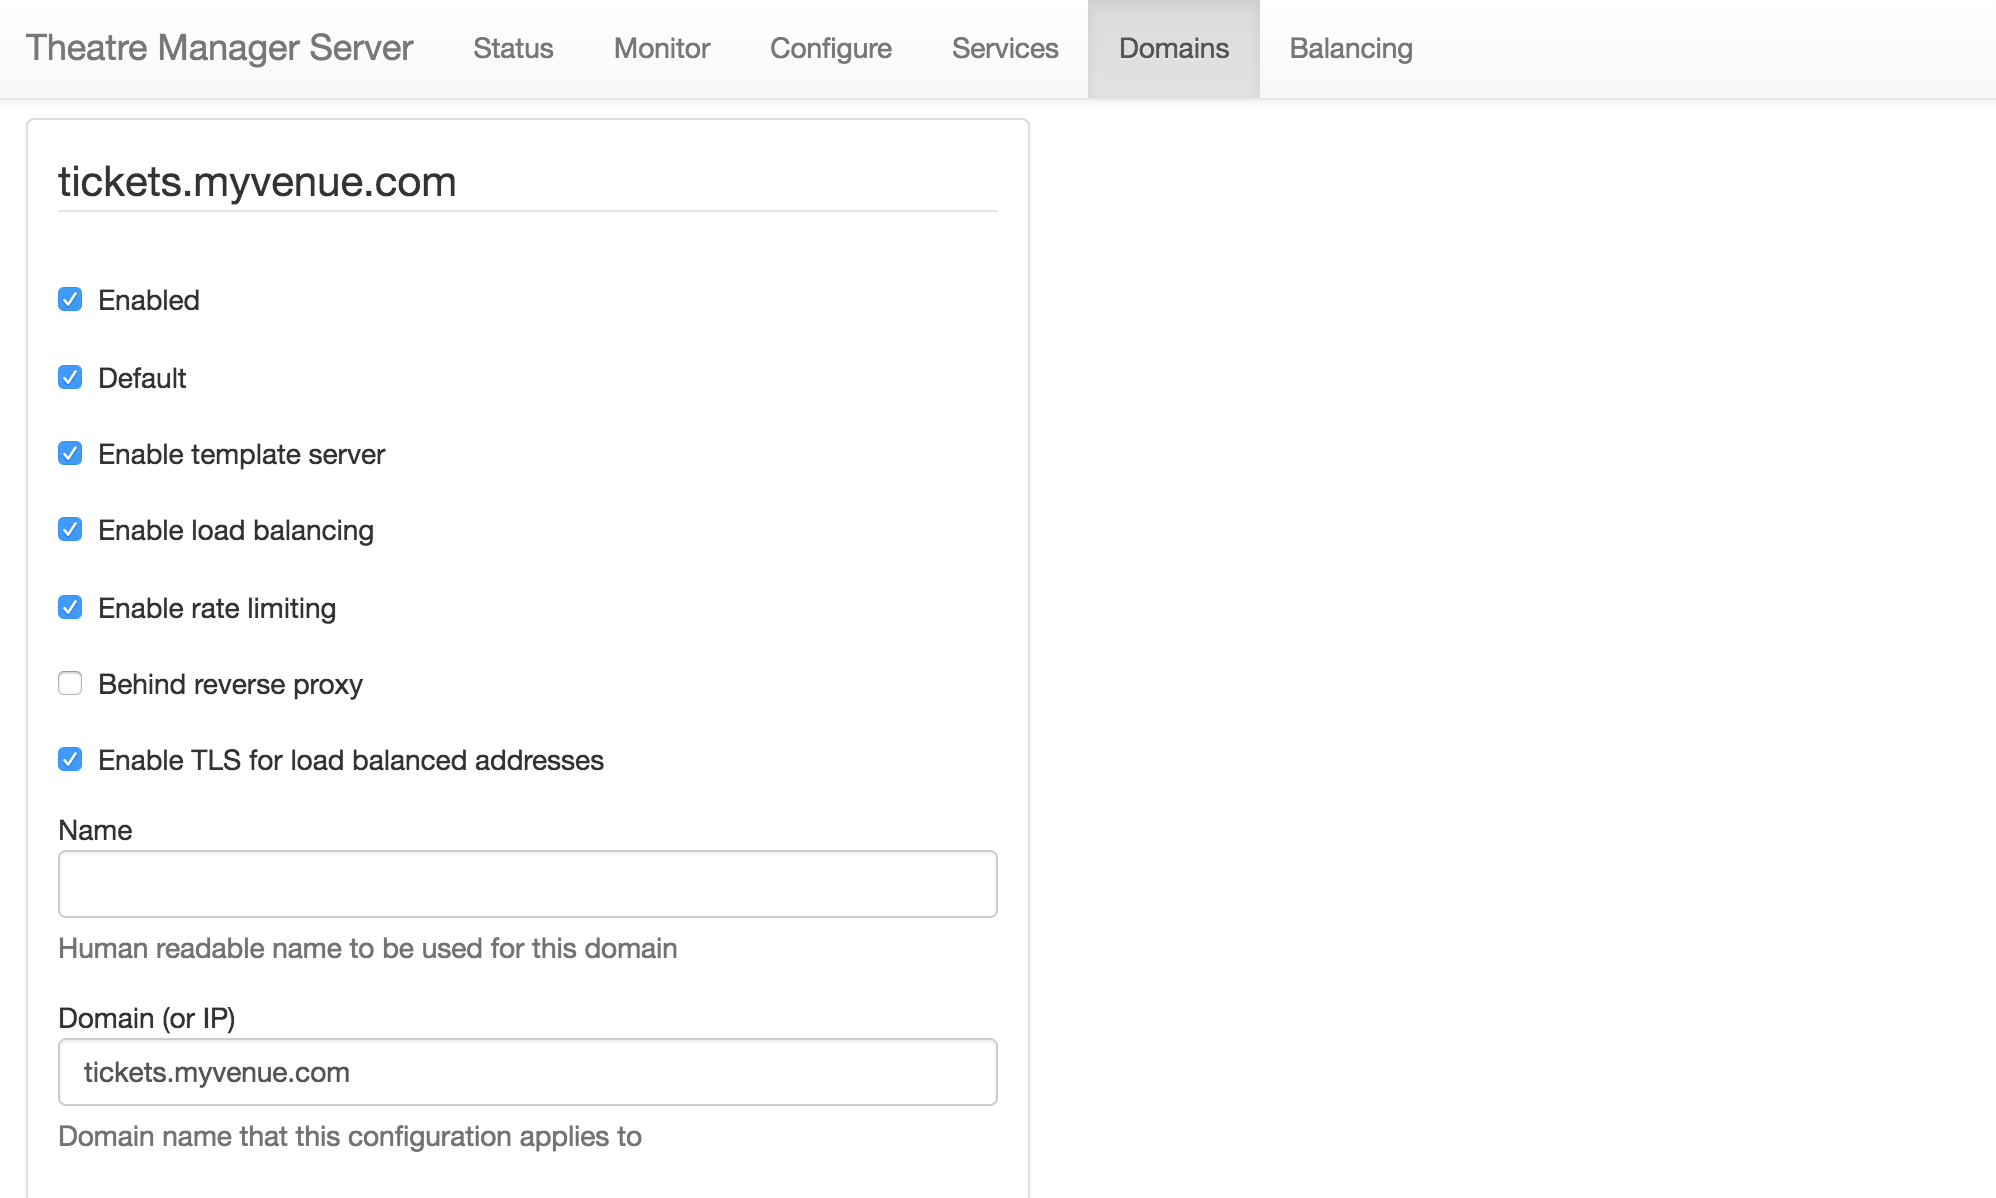
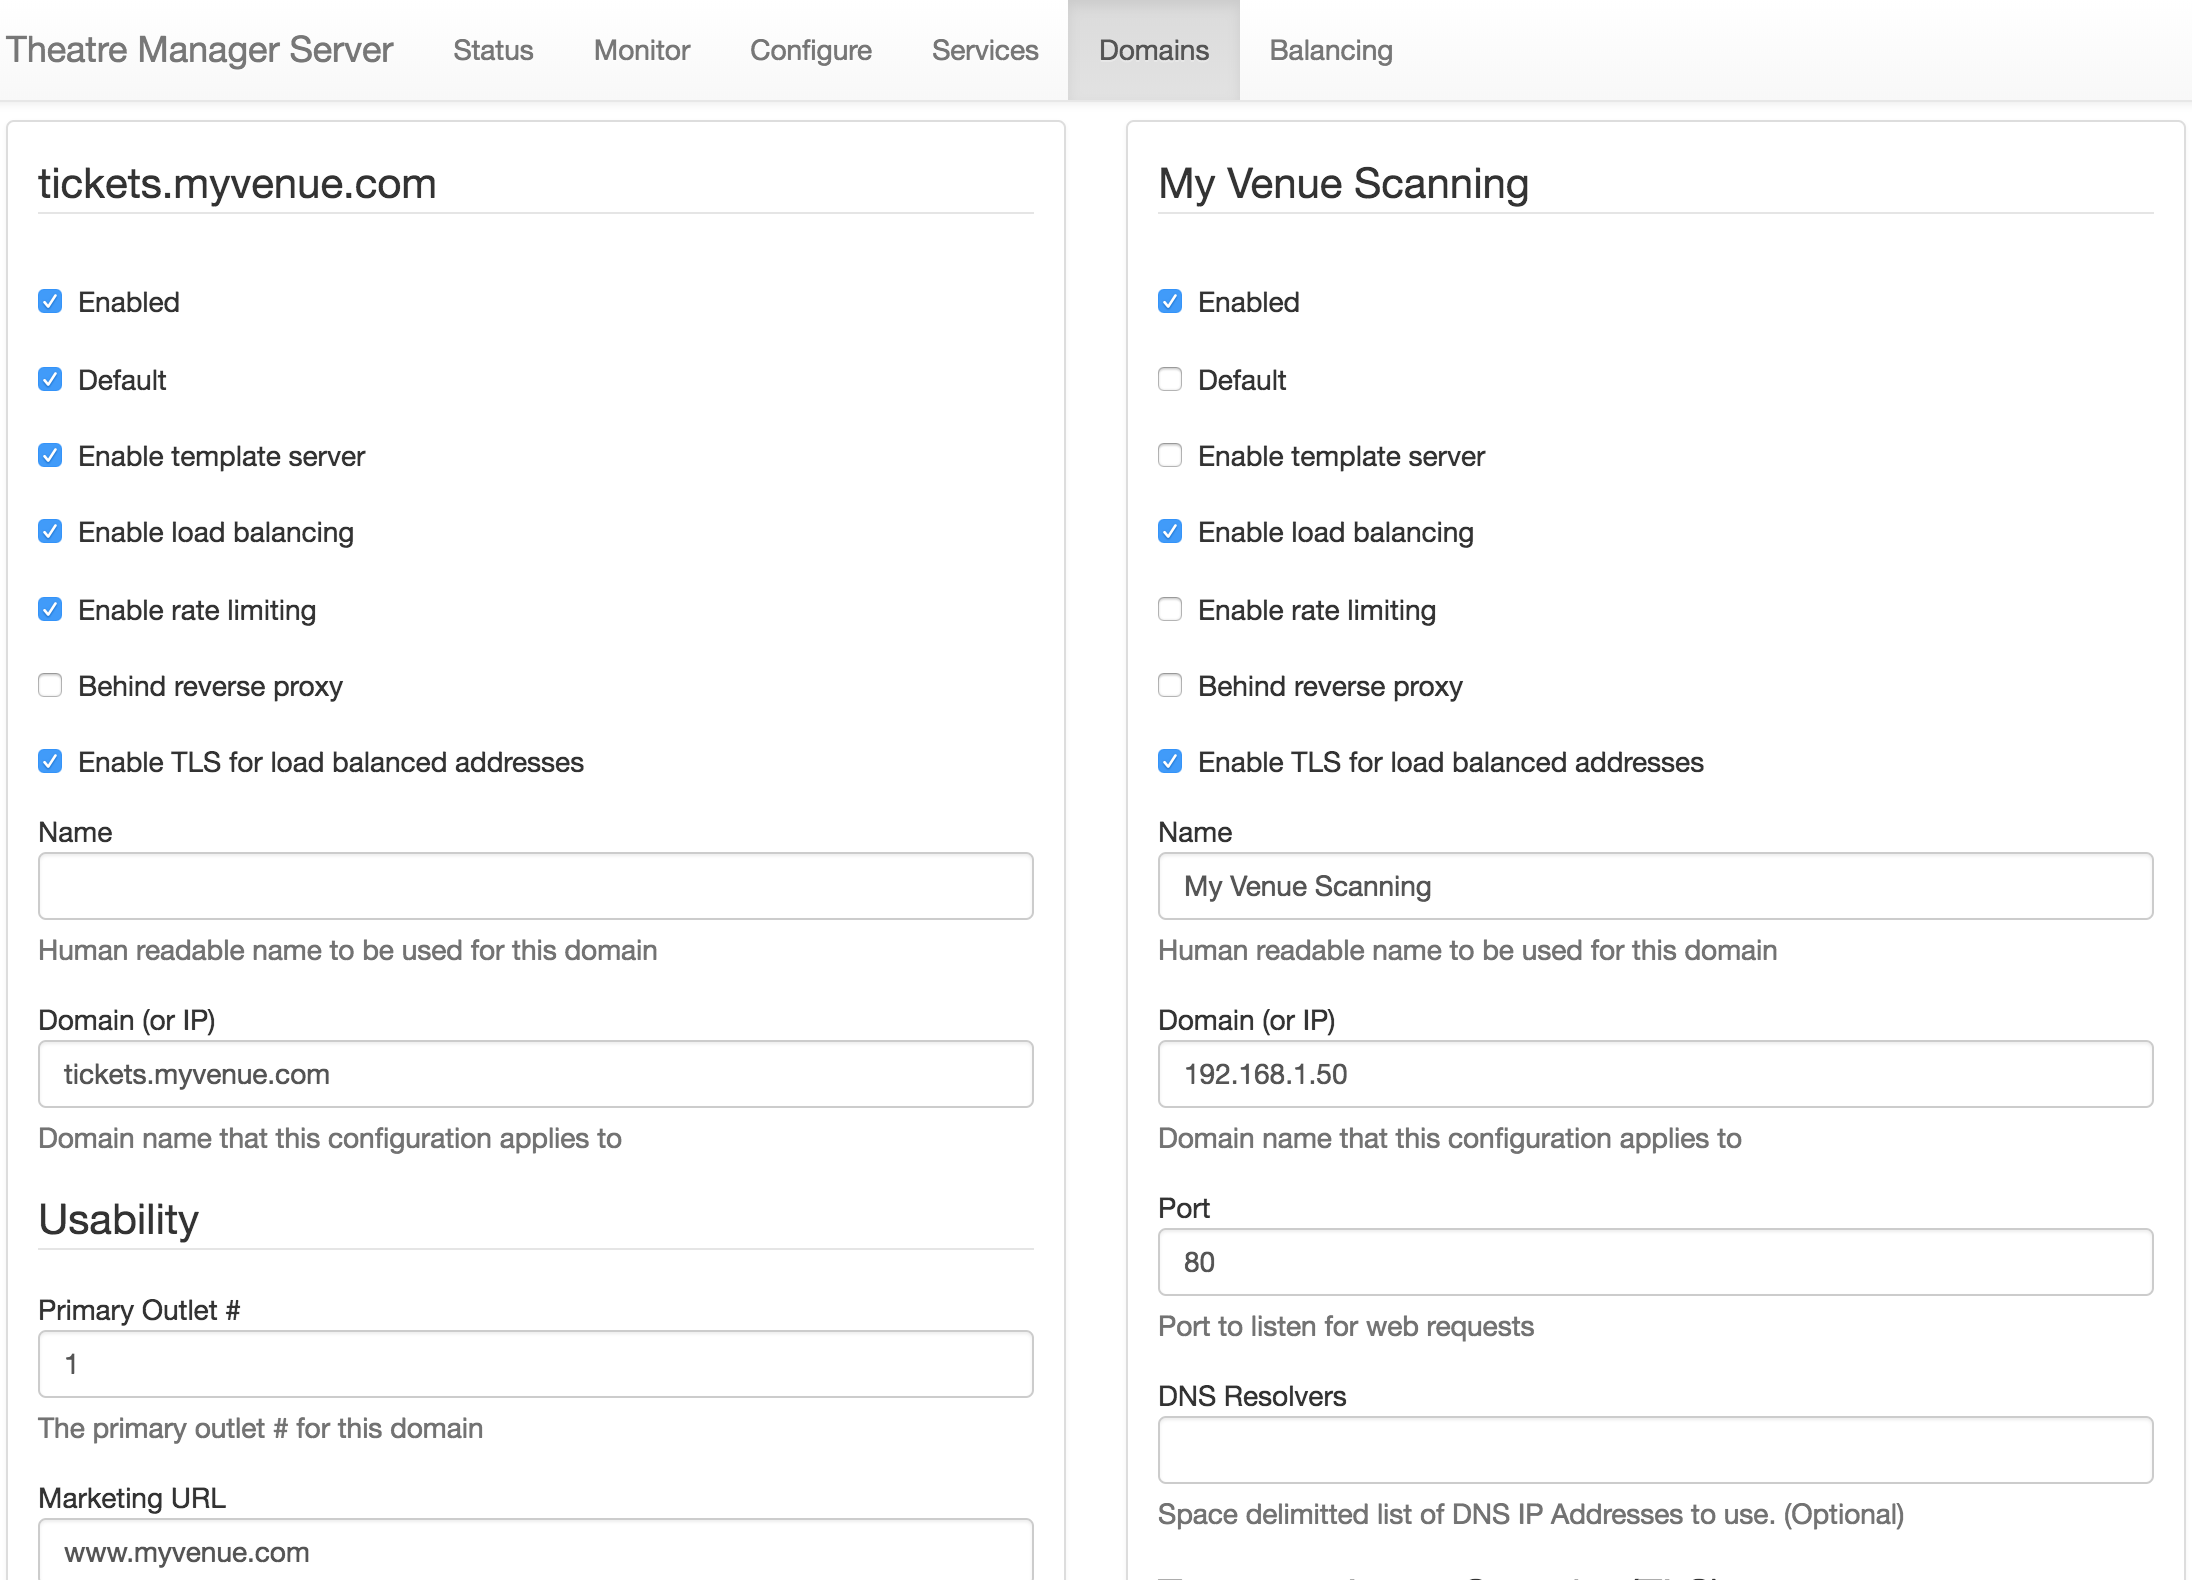
- Fill in the following details for the new domain:
- Check the Enabled box.
- Check the Enable load balancing box.
- Check the Enable TLS for load balance addresses box.
- Enter a Name for this connection. It may be something like Your Venue Scanning.
- Enter the Domain (or IP). This should be the IP address of the Web Listener.
- Enter 80 into the Port field.
- Click the Save button at the bottom of the right column.
- Select the Balancing tab at top of the Director window.
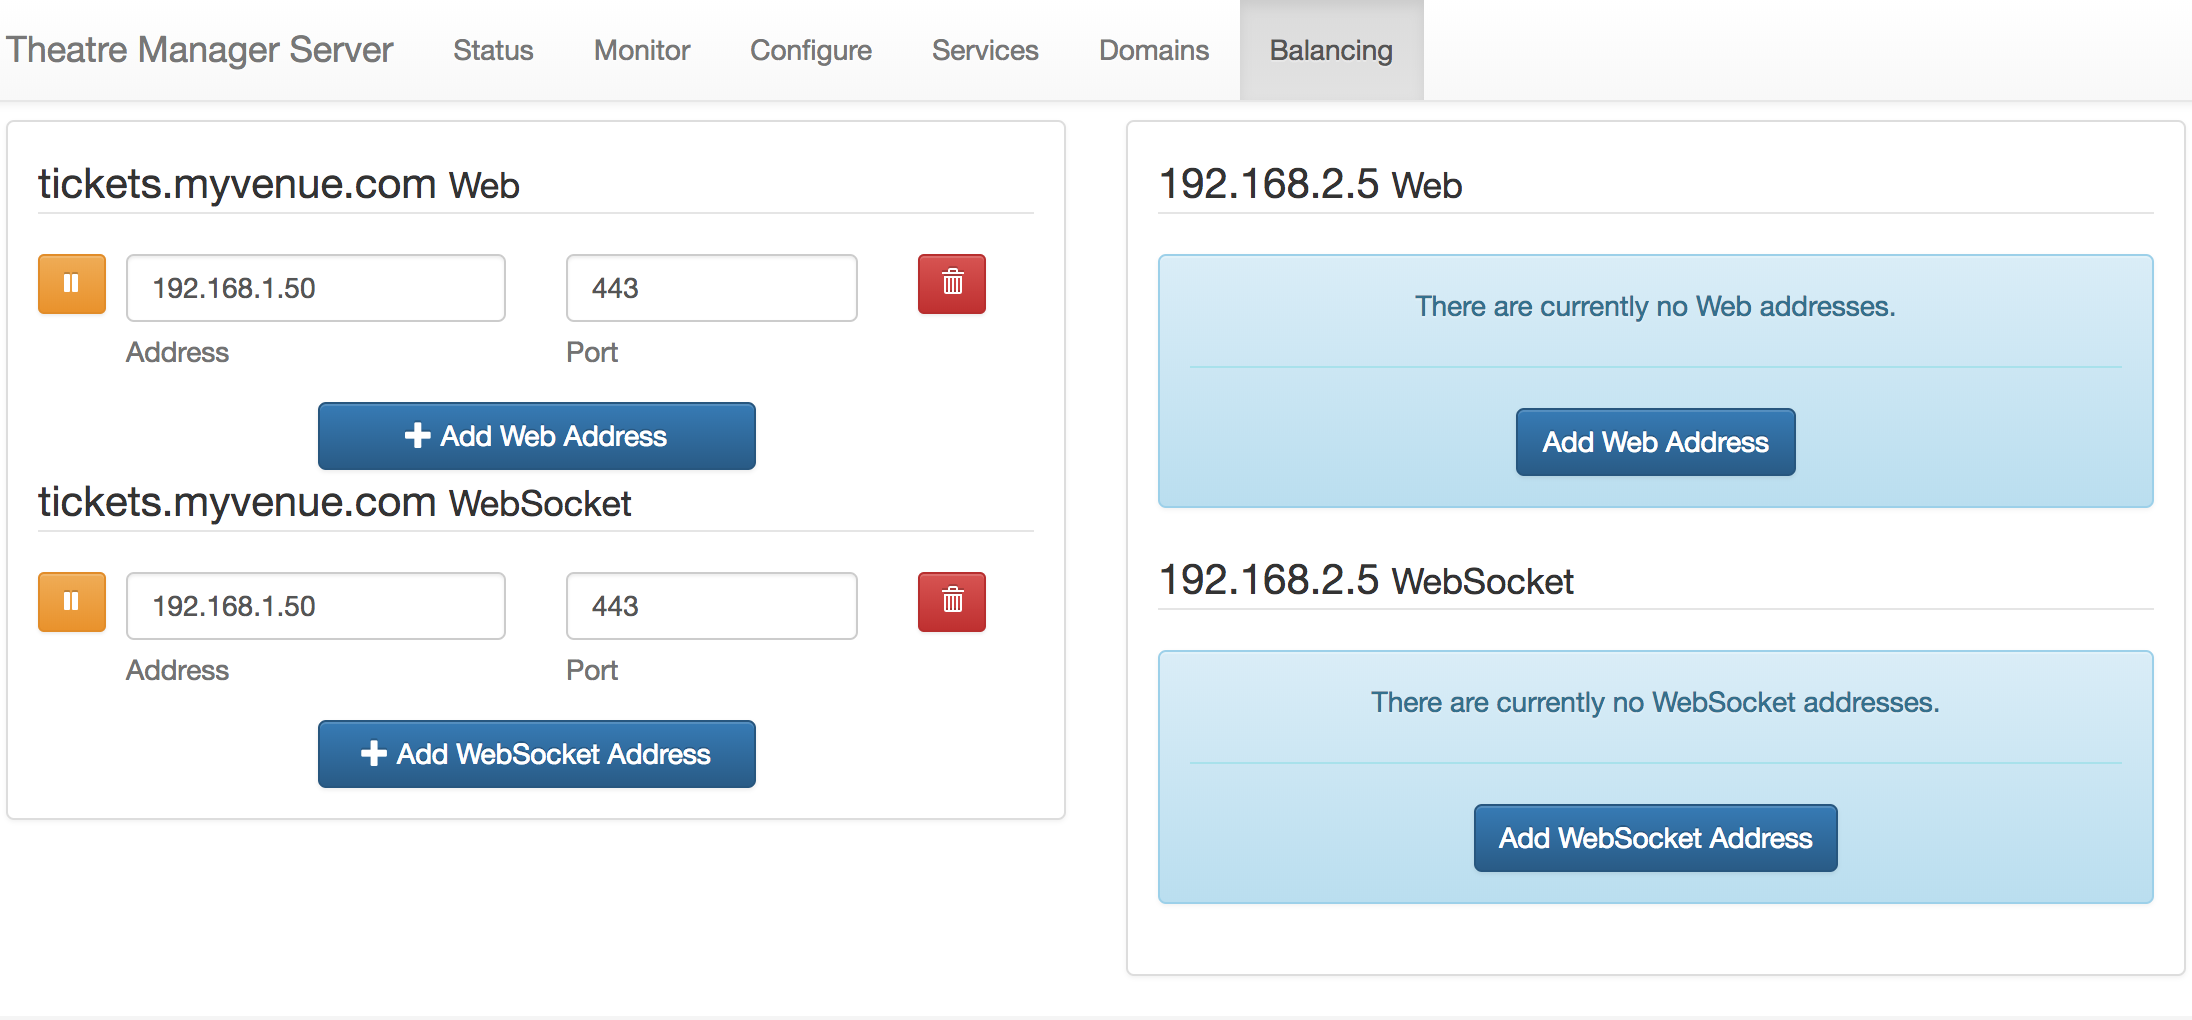
- Click the Add Web Address button under right column.
- Enter the following details:
- Set the Address to be the IP address of the Web Listener.
- Enter 443 in the Port field.
- Click the Save button at the bottom of the right column.
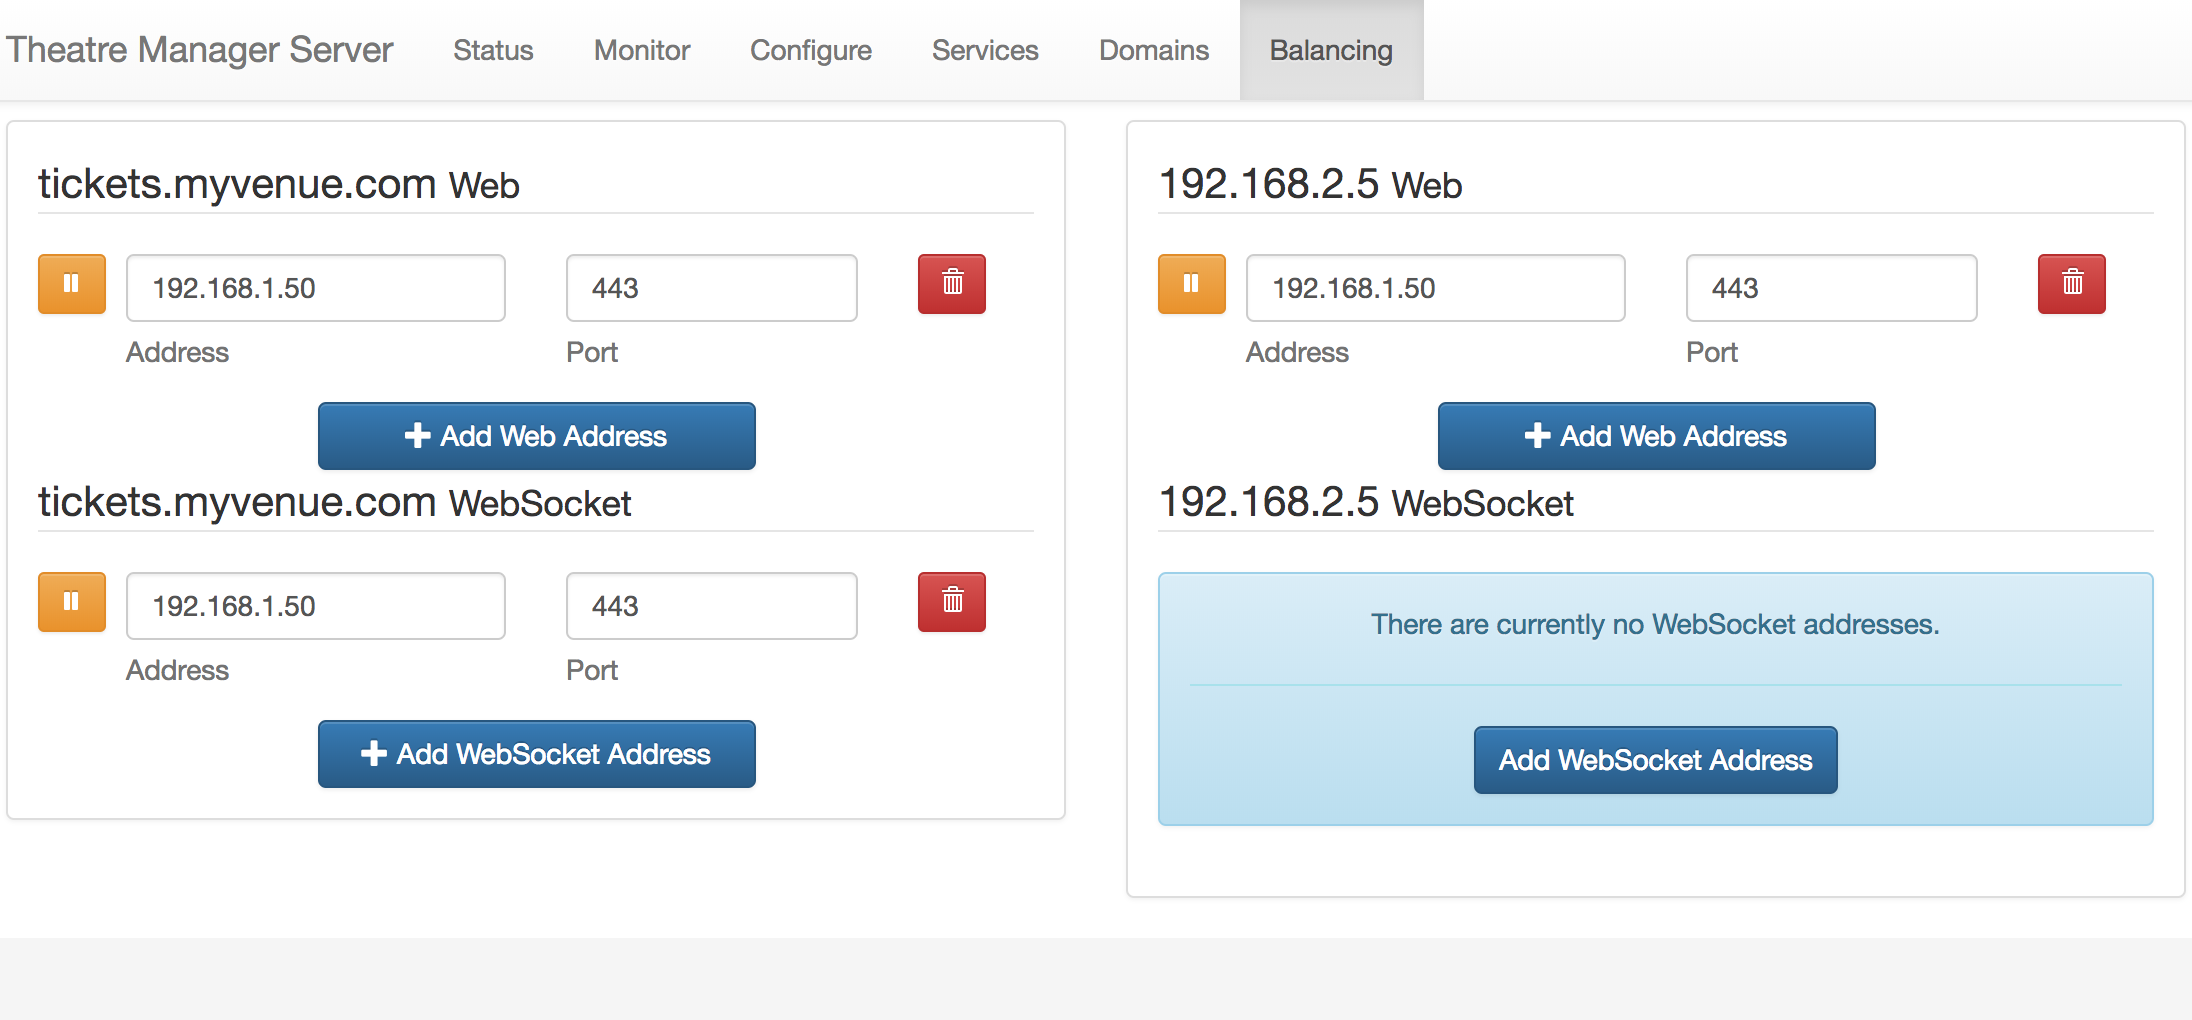
The Theatre Manager Server is now read to scan tickets using a Motorola Scanner.
Wireless Scanner Tips/Troubleshooting
The following list are some things that we've encountered that may help you.
Settings for Performance and Static IP
- Set power performance to maximum
(Jul 2011 O/S) Windows Start -> System Tab -> Power -> Advanced -> Set to "Max Performance"
(Nov 2011 O/S) Windows -> Settings -> System Power -> CPU Power [tab] -> Set to "Max Performance"
- Increase time for auto-shutdown/sleep mode
(Jul 2011 O/S) Windows Start -> System Tab -> ??? -> Advanced -> Either remove sleep mode or set to 10 to 15 minutes
(Nov 2011 O/S) Windows -> Settings -> System Power -> Advanced [tab] -> Turn OFF "Turn off device if not used for" or set to the highest minutes.
- This will stop the scanner from going to sleep and upon waking up, possibly receiving a different IP address.
- It also allows for faster scanning at the door as the usher does not need to wait for the scanner to wake up and re-connect to the wireless router.
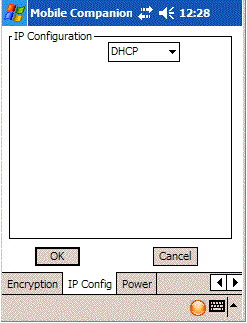
- Set the Scanner to have a fixed IP address
Theatre Manager counts the number of scanners in use by the IP address of the scanner that it is connecting from. If it is a DHCP and if each time the scanner connects to the network, it is given a new IP address, then you may run out of ticket scanner licenses.
You can talk with the IT department personnel responsible for issuing IP addresses to determine a range of suitable numbers to assign to the scanners and set the scanner to a fixed IP. This will make connections to the wireless hub faster and allow Theatre Manager to keep track of the various scanners more effectively.
Finally, if you can connect via internet explorer (located in the applications folder on the scanner) on the wireless device to your web site, you should have all the network infrastructure in place to do ticket scanning. This means only the Theatre Manager scanning program needs set up.
Changing the System password
Theatre Manager's application for the scanners is preset with the System Entry Password and System Exit Password of "123" (without the quotes). You may change this password and set your own System Entry and System Exit Password.
After you have changed the password(s), ensure you provide the updated password(s) to the required people within your organization> Otherwise they will not be able to access the Theatre Manager scanner application setup utilities.
To change the password(s), you perform the following steps:
Using Activesync- Gain access to the scanner via ActiveSync.
Start browsing the files on the scanner. To learn more about ActiveSync, click here.
- The files you are looking for are in the Applications -> AMS folder:
- SystemPassword.txt (it contains 123)
- ExitPassword.txt (it contains 123)
- Edit the contents of either file to the new password.
You can edit the password files directly on the wireless scanner itself.
To change the password(s), you perform the following steps:
- Navigate to Windows -> File Explorer -> Applications -> AMS
The files you are looking for are:
- SystemPassword.txt (it contains 123)
- ExitPassword.txt (it contains 123)
Quick tips on scanner connections
Quick tips on scanner connections
- Make sure Wireless is on (it is off by default)
Windows Start -> Settings -> Connections tab
- Change network from "work" to "internet"
Windows Start -> Settings -> Connections -> WIFI -> change "work" to "internet"
- Turn Wireless mode "on"
Windows Start -> Settings -> Connections -> Wireless Manager -> On
- Uncheck the 801.11d checkbox
This can be accessed from the home screen (or from the AMS setup/wireless/Options screen) by:
- Clicking on the wifi settings
- Clicking on the Fusion button on the bottom menu
- Choosing Options, Regulatory (needs to be set to the country you are in to match your router - usually USA or Canada)
- uncheck the 801.11d checkbox.
Scan displays numbers slowly
Symptoms
The symptoms seem to be that the first number from the ticket will appear on the scanner, then a small delay, then the second number will appear, then a small delay, then the rest of the numbers. In total, it might take the scanner just over a second to register all the numbers, rather than a fluid slow of digits to the screen.
Solution #1
If this occurs, the MC55 needs version 2.0.0.4A or later of scan wedge software installed. Please download and reinstall as per instructions to put the new software in place. Also, please record any settings you have made to set up the scanner as the re-install process clears all data and settings from the scanner.
Solution #2
Recent versions of Windows Mobile also has spell checking turned on. This has a rather detrimental effect on ticket scanning - as it the scanner tries to spell check and predict each ticket number as it is scanned. Please turn this off.
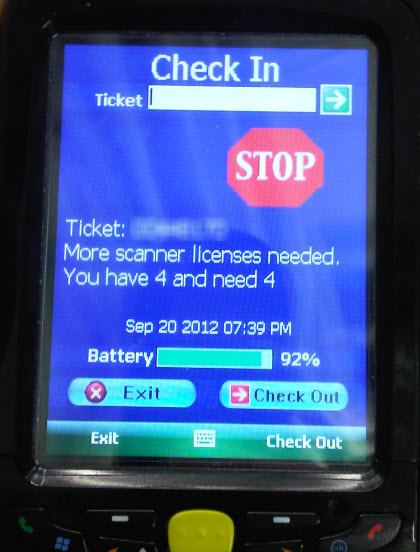
Scanner Count Exceeded and Scanner Speed
Only a couple of your scanners appear to be working. The scanners that are not working show the following:
Scanners should be using a fixed IP address. Click here for more information.
Theatre Manager tracks the scanner count by IP Address. If the scanner change their IP address (which they can do if they do not have a fixed IP address) a single scanner could be counted multiple times and your database knows how many scanners you are licensed for. If an IP address changes, then the database says - and now we have a fifth IP address. So somewhere along the line, Scanner #2 got assigned a new IP address.
Second, Stop/Start all the Web Listeners (so they are all off at the same time). This will reset the IP addresses in the log. When you start the scanners again, the new IPs will be registered and the scanner counts will be refreshed. You can also go the to the Web Listener and click the Clear Cache button.
Do not use a DNS Address, use a Static IP Address.
Further on the scanner, is it looking for tickets.YourTheater.com or is it looking for the direct IP address of the Apache machine (192.xxx.xxx.xxx)? Entering the IP of the Apache machine will speed transmission as the scanner will not have to wait for the DNS to resolve. You change this in the scanner setup, and change the address. Click here for the setup page.
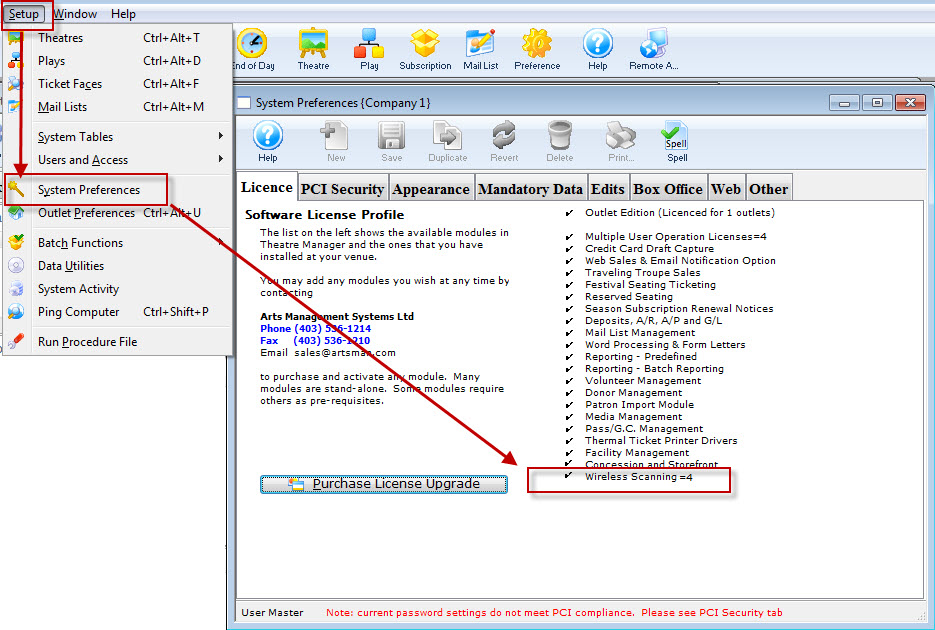
Check the Number of Scanners
To check the number of scanners you can pair to your system, choose Setup >> System Preferences.