Sample Imports
Importing Existing Patron To A Mail List
There are times when a group of patrons from the Theatre Manager database may need to be exported and imported back into Theatre Manager in order to create a new mail list. This might be required:
- to recover and old Mail List that was deleted and needs to be recovered -or-
- when an excel document containing patron numbers is manipulated in some way to further identify patrons (eg donors where their 6 year trend shoes each years donations increased by 10% every year -or-
- a list of people is passed to another department for selection for marketing purposes or to have their content altered in some way
 |
Before using the import features, we suggest making a backup of the database - just in case. |
Prepare the list of patrons
- Clean up data file.
- Open the file in Excel.
- Remove all column except the Patron # column.
- Change the first line in the column from Patron # to MKT_C_SEQ.
- Make the first line in the next column read PM_SHORT_NAME.
- Fill in the PM_SHORT_NAME column with:
- to add to an existing mail list: the exact name of the Mail List from Theatre Manager.
- to create a new mail list: the name of a non-existent mail list in Theatre Manager. Theatre Manager will create that new mail list for you
- Note: patrons cannot exist in a mail list twice, so they will be automatically de-duplicated
- Save the document as a tab-delimited file.
Import Patrons To A Mail List
- Click File >> Import/Export >> Patron >> Mail Lists.
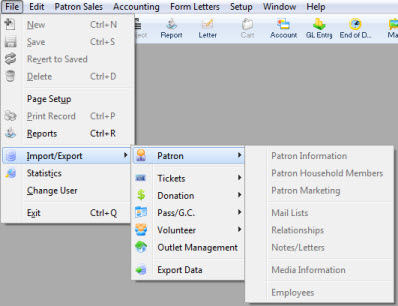
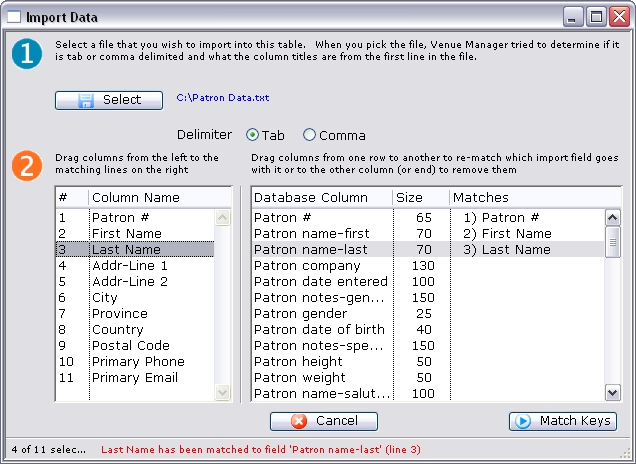
This will open the Import Data window.
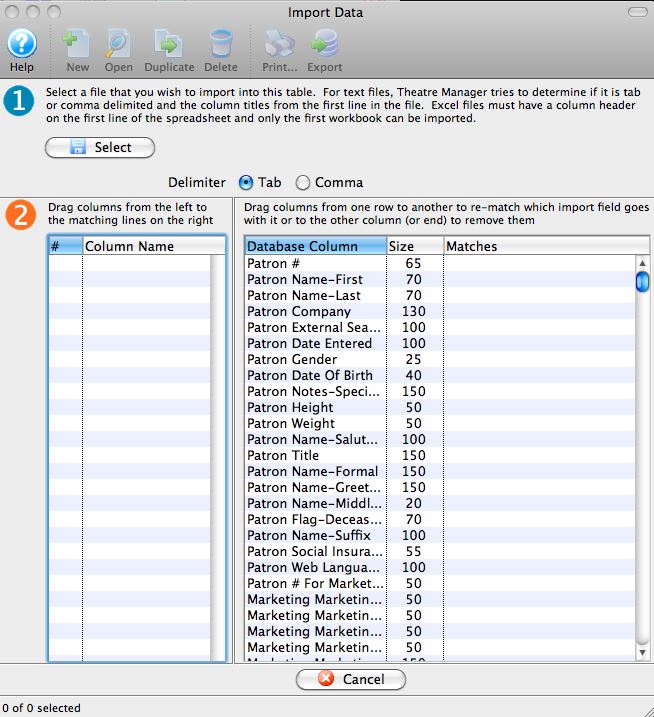
For more information on the Import Data window, click here.
- Set the Delimiter format of the file and use the Select
 button to pick the file that contains the data to be imported.
An Open File dialog for the user's operating system will appear.
Once the file has been selected, the column headers will appear in Step 2 of the window. Scroll through the list to ensure MKT_C_SEQ appears next to Patron # For Marketing Record and PM_SHORT_NAME appears next to Mail List Name. If a column header from the import file does not automatically match, drag the column from the left to the matching line on the right.
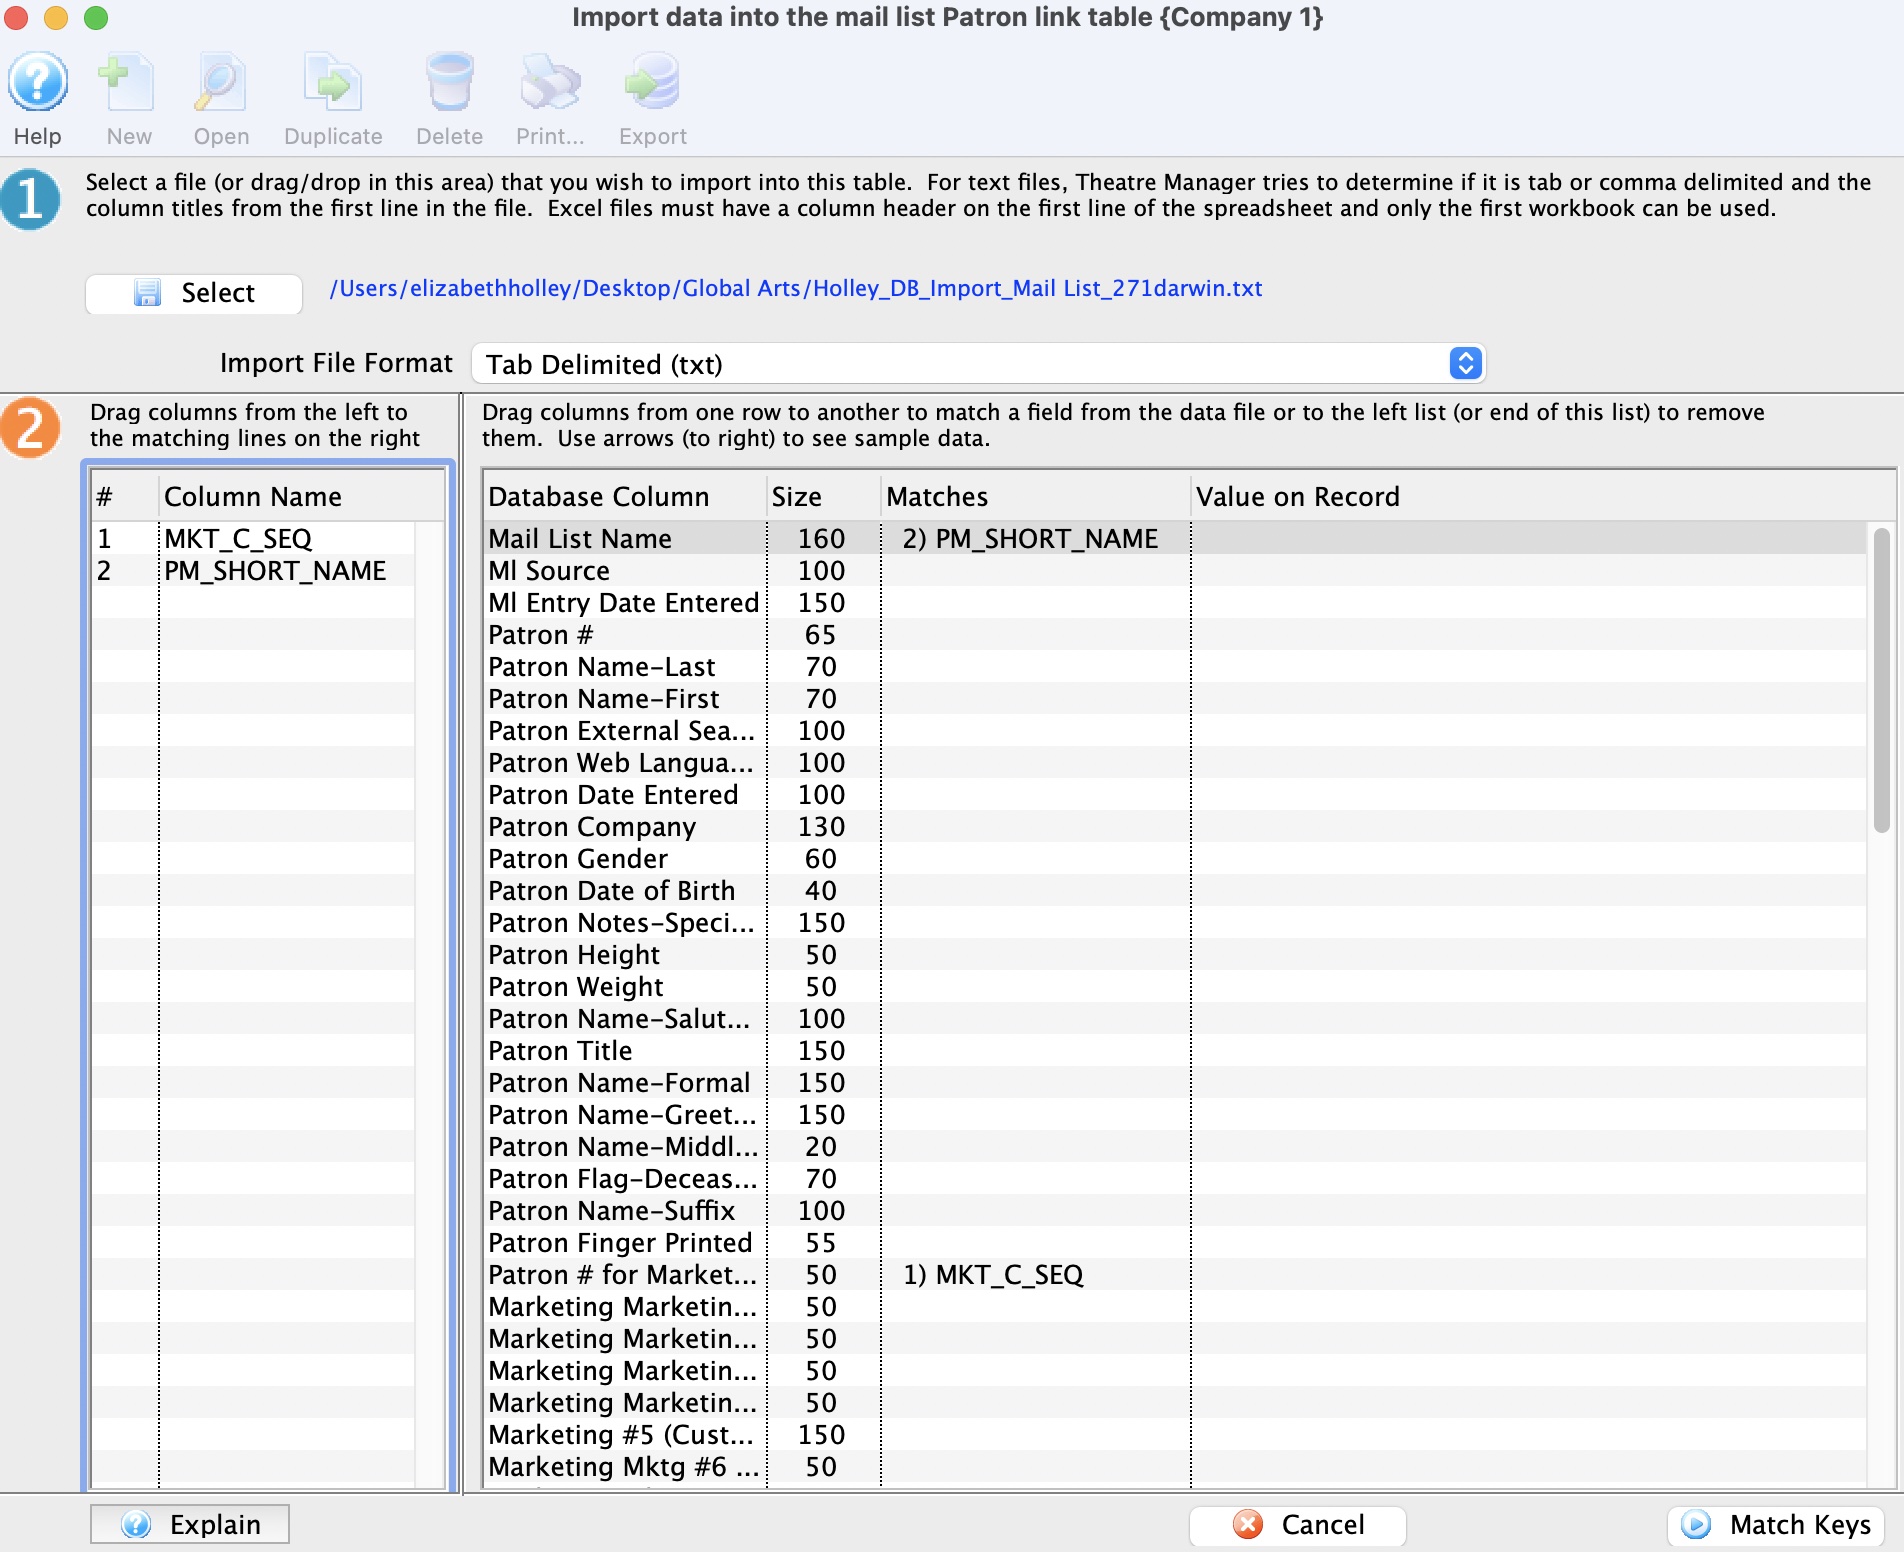
- Once all fields have been matched, click on the Match Keys
 button to move to Step 3.
The MKT_C_SEQ should be listed in Step 3 next to Patron # For Marketing Record. This line should be highlighted by default.
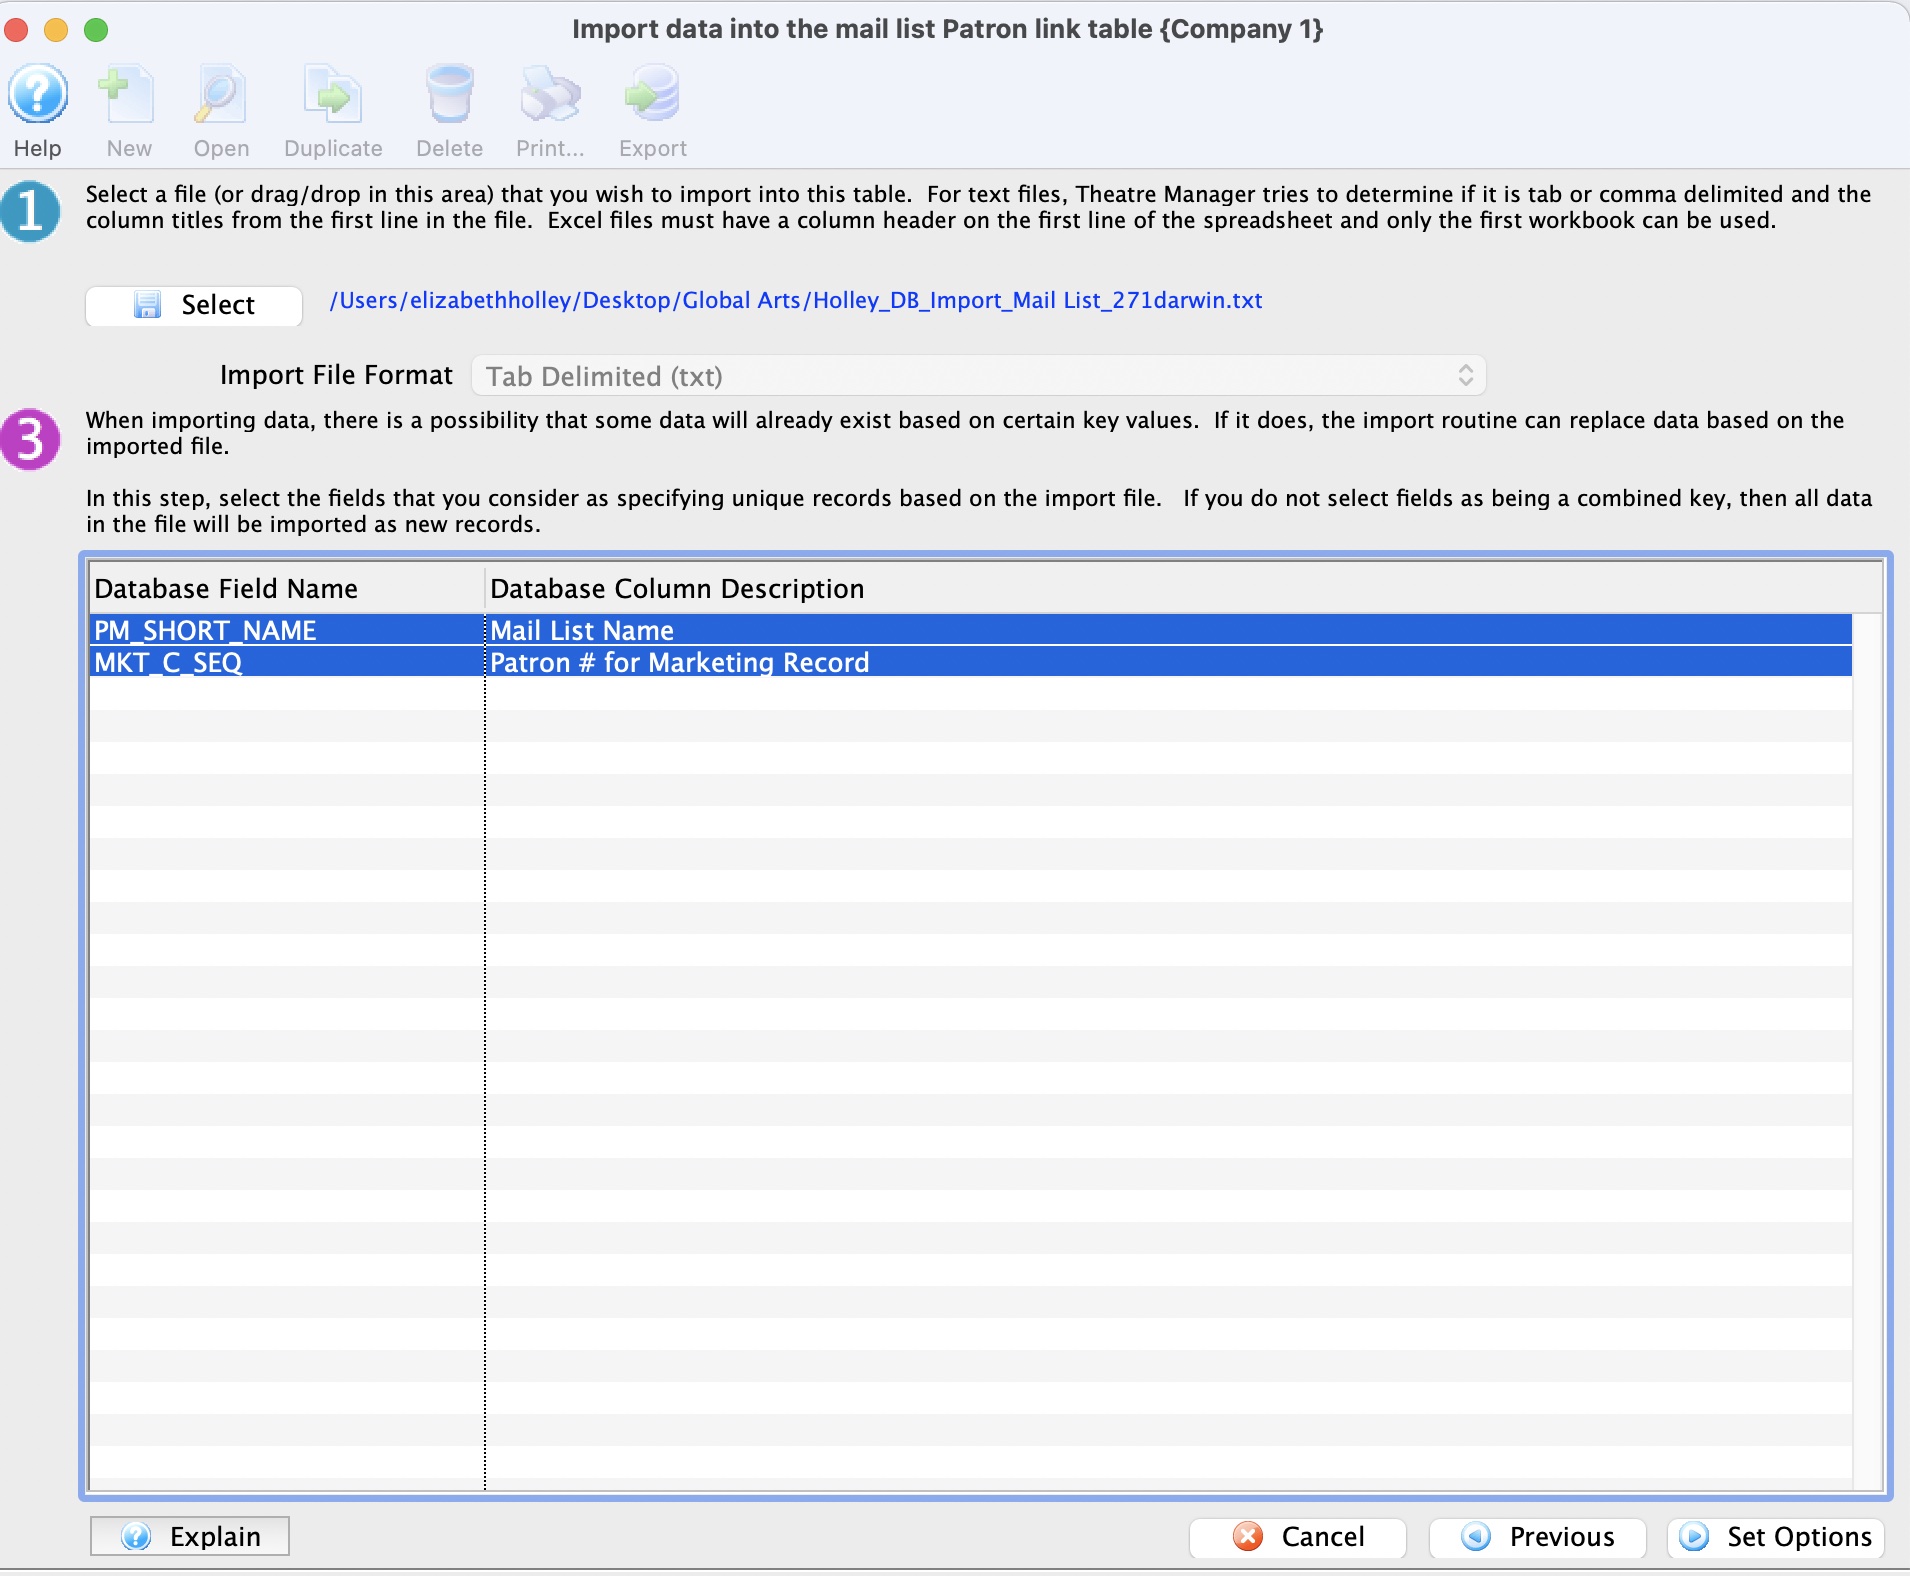
- Click the Set Options
 button to move to Step 4.
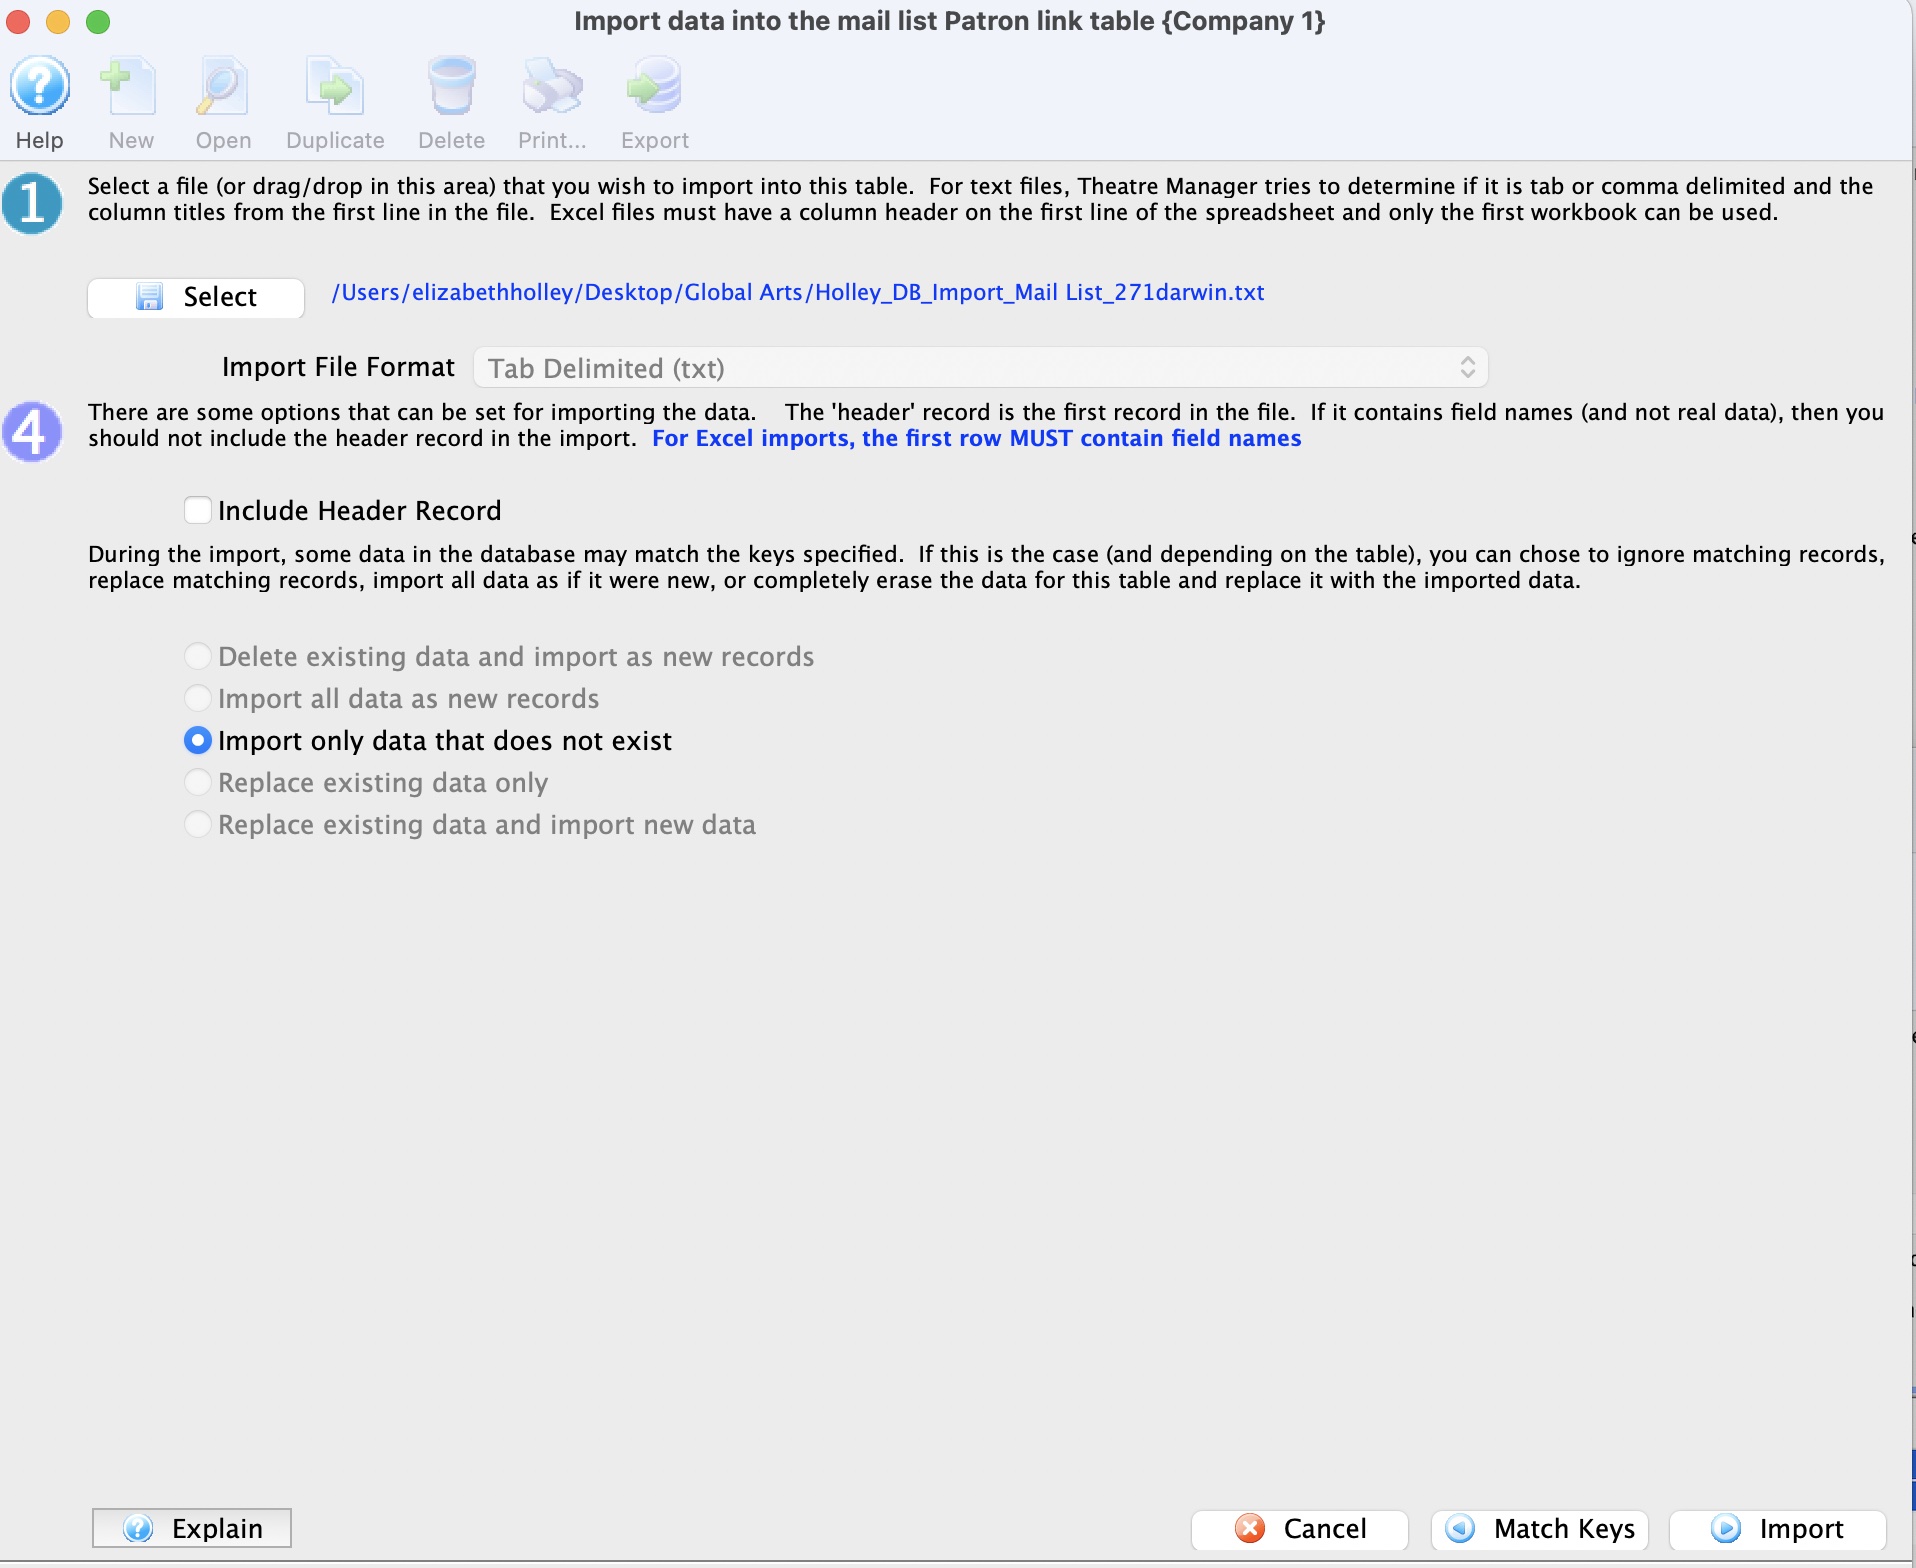
- The bullet in Step 4 defaults to Import only data that does not exist.
- Click the Import button to begin the import process.
A warning message will appear.
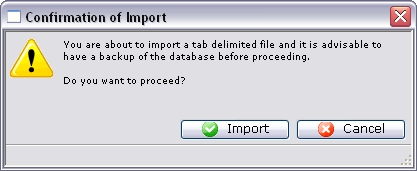
- Click the Import
 button to confirm the importing of data.
At the bottom of the Data Import window, a message will appear to show the import has started.

Depending on how much data is being imported, the import routine can take some time to run.
When the import is complete, a final dialog will appear.
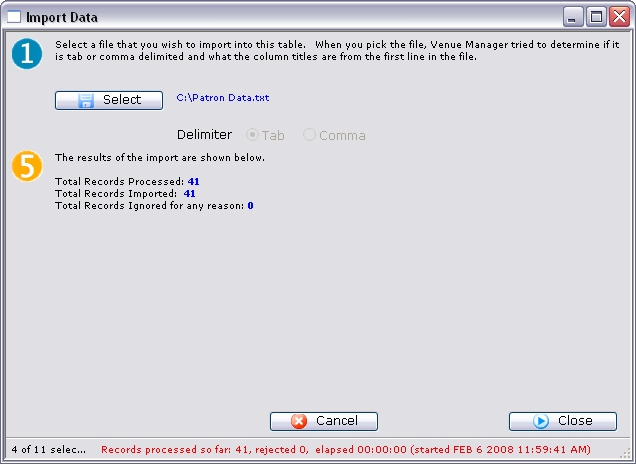
- Review the information on the dialog window, and then click the Close
 button to finish.
The Patrons have now been added to the Mail List. The Mail List can be opened and reviewed for details.
Importing Patron Data
At this time Theatre Manager allows organizations to import patron data only from another program. All other data importing should be handled by the Arts Management staff to ensure the data is properly imported. Before beginning the import process, please click here to read the tips on importing data.
- From the main menu bar, go to File >> Import/Export >> Patron >> Patron.
This will open the Import Data window.
For more information on the Import Data window, click here.
- Set the Delimiter format of the file and use the Select button to pick the file that contains the data to be imported.
An Open File dialog for the user's operating system will appear.
Once the file has been selected, the column headers will appear in Step 2 of the window.
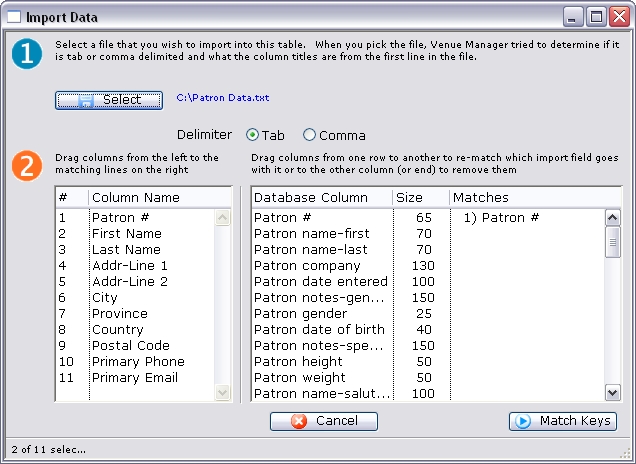
- From the box on the left hand side, match the fields with fields in Theatre Manager.
To match fields, click on a field and drag it to the right hand side to match it.
- Once all fields have been matched, click on the Match Keys button to move to Step 3.
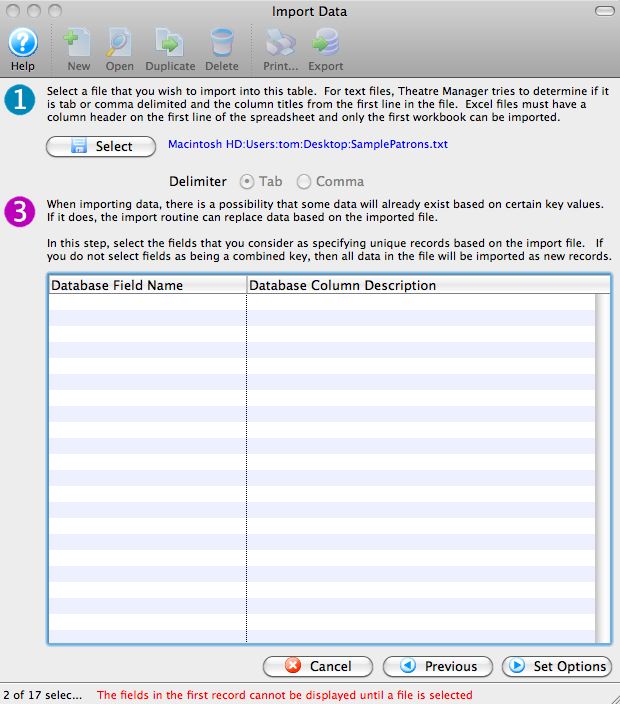
- If the data has any unique keys, they can be established here.
- Click the Set Options button to move to Step 4.
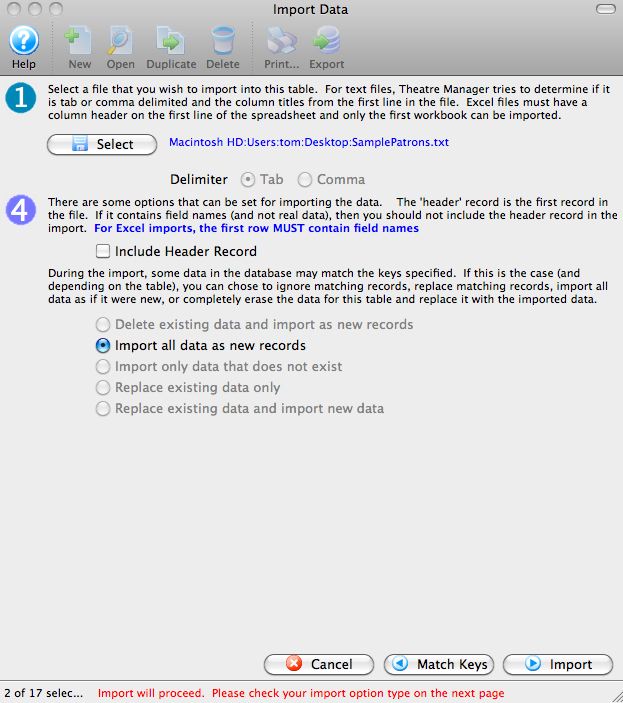
- Set any additional options before beginning the data import.
- Once everything is set, click the Import button to begin the import process.
A warning message will appear.
Ensure that a backup of the database has been done. - Click the Import button to confirm the importing of data.
At the bottom of the Data Import window, a message will appear to show the import has started.
Depending on how much data is being imported, the import routine can take some time to run.
When the import is complete, a final dialog will appear.
- Review the information on the dialog window, and then click the Close button to finish.