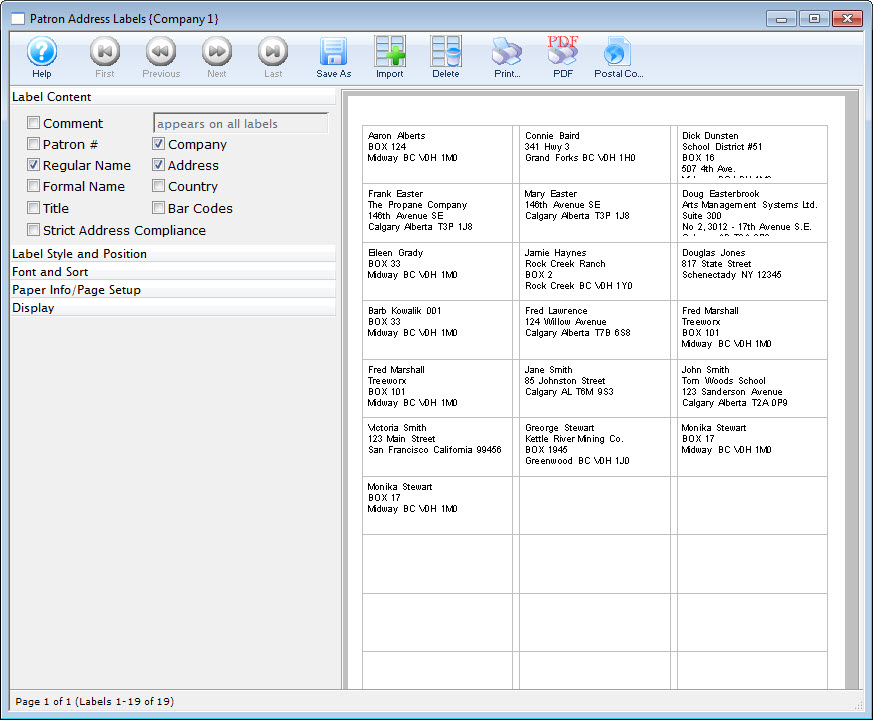
Address Labels
Employees are often called upon to assist with mailings and creating and printing labels. Theatre Manager can create the labels quickly and easily for you.
The default Mail List Criteria window opens.
This section contains information on generating and printing address labels to use with Form Letters in Theatre Manager.
Printing Address Labels while Printing Letters
Once letters have been printed, often mail labels will also need to be printed for the envelopes.
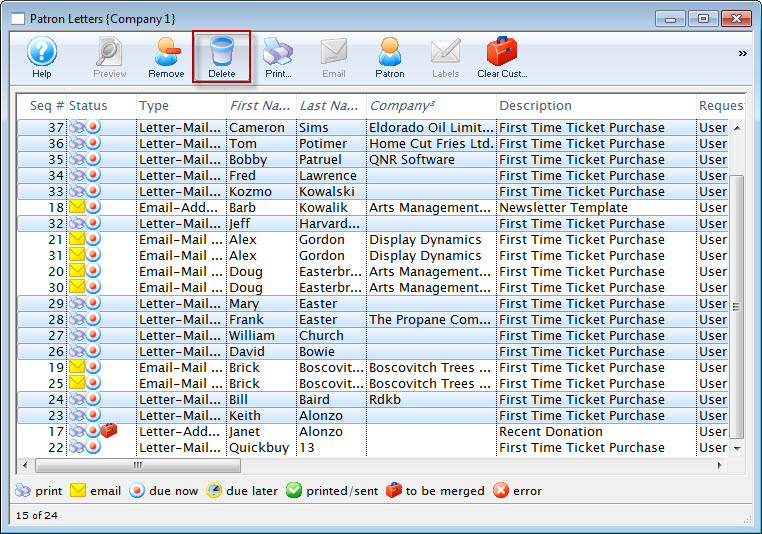
- From the Patron Letters window, click the Labels
 button.
Click here for more information on this window.
- The Patron Address Labels window will open.
- Adjust all settings as necessary.
For more information on this window, click here.
- Click the Print
 button.
The print dialog for the user's operating system will open.
- When printing is completed, the window will close.
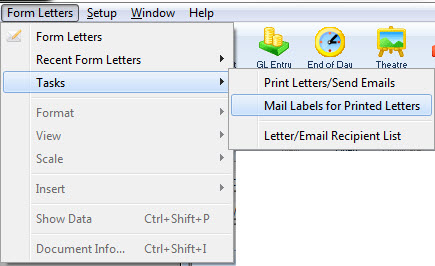
Printing Labels Later
Once letters have been printed, usually mail labels will also need to be printed for the envelopes. If the Patron Letter window has been closed, you can still print address labels for a batch of letters.
- Go to Form Letters >> Tasks >> Mail Labels for Printed Letters.
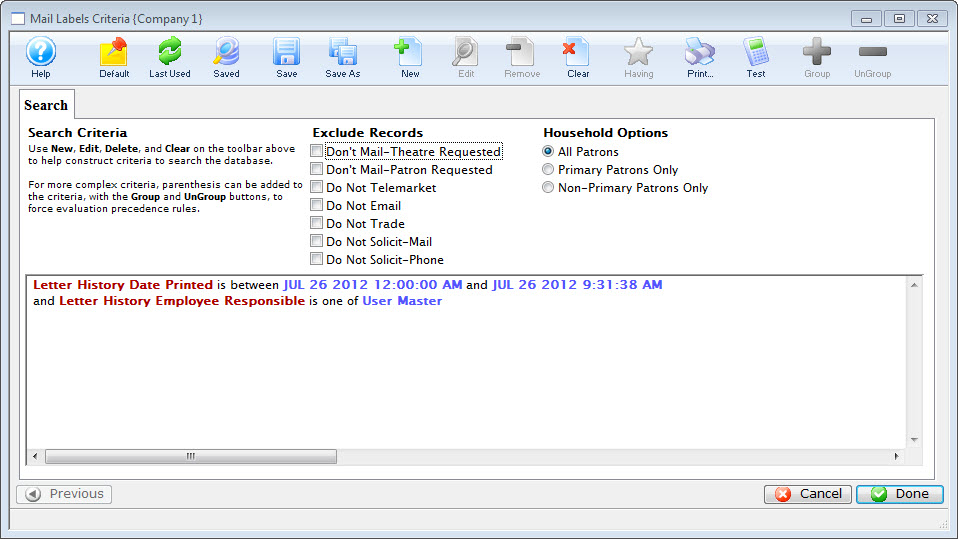
The Mail Labels Criteria window opens.
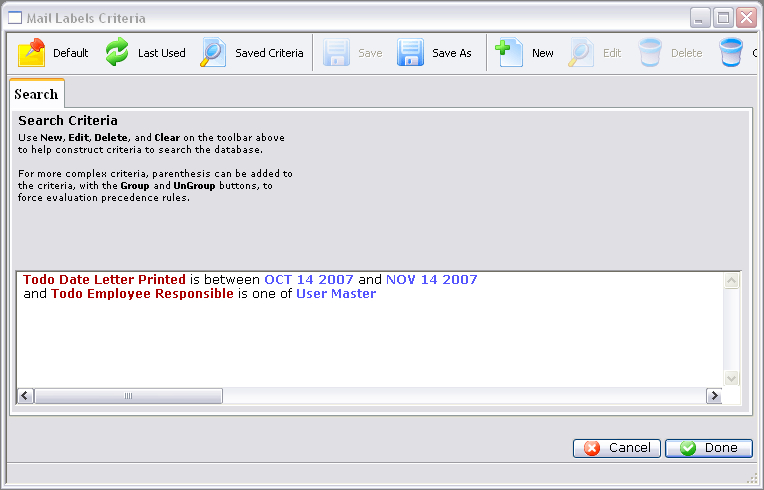
- Adjust the criteria to suit your needs.
To edit a set of criteria, double click on it.
- When complete, click the Done
 button.
The Patron Address Labels window opens.
- Adjust any settings as necessary.
For more information on this window, click here.
- Click the Print button.
The print dialog for the user's operating system opens.
- When printing is completed, the window closes.
Printing Labels for Printed Letters
- From the main Theatre Manager menu, select Form Letters >> Tasks >> Mail Labels for Printed Letters.
The default Mail List Criteria window opens.
- To create labels for a specific date or range of dates, double click on the Letter History Date Printed critera.
The Edit Parameters window opens.
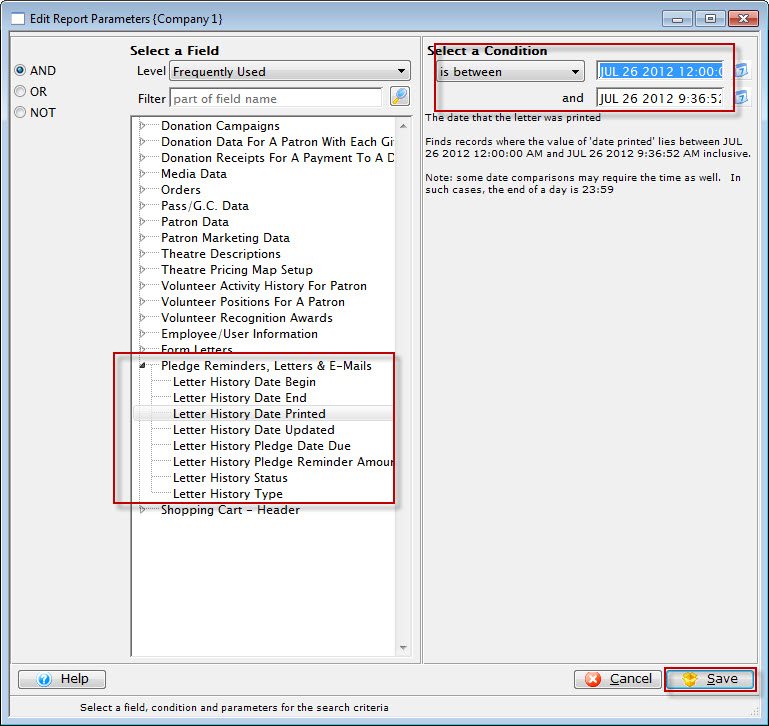
- Make the required changes and click the Save
 button.
You are returned to the Mail Label Criteria window.
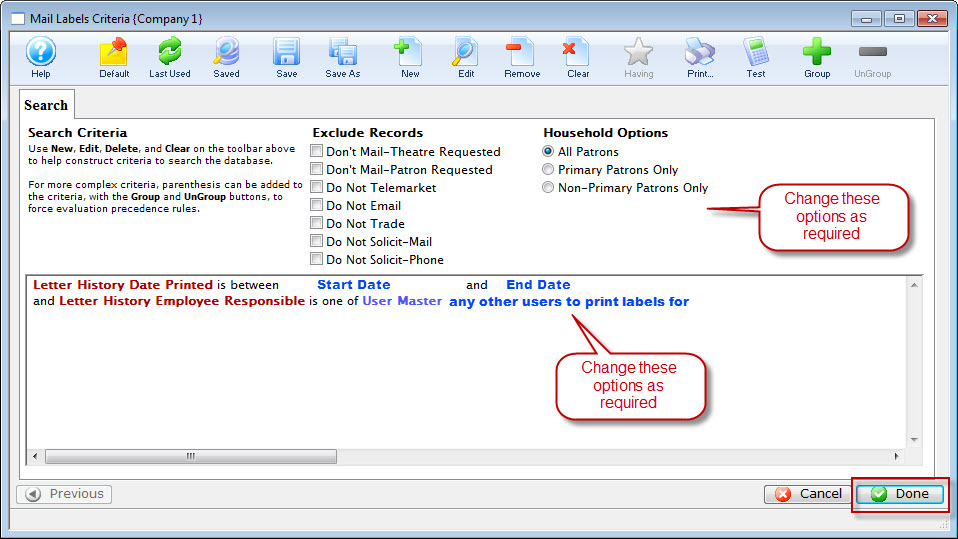
- Make the required changes and click the Done
 button.
The Patron Address Labels window opens. Click here for more information on the Address Labels window.
- Adust the labels, Style, Position, Font, Sort, Page layout as necessary.
- When the labels are as you would like to have them printed, click the Print
 button.
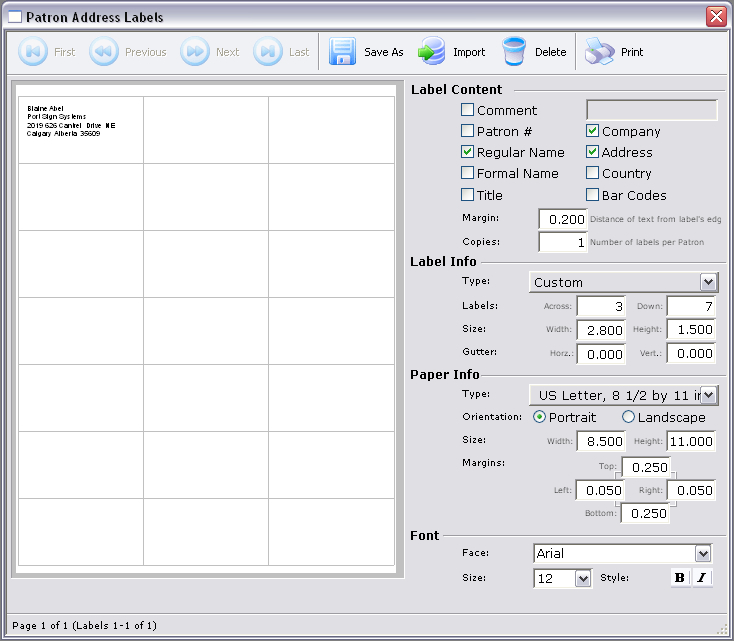
Patron Address Labels Window
Parts of the Patron Address Label Window

 |
Changes the view to the first page of labels. |
 |
Changes the view to the previous page of labels. |
 |
Changes the view to the next page of labels. |
 |
Changes the view to the last page of labels. |
 |
Saves a copy of the current label details under a different name. |
 |
Import a RTF document containing a label template. Normally these are obtained from the Avery Website. Click here for more information on importing an RTF file. |
 |
Deletes the current label details from the list of templates. Click here for more information on deleting templates. |
|
Prints all labels. |
 |
Prints all labels to a PDF file. |
 |
Prints a Postal Code Count report. Click here for more information on the Postal Code Record Count Criteria report |
Label Content Check Boxes
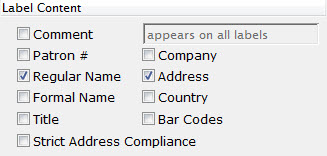
| Comment
|
When this is checked, a comment may be entered into the field on the right to be printed on the labels. |
| Patron # | When this box is checked, the patron number will be added to the label. |
| Regular Name | When this box is checked, the regular name (first name, last name) of the patron will be used. |
| Formal Name | When this box is checked, the formal name (salutation, first name, last name) of the patron will be used. This will override the regular name. |
| Title | When this box is checked, the patron's title will be added to the label - but only if the address type in the location code table is marked to print company/title |
| Company | When this box is checked, the patron's company name will be added to the label - but only if the address type in the location code table is marked to print company/title |
| Address | When this box is checked, the patron's address (address, city, state, zip) will be added to the label. |
| Country | When this box is checked, the patron's country will be added to the label. |
| Bar Codes | When this box is checked, a postal bar code will be added to the label based on the zip or postal code. |
| Strict Address Compliance | Standardized address information enhances the processing and delivery of mail. |

Label Style and Positions
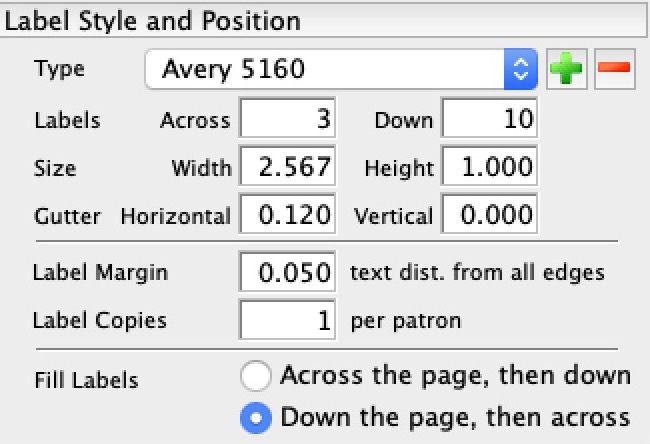
| Type | Drop Down listing of the Label templates. You can add or remove templates using the:
Add Delete |
| Labels | Across - allows you to specify the number of labels to print across the page
Down - allows you to specify the number of labels to print down the page. |
| Size | Width - allows you to specify the width (in inches) of the labels
Height - allows you to specify the height (in inches) of the labels. |
| Gutter | Horizontal - allows you to specify the height (in inches) of the gutter between rows of labels
Vertical - allows you to specify the width (in inches) of the gutter between the coulmns of labels. |
| Label Margin | Allows you to specify the width (in inches) of the margin between the labels and the edge of the page. |
| Label Copies | The number of copies of the label that you would like printed. |
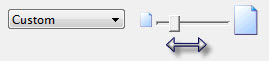
| Fill Labels | 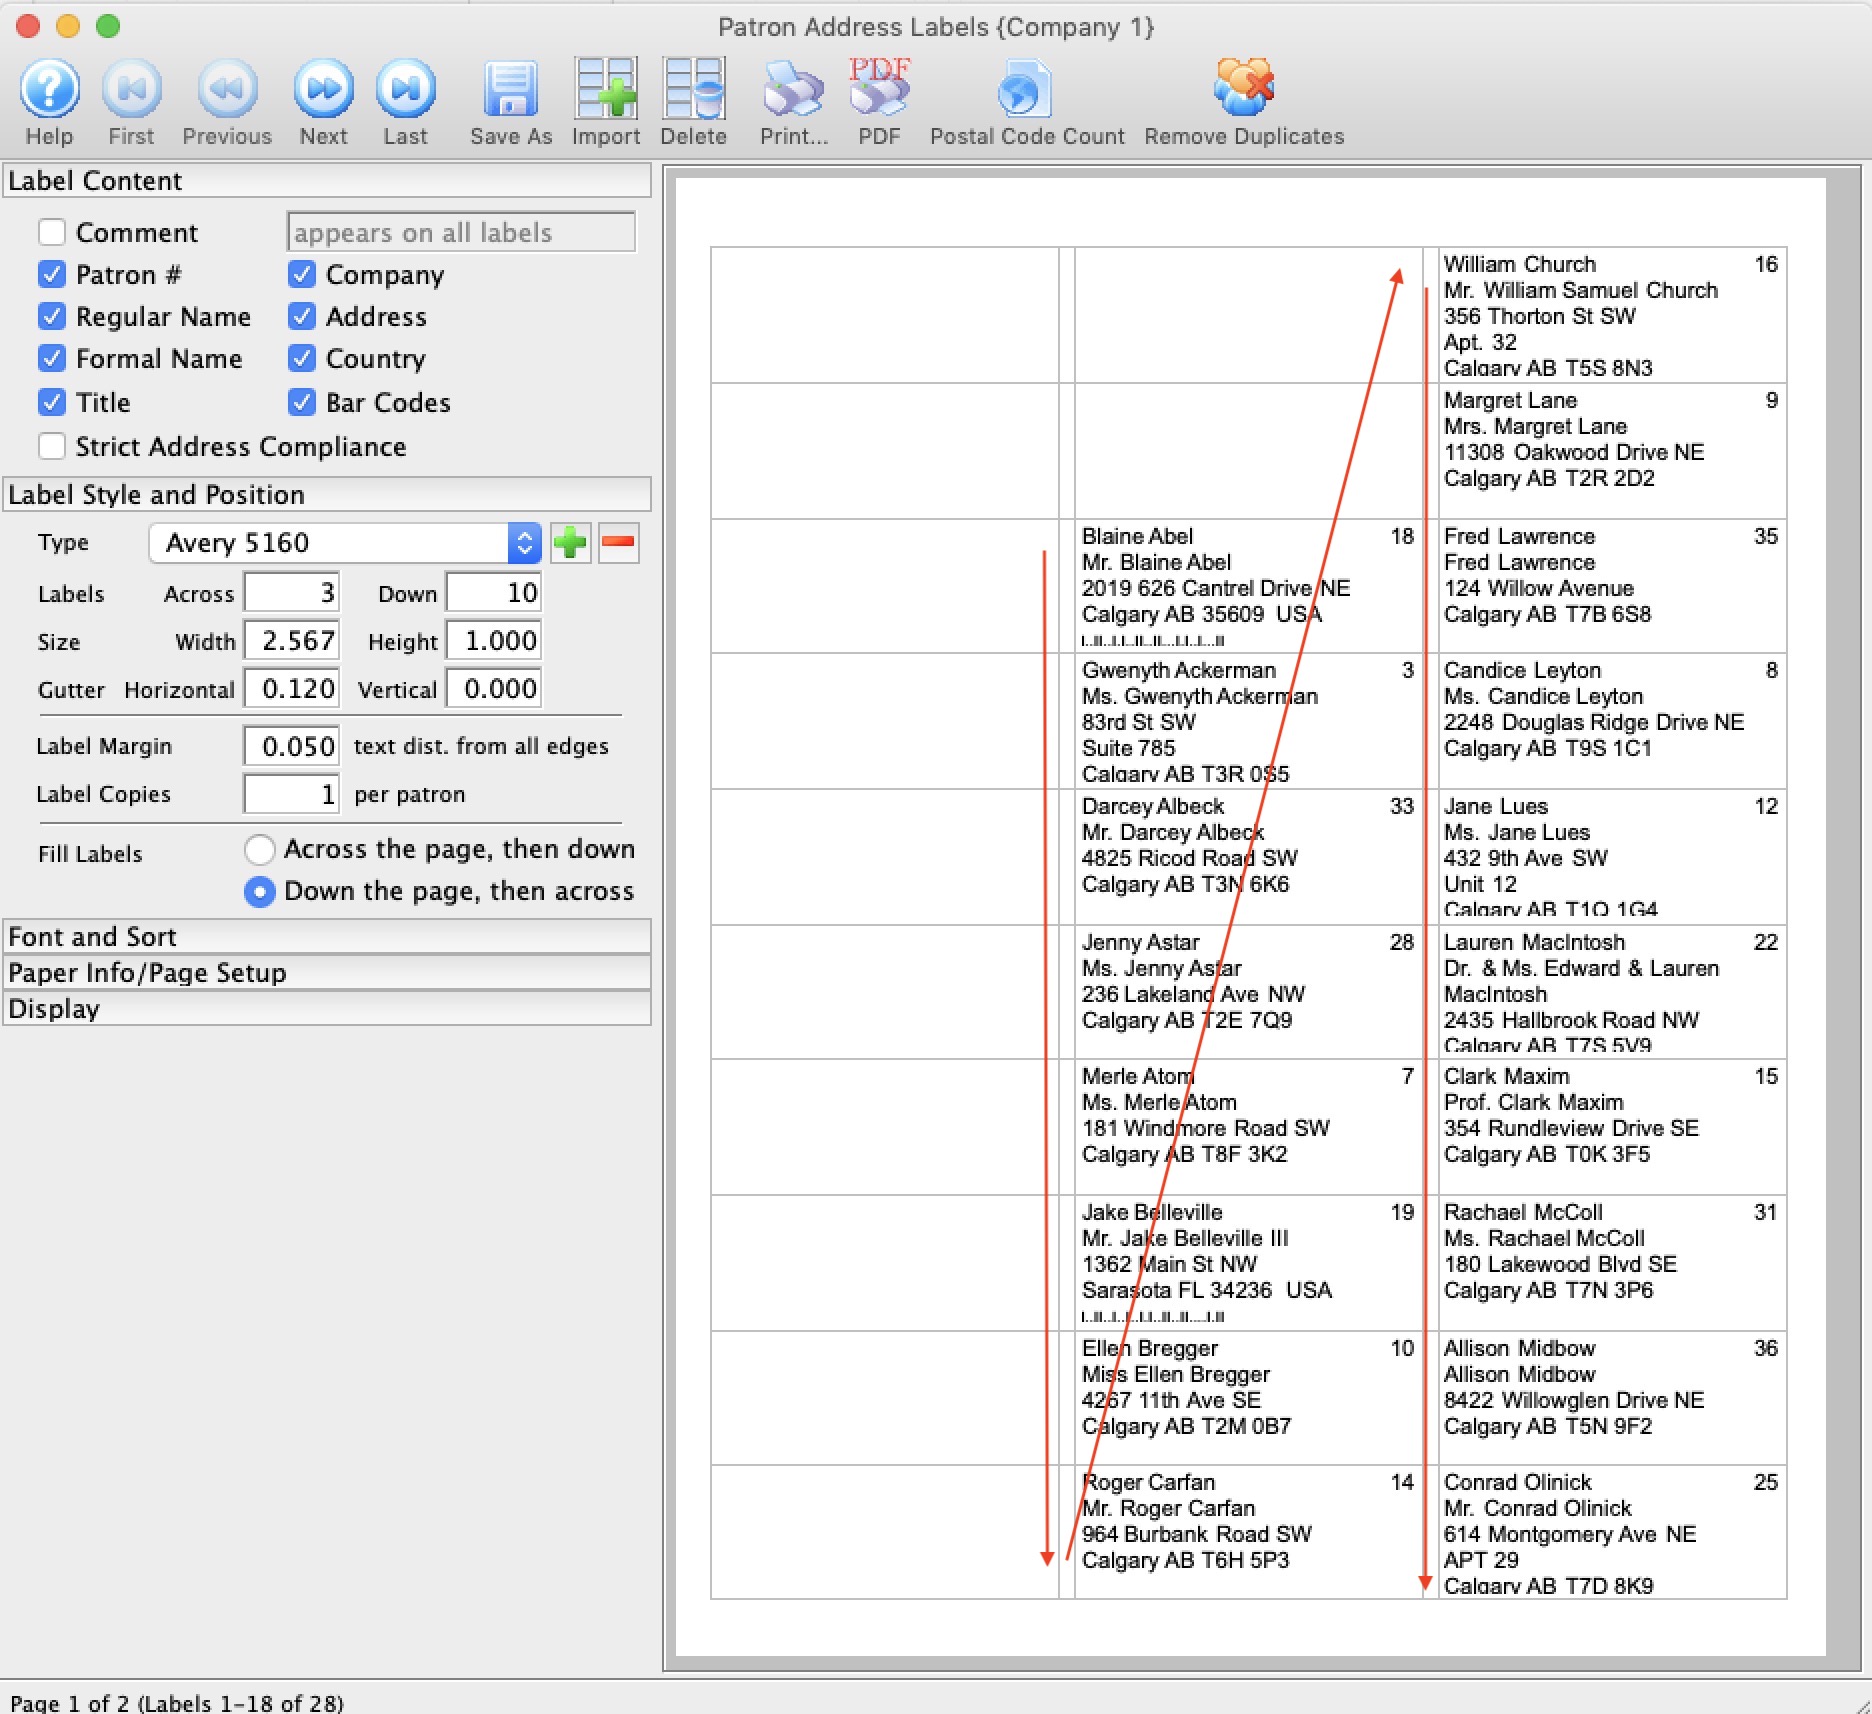 There is a choice to print the labels across the page (the default) or to print them down the page. The image to the right shows them printing down the page (then across) where as the image at the top of the page shows them printing across the page (then down).
Printing down the page may help those who find it easier to work down the label page when transferring them to envelopes. |
 button,
  button,
 Font and Sort
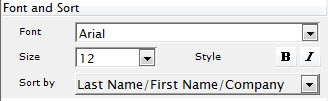
| Font | Drop Down list of the Fonts available on your system. Changes the Font of the lettering on the labels. |
| Size | Changes the size (in points) of the font on the labels. |
| Style | Allows you to bold or italicize the font on the label. This only applies if the font used allows Bolding and Italicizing |
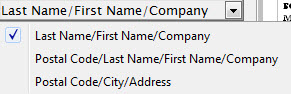
| Sort By
|
Allows you to Sort your labels. Choices are:
Last Name/First Name/Company Postal Code/Last Name/First Name/Company Postal Code/City/Address |
Paper Info/Page Setup
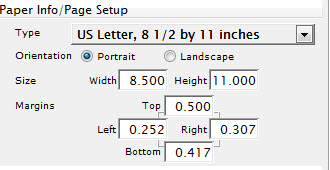
| Type | The drop down menu contains a list of standard paper sizes. It also has a custom option if the paper being used is not found on the list. |
| Orientation | The orientation of the paper is either portrait or landscape. |
| Size | If a default paper size is used, the size will appear here. If a custom paper size is used, then the width and height can be adjusted. |
| Margins | Allows for setting the top, left, right, and bottom margins for the paper size being used. |
Display

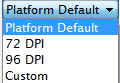 |
Selecting from the drop down list allows you to change the display of the labels so you can better see for editing. |
 |
Allows you to change the display of the labels by movong the box from left to right so you can better see for editing. |
Right Click Context Menu
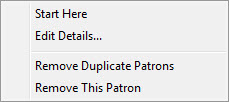
| Start Here | When this option is selected, the labels will adjust to start at the current position. This is used for when a few labels have been used on the page. All labels will adjust from this position. |
| Edit Details | When selected, the details window will open allowing for adjustments to be made to the label. |
| Remove Duplicate Patrons | Sets Theatre Manager to go through the labels and remove any duplicate labels. |
| Remove This Patron | Removes the current label from the page. |
Adding and Importing Label Templates
Theatre Manager comes with a limited number of standard label templates. If you want to add more of your own, a good source is the Avery label template page - get the Microsoft Word version in RTF format.
To add a new template, you perform the following steps:
- Open the Patron Address window.
Click here for more information on how to open the window.
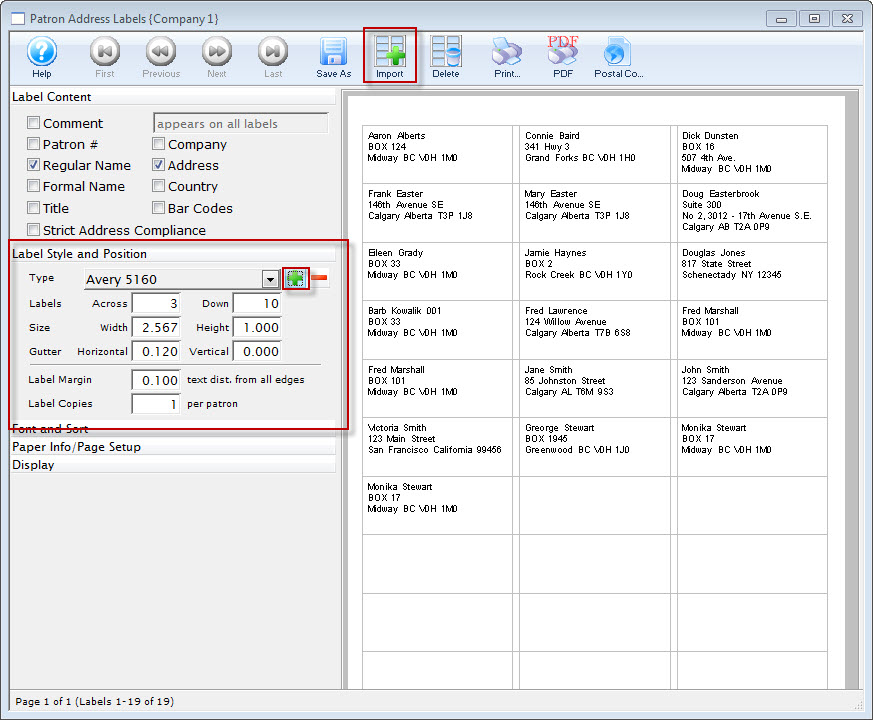
- Expand the Label Style and Postion.
- Click the Plus
 button, alternatively, click the Import Labels button.
The Import Selection dialog opens for your operating system.

- Find the RTF file to import and click Open.
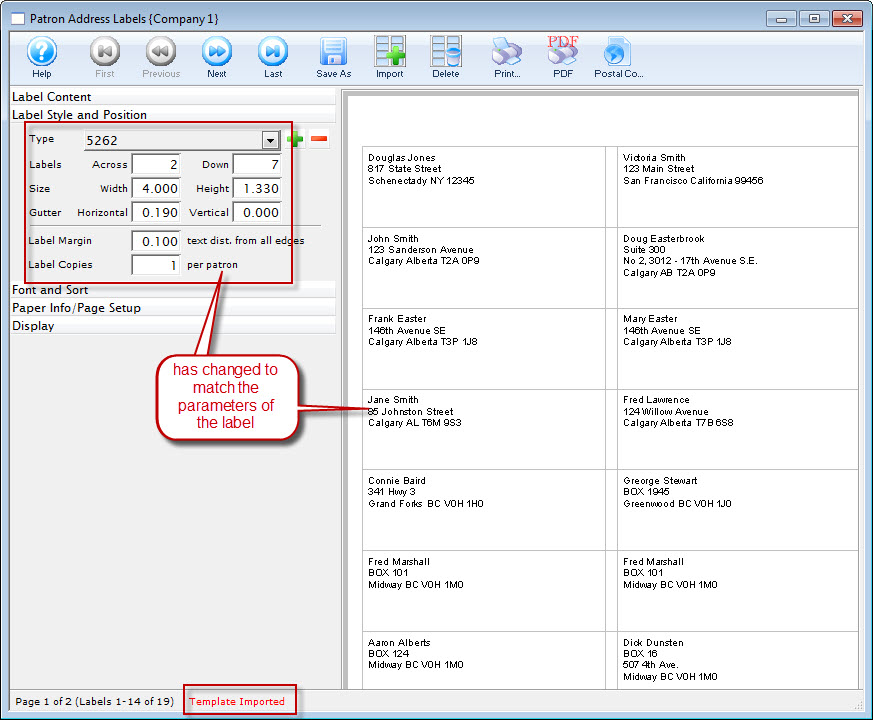
The Address Labels window displays the new format.
Deleting a Template
To remove a lable template, you perform the following steps:
- Open the Patron Address window.
Click here for more information on how to open the window.
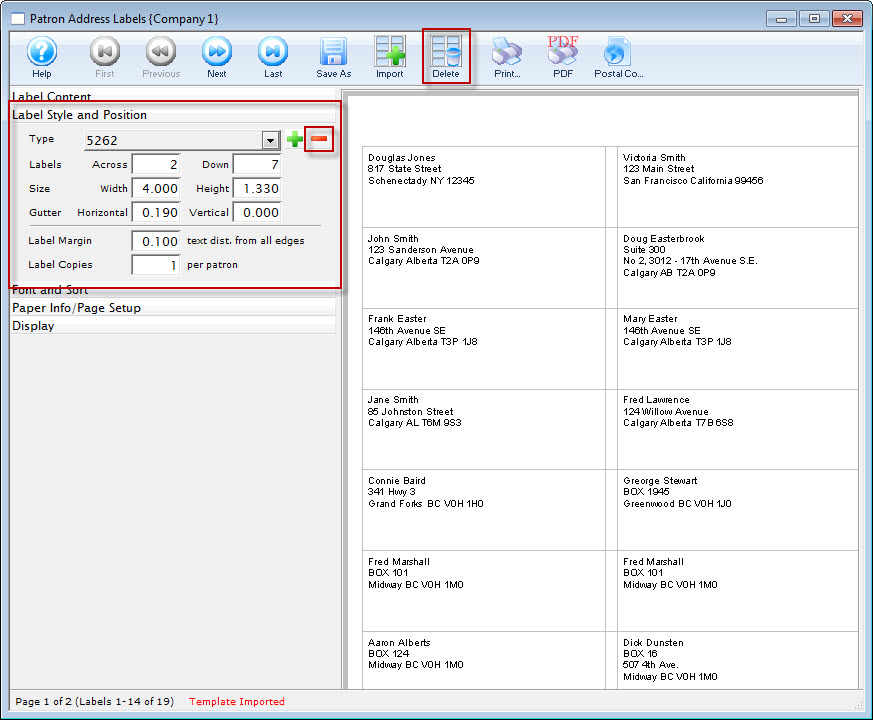
- Expand the Label Style and Postion.
- Click the Minus
 button, alternatively, click the Delete Labels button.
The delete label dialog opens.
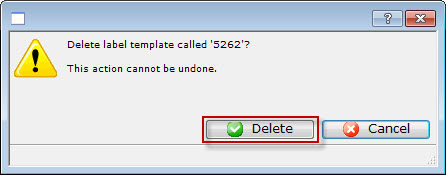
- Click the Delete
 button.
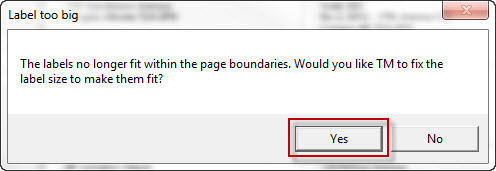
Theatre Manager loads the next template in the list. If the template is a different size, another confirmation opens.
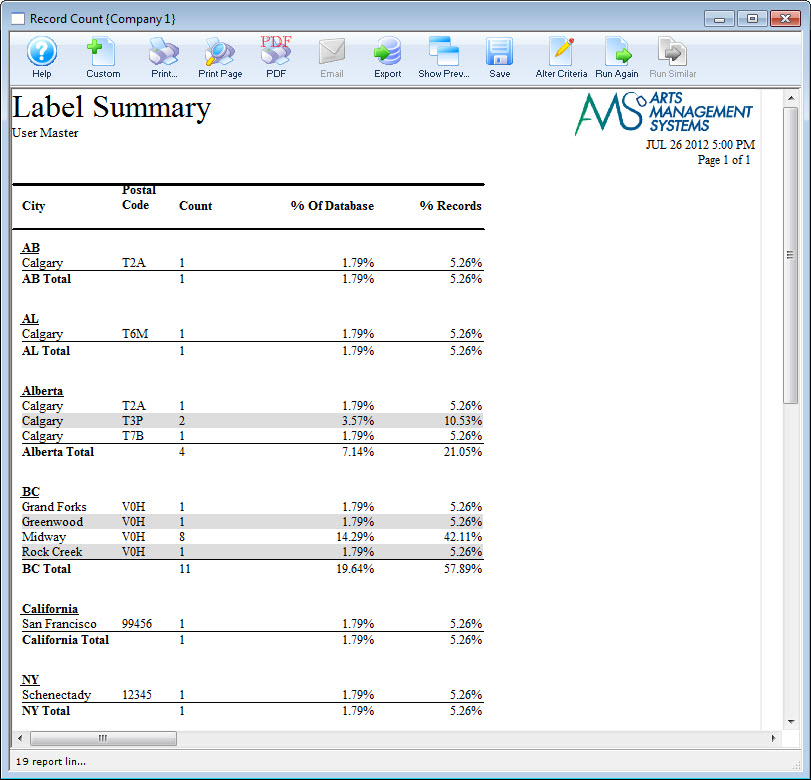
Postal Code Report
To create a report of the Postal Codes of your labels, you perform the following steps:
- Open the Patron Address window.
Click here for more information on how to open the window.
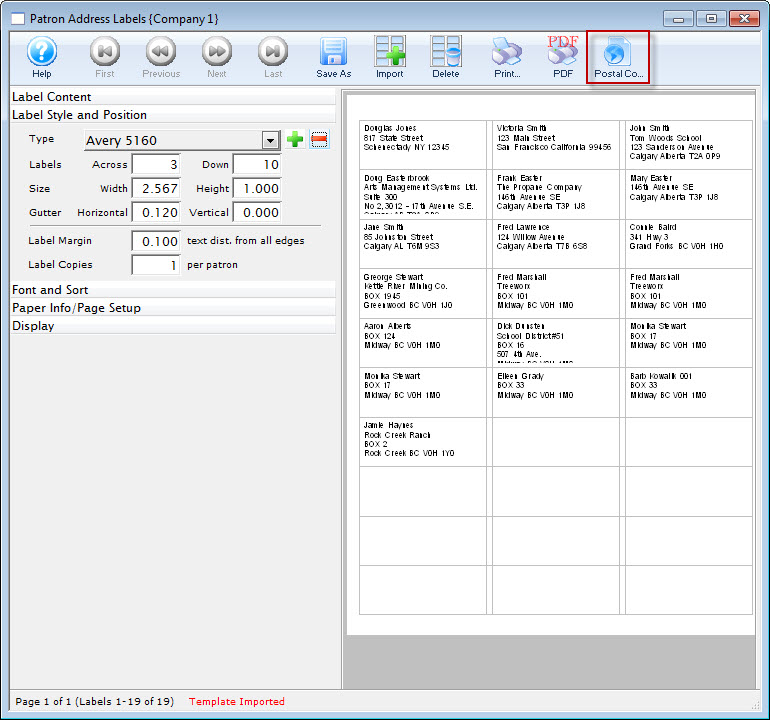
- Click the Postal Code button.
The Record Count Criteria window opens to the Sort & Subtotal Tab.
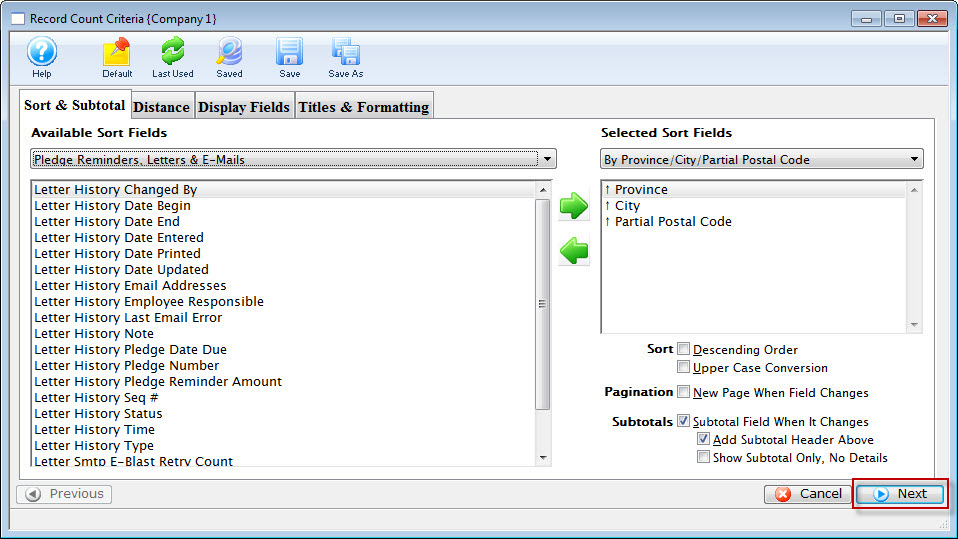
For information on how to change a Sort, click here.
- Review the sort fields, making any afdditions, deletions or changes as necessary.
- Click the Next
 button.
The Distance tab opens.
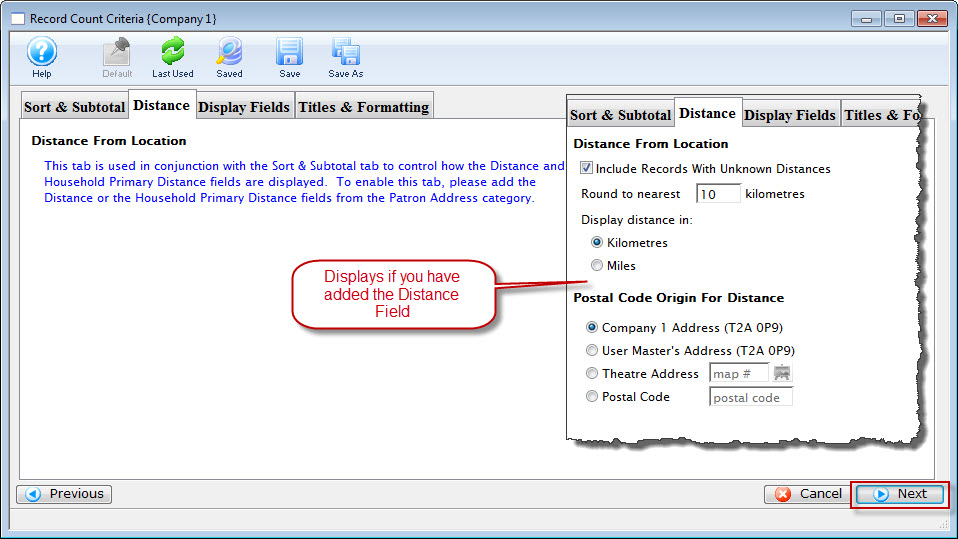
- Review the tab, when complete, click the Next button.
The Display Fields Tab opens.
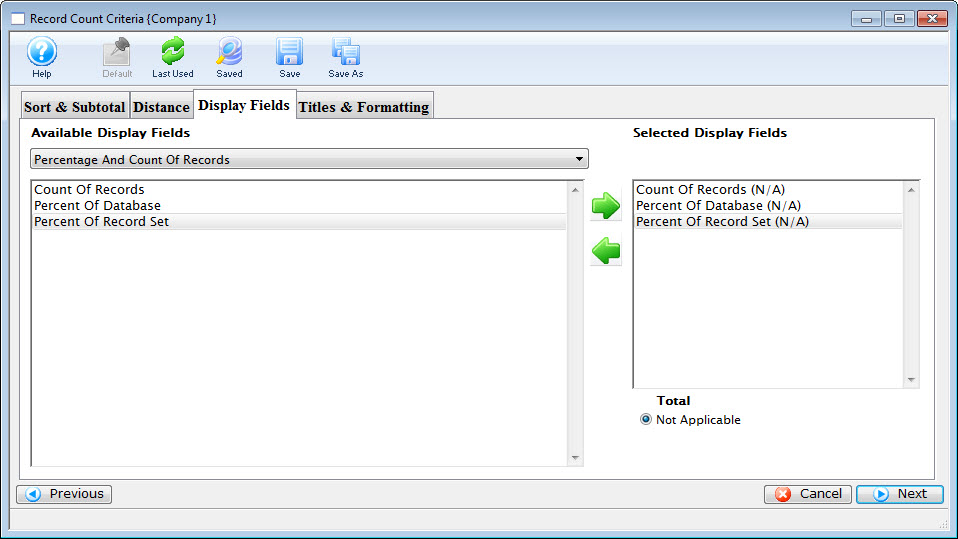
- Review the tab, when complete, click the Next button.
The Titles and Formatting Tab opens.
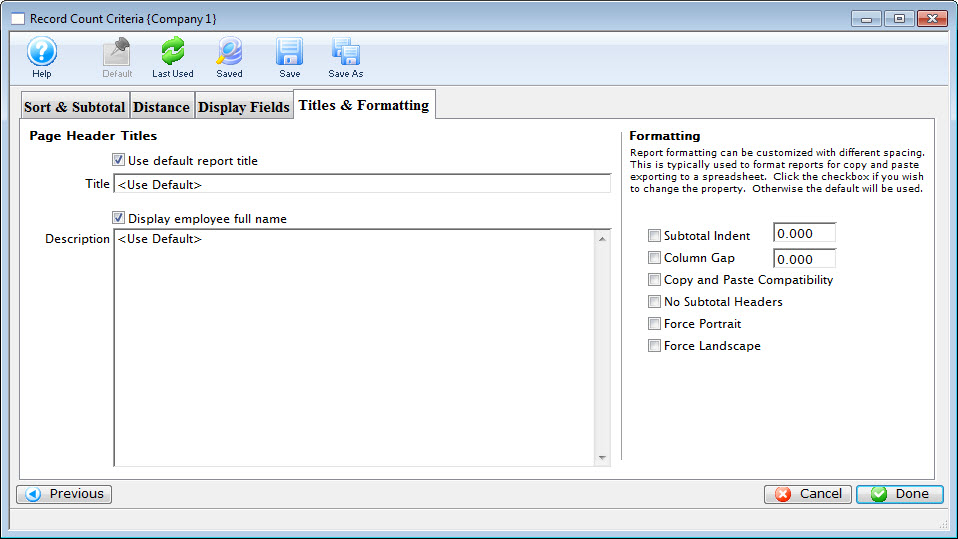
- Review the tab. Click here for more information on this tab.
- When complete, click the Done button.
Your report is displayed.