Billing and Accounting
When you use projects, you can create estimates, orders and bill for the tasks grouped in the project all under one order.
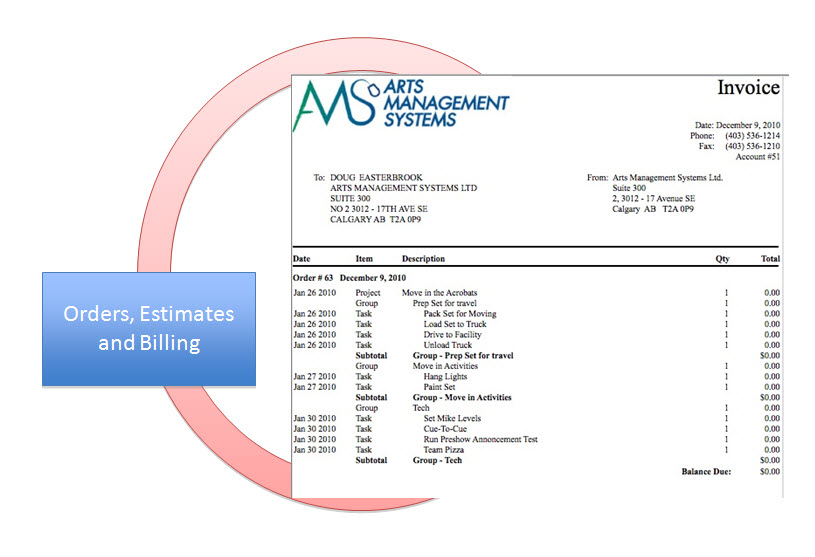
Once you have completed all the tasks, you can invoice the customer at that detailed level or use a higher summary level as part of the invoicing.
As it can take more than one person to complete the tasks to complete the project, plus any additional resources (people and things) add to the price and all can be billed to the customer.
Facility Management allows you to keep track of what the estimate was versus what the final billing cost. Simply:- Task = From this time to that time, somebody is doing x as related to the project.
- Project = The collection of tasks, as they relate to each other.
- Billing = When you ask for the $$ for doing all the tasks in the project.
Billing in a Project

There are 3 billing types you can select. These are:
- Estimate (default) - Estimated amounts will be used and printed while billing is set to estimate. The project itself can have an estimate, or if you enter estimates on the individual tasks, those estimates are used instead.
- Invoice - the project will begin creating transactions that will appear in end of day for posting to the G/L.
- Cancelled - If "Cancelled" is selected, all existing transactions are reversed and running end of day will cause reversing G/L entries to be created.
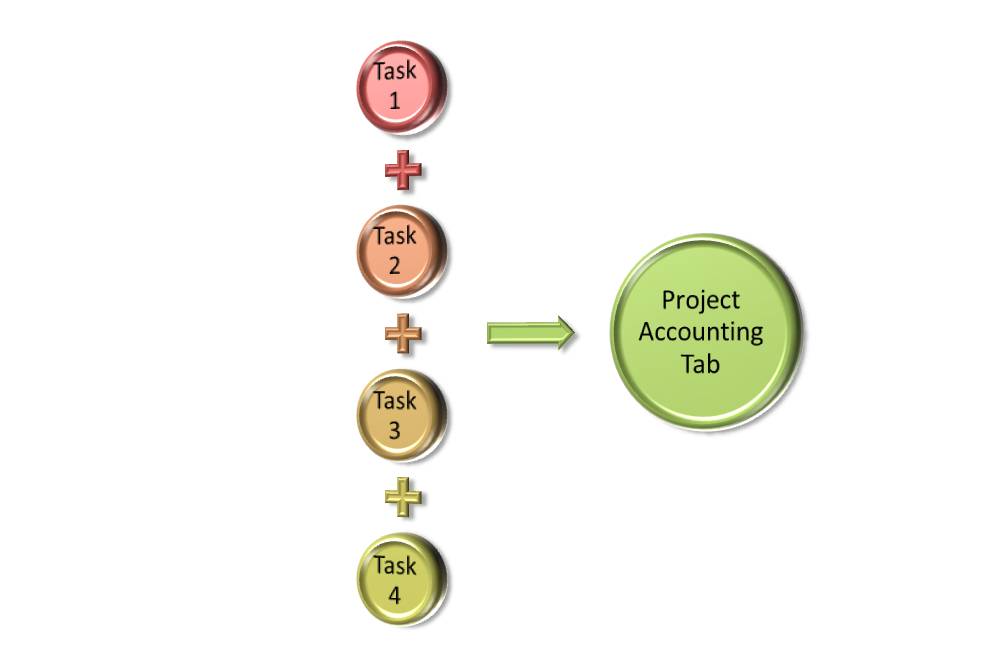
On the Project Detail Accounting tab, the Actuals and Costs areas are calculated based on the tasks associated with the project and the resources and volunteers associated with each task. The project window just shows the roll-up of all the individual task windows.
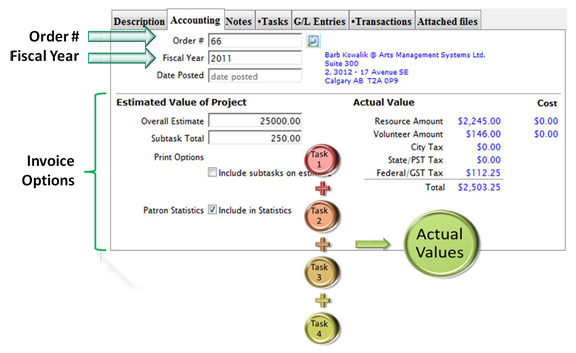
Changing the Project Billing Type
When Invoice is selected, the project is set up end-of-day processing to create transactions. You can choose Invoice from the drop down list when you add a new project, or you can choose Invoice after a project has been setup. Some rules are:
- An order number is required for billing.
- Printing an invoice estimate will cause an order to be created.
- You can associate the project to an existing order (an order can have multiple projects).
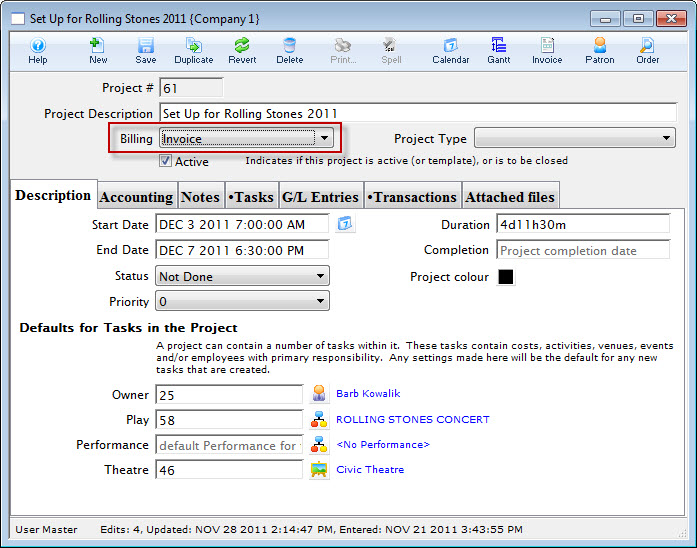
To start, you perform the following steps:
- the project window, click the Billing drop down list and choose Invoice.
The Change Order dialog opens.
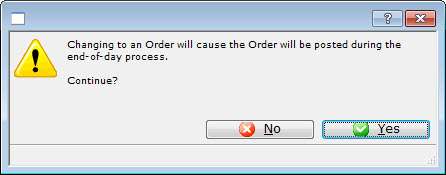
- Click the Yes
 button.
The Select Patron For This Order dialog opens.
- Search for the patron you want to attach to this project.
- Enter enough of the patron first name, last name, and or company to see a list of patrons
- Double click on the one you want. If you want a different one, double click on that
- Once you have the patron you want at the top, click 'Create Order'
- This will assign the patron and order to the project
- Once you have selected the Patron, click the Create Order
 button.
The Order is created and you are returned to the Project window.
Click the Accounting tab.
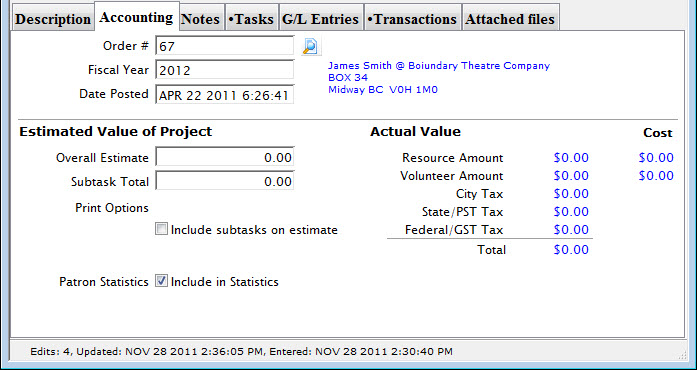
Once the tasks have been entered, the Volunteers, Personnel and Resources assigned, the amounts entered per hour for volunteers, personnel and resources will be displayed on the Accounting tab.
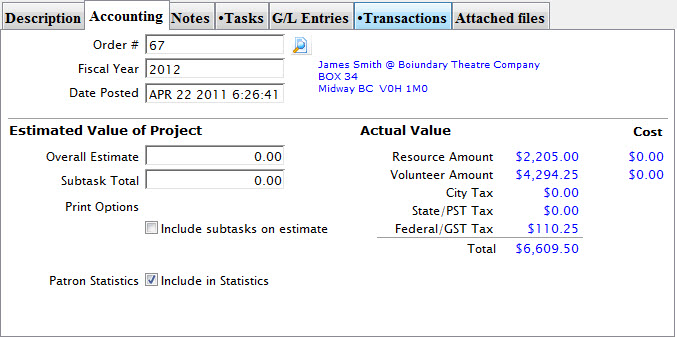
The Actuals and Costs are calculated based on the tasks associated with the project and all the resources and volunteers assocuated with each task. This tab displays the roll up of the tasks.
Paying an Invoice
Facility Management uses the familiar Theatre Management Order and Payment Management windows for taking an invoice payment. To pay for an invoice, you perform the following steps:
- Click the Order
 button in the Project window ribbon bar / toolbar.
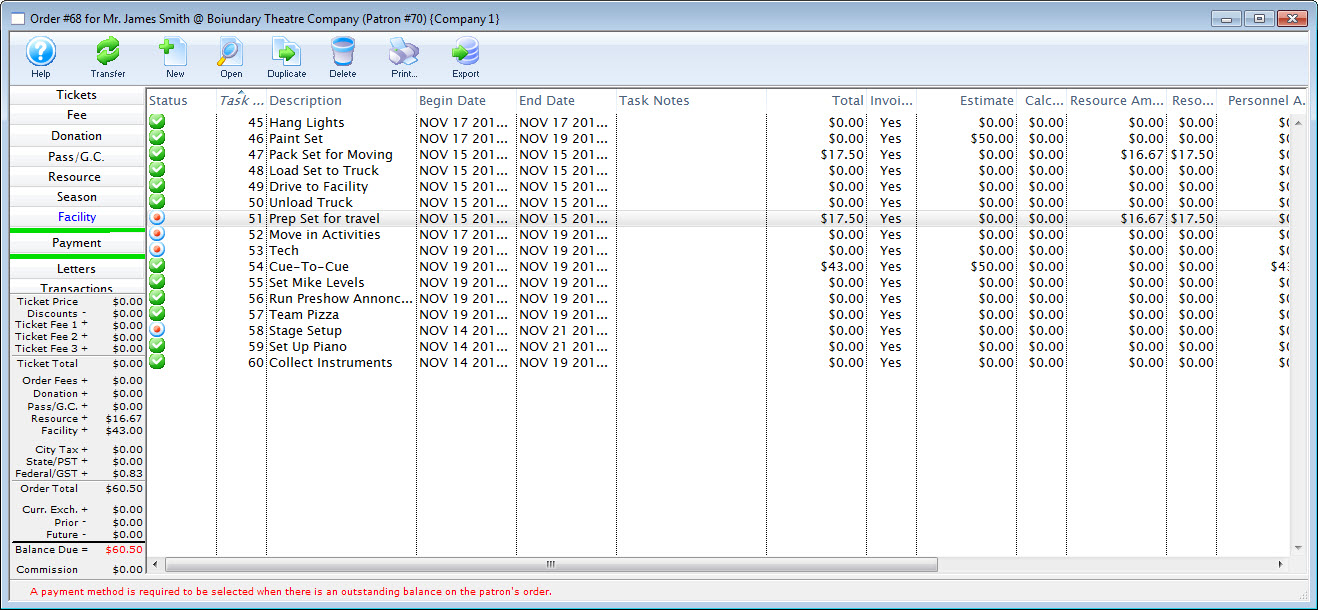
The Order window opens to the Facility page. Here you can review all of the tasks and their associated costs.
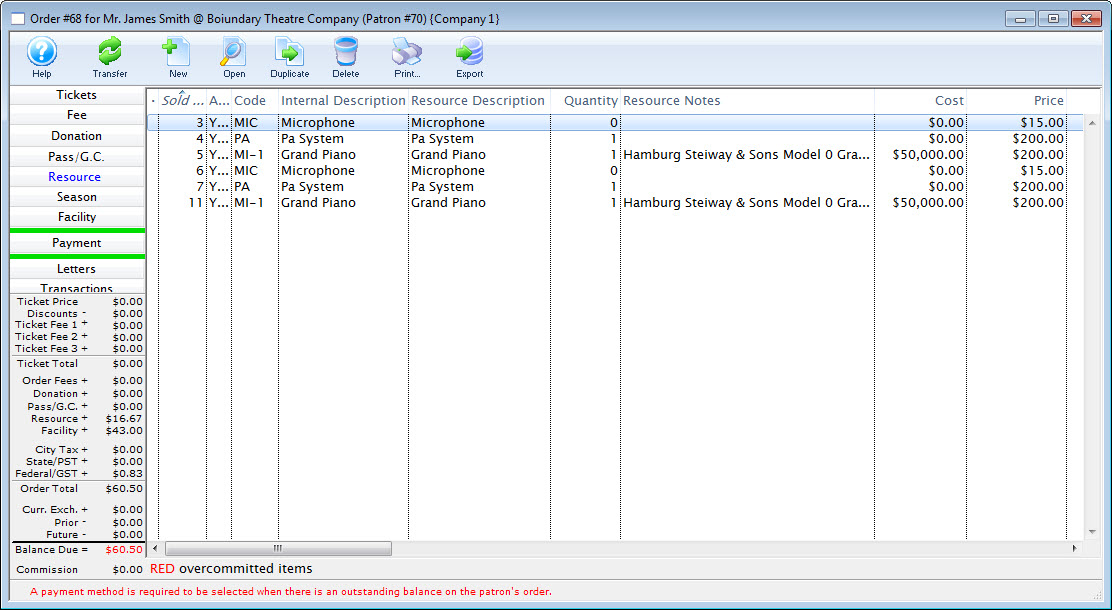
To view the Resources, click the Resource
 button. The resource page also applies to Facility management and shows any resources that have been added to the Tasks in the Project.
- Click the Payment
 button.
The Payments page opens. Click here for more information on the Payments page, how to create a payment, or a post dated payment, transferring a payment, etc.
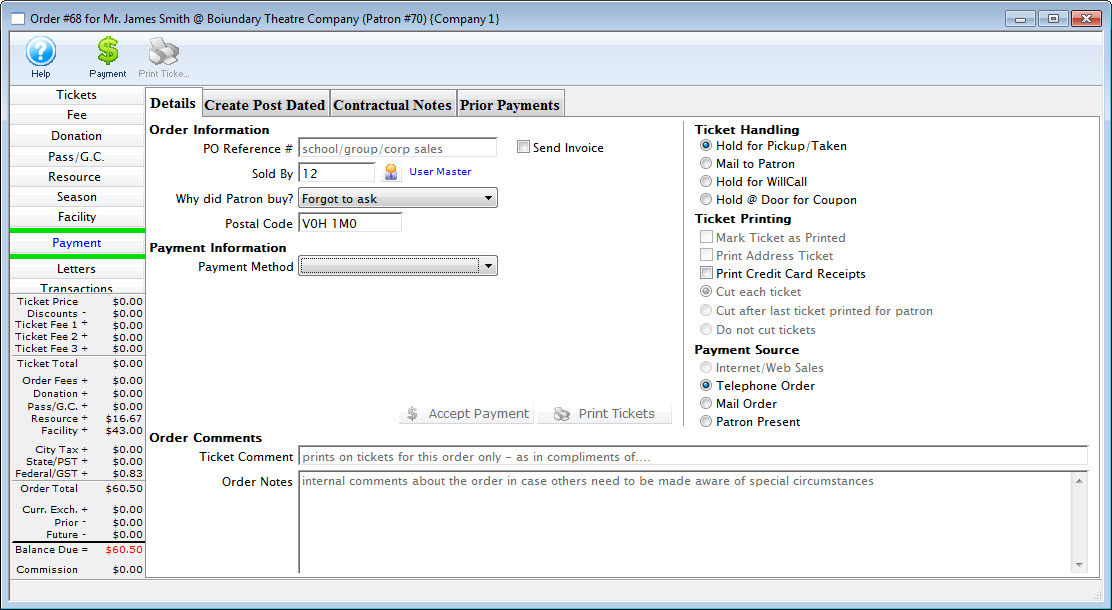
Once you have completed your payment, you are returned to the Project window.
Printing an Invoice
Printing an invoice is similar to printing an Estimate.
To print an invoice, you perform the following steps:
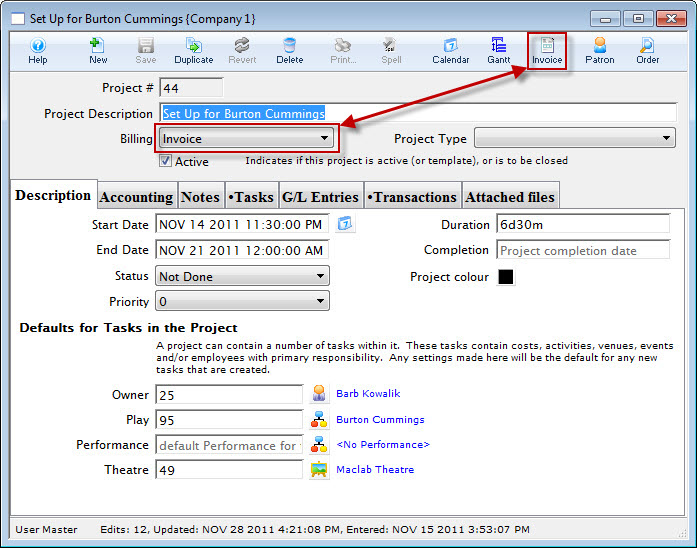
- In the Project window, click the Billing drop down and choose Invoice.
The Estimate button in the Project window ribbon bar / toolbar changes to Invoice.
A dialog opens, stating that changing to an order causes the Order to be posted during the end of day process and asks if you want to continue.
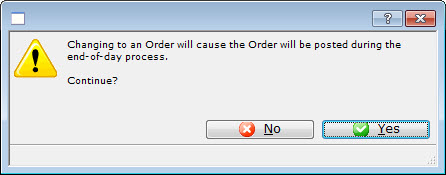
- Click the Yes
 to continue.
You are returned to the Project window.
- Click the Invoice
 button.
The Print Invoice Criteria window opens.
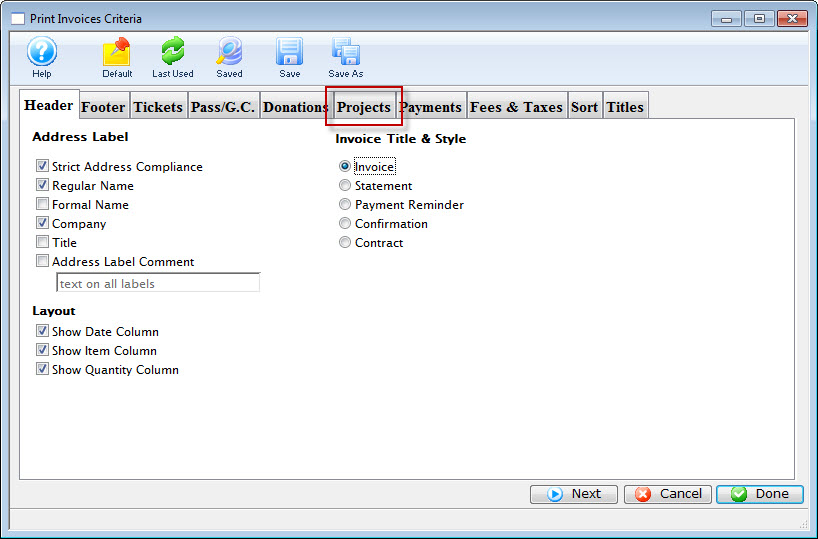
Review the information on the tab to ensure that the information you want printed on the invoice is selected.
- Click the Projects tab.
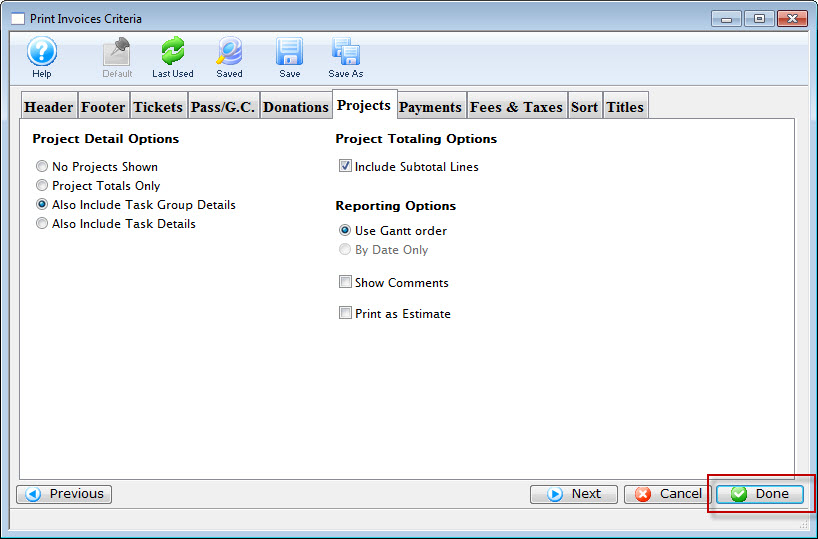
Review the information on the tab to ensure that the information you want printed on the invoice is selected.
- Click the Done
 button.
The Estimate prints.
Click here for more information on the Finished Report window.
You can review the other tabs as necessary.
Printing an Estimate
You can print estimates of a project or the invoice from the Reports window:
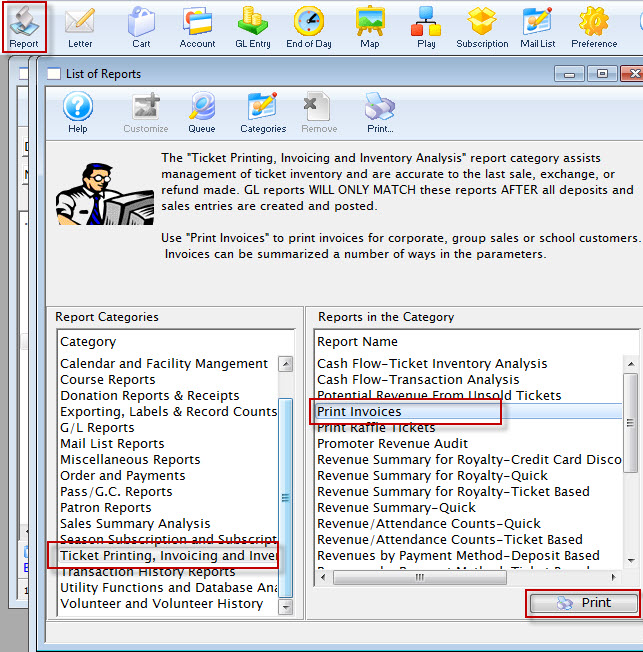
Or from the Reports window.
- Click the Estimate
 button in the Project toolbar / ribbon bar.
The Print Invoices dialog opens.
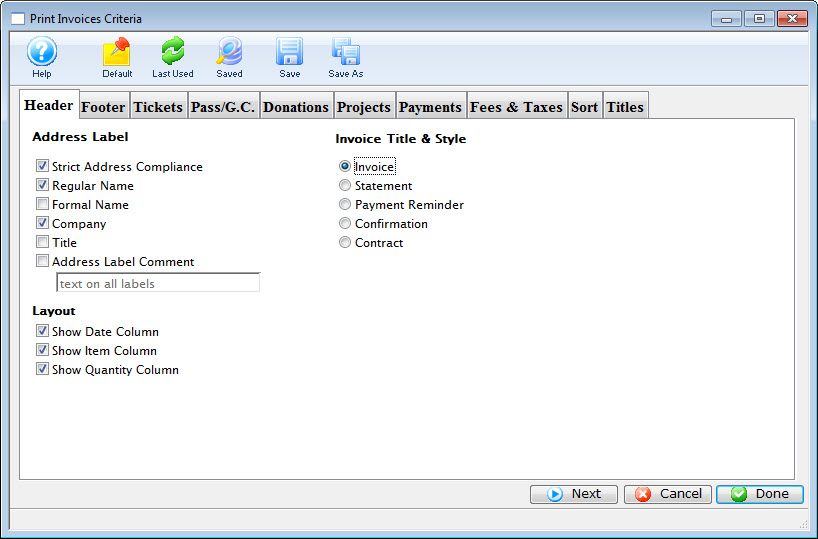
- Click the Projects tab and ensure the Print as Estimate checkbox is enabled.
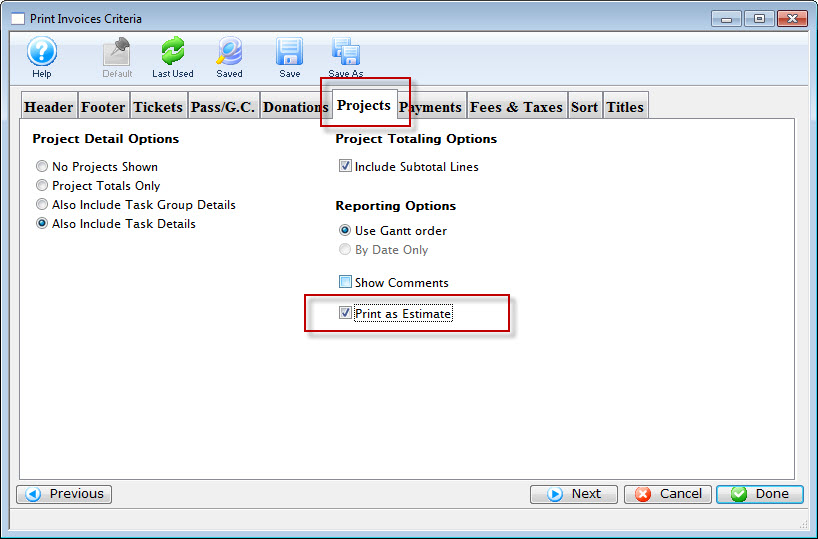
You can review the other tabs as necessary.
- Click the Done
 button.
The Estimate prints.
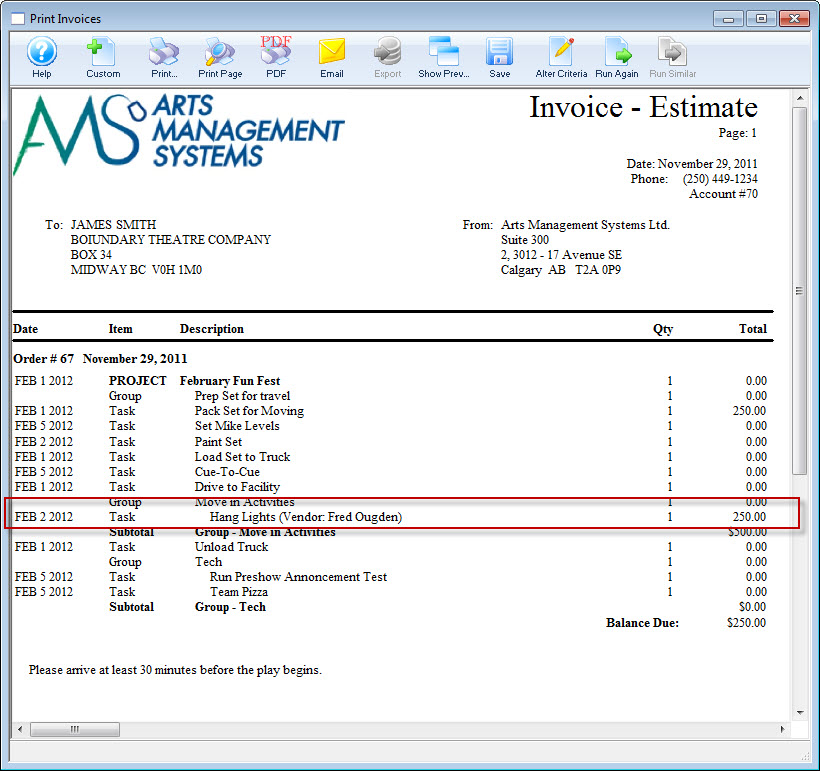
Click here for more information on the Finished Report window.
Where did the highlighted amount come from?
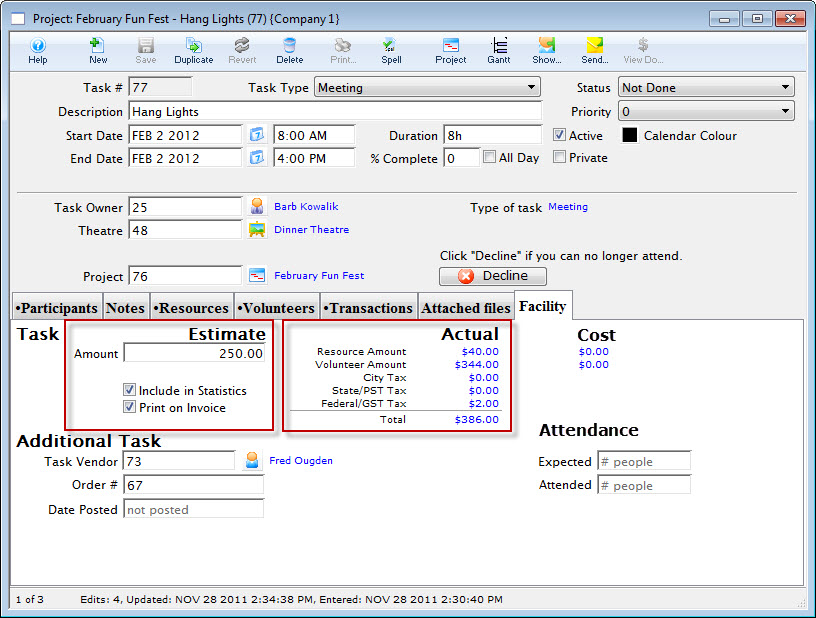
The Facility tab of the task listed in the Estimate. Click here for more information on the Task Facility tab.
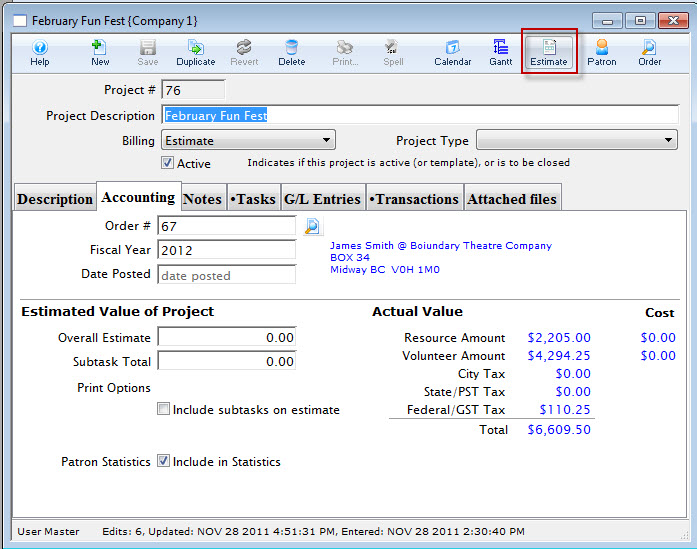
To print an estimate, you perform the following steps: