Ticket Face Detail Window
The Ticket Face Detail window displays all of the information about a ticket.
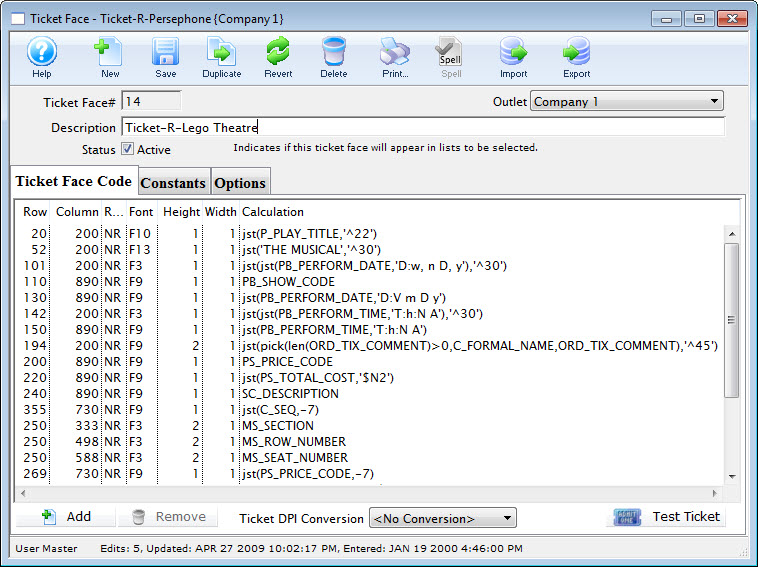
Parts of the Ticket Face Detail Window
 |
Inserts a new ticket face. For more information on creating new ticket faces click here. |
 |
Saves changes made to the current ticket face. |
 |
Creates a duplicate copy of the current ticket face. |
 |
Reverts changes made to the ticket face back to the last saved point. |
 |
Deletes the selected ticket face. For more information on deleting ticket faces click here. |
 |
Generates a report of the ticket faces to the screen or default print location. |
| Ticket Face# | Unique number given to the ticket face by Theatre Manager |
| Outlet | Outlet responsible for the ticket face. |
| Description | Name of the ticket face, if it is for a ticket, receipt, renewal notice etc. |
 |
Code used to create the ticket face. For more information on the ticket face code tab click here. |
 |
Equations calculated prior to printing the ticket. For more information on the constants tab click here. |
 |
Additional options for ticket printing. For more information on the options tab click here. |
 |
Adds a line to the bottom of the ticket parameters and opens the Ticket Face Detail window. For more information on the Ticket Face Detail window click here. |
 |
Removes the currently selected lines from the ticket face. |
| Ticket DPI Conversion | Allows the conversion of the row and column information to a different DPI. |
 |
Enables printing of a sample ticket to the printer. Ensure the printer is correctly set up in the options tab. This is designed to print a sample ticket with sample information. To see an actual ticket with correct information the ticket face number must be entered into the Plays and Dates information for a particular play. Sell tickets to a test patron account and print them as a final test of the ticket design. |
Ticket Face Code Tab
Parts of the Ticket Face Code Tab
| Row | Row the calculation is applied to |
| Column | The column the calculation is applied to |
| Rotation | The rotation of the data |
| Font | The font used to display the data |
| Height | The height of the characters |
| Width | The width of the characters |
| Calculation | Exports the ticket calculations |
|
Add a line to the ticket face calculations.
|
|
Remove a line from the ticket face calculations. |
| Ticket DPI Conversion | Allows the conversion of the row and column information to a different DPI. |
|
Enables printing of a sample ticket to the printer. Ensure the printer is correctly set up in the options tab. This is designed to print a sample ticket with sample information. To see an actual ticket with correct information the ticket face number must be entered into the Plays and Dates information for a particular play. Sell tickets to a test patron account and print them as a final test of the ticket design. |
Constants Tab
You use constants to add to ticket face equations. Constants replace long lines of equation that need to be repeated or in conjunction with pick statements. A pick statement may read if the constant is not met to print one thing on the ticket but if the constant is met to print something completely different. Constants allow for more editing options and can be used as many times as is needed in the ticket face.
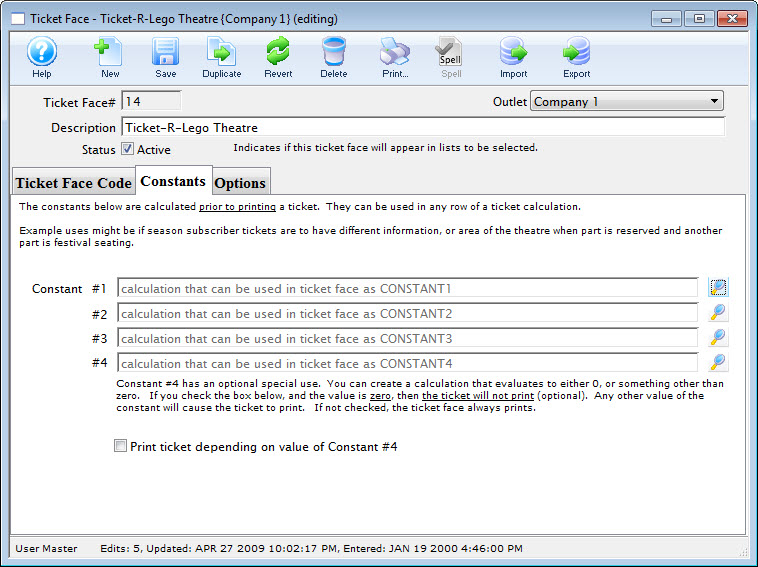
Parts of the Constants Tab
| Constant #1 | First constant equation. |
| Constant #2 | Second constant equation. |
| Constant #3 | Third constant equation. |
| Constant #4 | Fourth constant equation. |
 |
Opens the constant equation window. For more information on creating constants click here. |
| Print Ticket Depending on Value of Constant #4 | If the value of constant #4 equals zero the ticket face will not print. |
Ticket Face Constants
You use constants to add to ticket face equations. Constants replace long lines of equation that need to be repeated or in conjunction with pick statements. A pick statement may read if the constant is not met to print one thing on the ticket but if the constant is met to print something completely different. Constants allow for more editing options and can be used as many times as is needed in the ticket face.
An example of a constant value is:
- CON(PATRON_FIRST_NAME,' ',PATRON_LAST_NAME).
- Print the patron's first name, a space and the patron's last name.
This statement says:
Rather then having to type this information several times, CONSTANT1 can be typed to generate the patron's name. A more complicated constant may be used within the ticket face when something other then the regular ticket information is to be printer.
In addition to acting as a constant, line #4 can be set to require a value equaling something other then zero. If the value of the equation is zero, a ticket will not print. This feature can be used when a ticket is not required if a patron meets specified conditions.
Adding a Constant
- Open the Ticket Face List window.
Click here to learn how to access this window.
- Select the ticket face you are adding a constant to.
Single click on a ticket face to select it.
- Click the Open
 button.
- Click the Constants tab.
- Click the Lookup button.
The Constants Detail window opens.
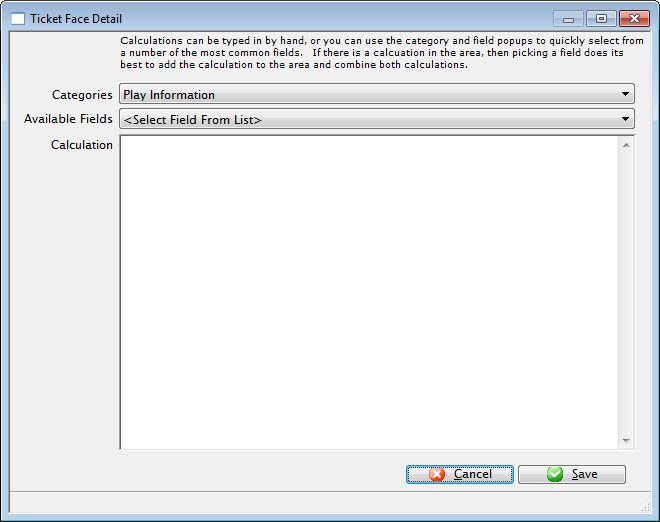
- Enter the Constant equation.
To enter information under 'Calculation', click on 'Category' drop-down list.
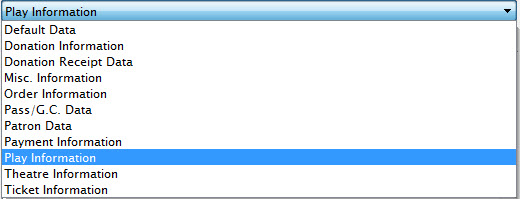
Once you have selected an option, click the 'Available Fields' drop-down list.
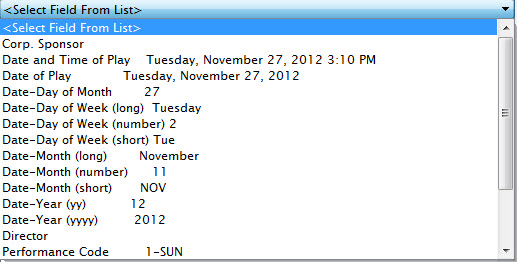
This pop-up menu has two columns.
The left column is the fields to be entered and the right column is the sample information. Select a field (for example - company name). The information that appears in the field calculation (D_COMPANY) instructs the printer to put the company name (found in Company Preferences) in this location on the ticket.
You can type this information into the field calculation, however, if all event data is typed onto the ticket face, this prevents the tickets from being able to be used for other events. Click here for more information on Calculations.
- Click the Save
 button.
The Constant has now been added to the ticket face and can be used in conjunction with other equations.
Options Tab
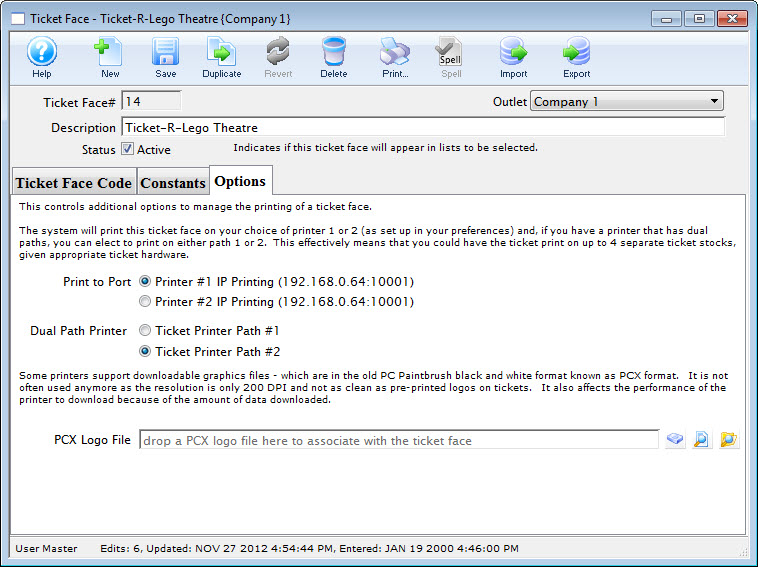
Parts of the Options Tab
Print to Port |
|||
| Printer #1 | Option 1 for ticket printing. Any ticket printed using this ticket face will be sent to the printer specified in the hardware setup as printer #1
This allows you to print a batch of tickets to two printers with different stock in them, depending on the event purchased. Printers do not have to be identical types or models or ports. |
||
| Printer #2 | Option 2 for ticket printing. Any ticket printed using this ticket face will be sent to the printer specified in hardware preferences identified as printer #2.
This allows you to print a batch of tickets to two printers with different stock in them, depending on the event purchased. Printers do not have to be identical types or models or ports - they have to be the same manufacturer. |
||
Dual Path Printer |
|||
| Ticket Printer Path #1 | Port 1 on the ticket printer. Select this option if the ticket should print to this port. | ||
| Ticket Printer Path #2 | Port 2 on the ticket printer. Select this option if the ticket should print to this port. | ||
Logo |
|
||
| PCX Logo File | File name of the logo to be printed on the ticket | ||
 |
Search button to locate the logo file. | ||
 |
Opens the logo in it's designated program for viewing. | ||
 |
Opens the folder the logo resides in. | ||
