TLS Certificate
TLS Certificate
Before you can get an TLS certificate, you will need:
- a static IP address for your router that is obtained from you ISP
- a 'nice' domain name like tickets.yourvenue.org which is set up with an 'A' record on a DNS server and points to your firewall
- to open ports 80 and 443 at the Firewall per PCI requirements
The steps you will need to follow to set up an TLS Certificate and get web pages working are in the following sections.
For Venues hosted on AMS Cloud
 |
AMS provides the static IP for you as part of your setup.
AMS can provide a URL like 'yourname.artsman.com' if you wish, and if so, will also provide our group TLS certificate for your use. If you prefer to use your own domain name, you will need your own TLS that we can obtain and set up. |
Static IP for Your Router
Static IP for Your Router
- a static address for your router.
- a 'nice' domain name like 'tickets.yourvenue.org' that points to your firewall. These generally cost about $10 to $20 monthly in addition to your connection fees, unless you have a business internet package - in which case you probably get one included.
Obtaining a Static IP
The static IP must be obtained first and is supplied by your ISP. It will be set up in your firewall/router so that it never changes and means that customers will always be able to find you on the internet. These generally cost about $10 to $20 monthly in addition to your connection fees, unless you have a business internet package - in which case you probably get one included.
If you have a static IP and do not recall it, then open up a browser and type 'whatsmyip.org'. This asks a web site to tell you what the IP address of the outside of your router is. Alternately, you can enter the config mode for your router to determine the static IP address.
For Venues hosted on AMS Cloud
|
AMS provides the static IP for you as part of your setup. |
External DNS
External DNS
You can think of this as a 'nice' name by which customers can find you, or if they see it in the URL area of the browser, they will be confident that they are connecting to the right web site.
Call up your ISP (or web site hosting company) and ask them to create a DNS record for 'tickets.myvenue.com' (where myvenue is replaced by your main web site name). As an example, if your main web site is www.artsman.com, then you would like your ISP to create a DNS record for tickets.artsman.com.
Possible DNS names that you may prefer from a marketing perspective are:- tickets.myvenue.org
- boxoffice.myvenue.org
- sales.myvenue.org
- tm.myvenue.org
- secure.myvenue.org
- and if you have a mail server or other services already in your organization, we could use that as well.
Once the DNS record has been created and is propagated to the internet (this usually happens in a few hours but can take as long as 24 hours), the next step is to purchase and install the TLS certificate.
For Venues hosted on AMS Cloud
|
AMS can provide a URL like 'yourname.artsman.com' if you wish, and if so, will also provide our group TLS certificate for your use. |
Buying the actual TLS Certificate
Buying the actual TLS Certificate
Purchasing your TLS from Arts Management Systems
Arts Management Systems uses 4096 bit encrypted premium certificates and if you wish to purchase one, please contact the sales office at (888) 536-5244, ext. 2.
When you buy a TLS Certificate from Arts Management Systems, information that we will require from you in order to customize is to your venue are:
- company name (do not abbreviate, provide the full legal company name)
- primary contact's first and last name
- primary contact's title
- primary contact's email address
- primary contact's direct phone number
- venue's legal Address, City, full State/Province name (do not abbreviate the state or province name)
- external DNS that you set up such as tickets.myvenue.org
- the operating system that Apache is running on (OSX, Linux, or Windows)
- we will require an authorized administrator's email address to send the verification to and approve the request. This needs to be an email address you have the ability to check for the incoming emails. Please make sure that the email account has been set up and is available before you provide us the email account to use, or the approval email will not be delivered. With an invalid or non-working email account, the TLS certificate will not be processed. The options for the email address are below: (Select ONE of the following)
- admin @ myvenue.org
- administrator @ myvenue.org
- hostmaster @ myvenue.org
- webmaster @ myvenue.org
- postmaster @ myvenue.org
- An email indicating that a TLS creation request has been started.
- An email requiring you to confirm the information at the specified email address above. Please confirm the email (by clicking on the acceptance link within that email) and accept the TLS request.
- After you have confirmed email #2's acceptance link and the TLS has been processed by GeoTrust, the 3rd final email containing the actual TLS certificate information will be sent to you. Please note that this final email may arrive anywhere from 10 minutes to 12 hours after email #2 was accepted depending upon the next processing cycle.
Self Purchased TLS Certificate
If you purchase your own TLS certificate from another source, you will need to install it yourself following the instructions provided to you during the purchase process and make sure it works. If you have any questions about your Self Purchased TLS certificate, contact the company from whom you purchased it for any and all assistance.
Install and Test the TLS Certificate
Install and Test the TLS Certificate
Once the firewall rules have been implemented and the TLS certificate installed:
- Open up a browser
- Type 'https://tickets.myvenue.org'
- It should display a web page in the browser and turn on the lock on the browser.
- Use Qualys TLS Certificate Test to test the TLS Certificate.
Make sure to check the option "Don't show the results on the Boards"
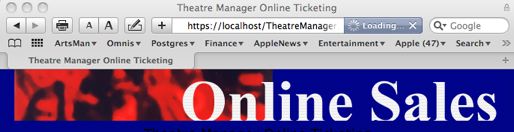
This page shows safari with the lock on the upper right turned on
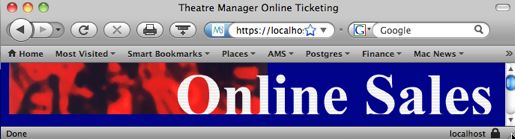
This page shows firefox with the lock on the lower right turned on
Please check for it on your browser as appropriate.
Diffie Hellman Parameter File
Diffie Hellman Parameter File
What is Diffie-Helman?
Credit: Stack ExchangeDiffie-Helman is a way of generating a shared secret between two people in such a way that the secret can't be seen by observing the communication. That's an important distinction: You're not sharing information during the key exchange, you're creating a key together.
This is particularly useful because you can use this technique to create an encryption key with someone, and then start encrypting your traffic with that key. And even if the traffic is recorded and later analyzed, there's absolutely no way to figure out what the key was, even though the exchanges that created it may have been visible. This is where perfect forward secrecy comes from. Nobody analyzing the traffic at a later date can break in because the key was never saved, never transmitted, and never made visible anywhere.
The way it works is reasonably simple. A lot of the math is the same as you see in public key crypto in that a trapdoor function is used. And while the discrete logarithm problem is traditionally used (the xy mod p business), the general process can be modified to use elliptic curve cryptography as well.
But even though it uses the same underlying principles as public key cryptography, this is not asymmetric cryptography because nothing is ever encrypted or decrypted du ring the exchange. It is, however, an essential building-block, and was in fact the base upon which asymmetric crypto was later built.
How to create your Diffie Helman parameter file
Since the Diffie-Helman parameter file is a way of creating a shared secret at the start of the cryptographic process, you can change it as often as you want, completely independently of the TLS certificate. It is quite easy to do so.
| Macintosh |
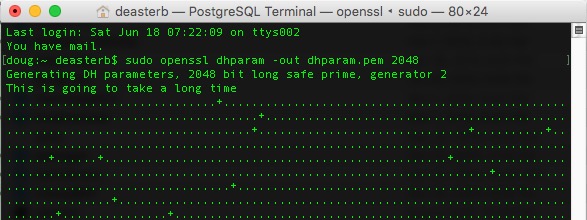
This needs to be done using Terminal:
|
| Windows | Please ask Arts Management support to make one for you or find a Macintosh. |
Testing your Web Sales (the Hosts file)
Testing your Web Sales (the Hosts file)
|
If your computer in the office cannot see the ticketing web site, the best way is to set up a DNS server inside the network to help all computers see the server.
Only edit the local machines 'host' file if you cannot set up a DNS server. |
Testing your Web Sales Site
You should be able to access your ticketing web site via the URL you used to create the TLS certificate after the:
- TM server is set up as a web server
- firewall adjusted to open the necessary ports and
- web listeners running
Try accessing the ticketing web site from:
- a location outside the office to confirm it works. A cell phone is the ideal way - using the data plan and not while connected to the wifi network.
- one or more computers inside the office to confirm that it works
Troubleshooting access inside the office
If you are having issues connecting to your ticketing web site while inside the office and are receiving timeouts, this is often resolved by:
- adding an internal DNS entry to your DNS server to point to your ticketing web site via an internal path (preferred approach) -or-
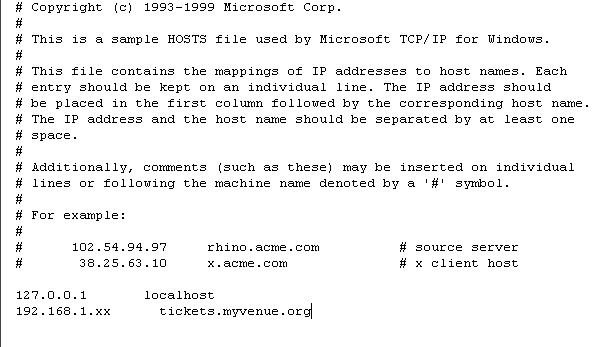
- editing the hosts file on each machine
Mac's are not usually subjected to this issue. PC's inside the office frequently are because they do not always seem to be able to resolve the DNS that goes outside the firewall and back in, so you have to edit the hosts file to tell the PC how to find the web site.
Editing the Host file for Mac
Editing the Host file for Mac
Troubleshooting generally depends on the behavior of the DNS within the firewall and the operating system used. Most Mac's will easily find 'tickets.yourvenue.org' by navigating through the firewall properly. However it may be possible for a machine to not be able to access the online sales domain directly.
The best way of correcting this issue is to put an entry within the internal DNS server to point 'tickets.myserver.org' directly to the IP address of the apache server.
If that is not possible, an entry in the hosts file of each web listener that points to the apache server can be made. This should be done if the DNS does not propagate in the internal network. If the Web Listeners start up and are able to find the 'tickets.myvenue.org', you will not need this step. If they do startup but they seem to be ignored by apache very quickly, then you will need this step.
| # | Description | |
| 1 | Open the 'Terminal' window. | |
| 2 | Type cd /etc. | |
| 3 | Type sudo vi hosts. | |
| 4 | Type the administrator password to the machine. | |
| 5 | Use the arrow keys on the keyboard to scroll down. | |
| 6 | Type 'I' to enter the edit mode. | |
| 7 | Add the IP address of the Apache machine followed by the online sales domain.
| |
| 8 | Click the 'ESC' key on the keyboard. | |
| 9 | Hold the SHIFT key on the keyboard and type Q. | |
| 10 | Type WQ.
This with write the changes to the Host file and close it. |
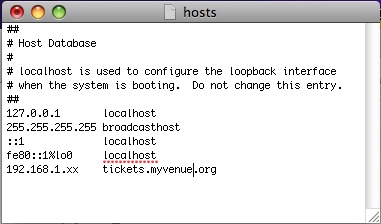
Editing the Host file for Windows
Editing the Host file for Windows
Troubleshooting generally depends on the behaviour of the DNS within the firewall and the operating system you use. Windows machines sometimes need a helping hand.
The best approach is to put an entry within the internal DNS server to point 'tickets.myserver.org' directly to the internal address of the apache server.
If that is not possible, an entry in the hosts file of each web listener that points to the apache server may be needed. If the Web Listeners start up and are able to find the 'tickets.myvenue.org', this step is not needed. If they do startup but they seem to be ignored by apache very quickly, this step will be needed.
| # | Description |
| 1 | Open My Computer. |
| 2 | Navigate to c:/windows/system32/drivers/etc/ (or where the windows system32 directory is located). |
| 3 | Right click on the Hosts file. |
| 4 | Select Open With... WordPad. |
| 5 | Add the IP address of the Apache machine followed by the online sales domain.
|
| 6 | Click File >> Save. |
| 6 | Close the Host file. |