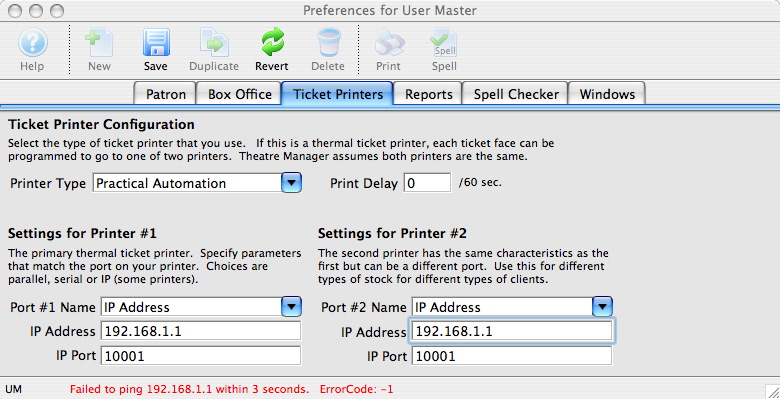
Practical Automation Printer Setup
Depending on the ticket printer and the operating system there will be different confirmation windows before the tickets are printed.
 |
NEVER INSTALL a practical automation printer driver on a computer even if suggested by the operating system. If a practical automation printer driver has been installed, remove it.
When using ticket printers with parallel ports, there should be no printer driver assigned to LPT1. |
|
Finding out Practical Automation Ticket printer current IP address
|
Changing IP Address on Practical Automation Printers
- Use a web browser to talk to the printer. This may not work with some browsers (Firefox is most reliable)
- Use a special application to access the printer and change a number of settings. This method always works and is the preferred method.
 |
We recommend that you provide a static IP address to the thermal ticket printer.
This ensures each time the ticket printer is turned on, the Theatre Manager's workstations will be able to communicate properly with it |
|
It is a good idea to stick a label with the printer's IP address directly onto the printer. |
|
If you change the printer's IP address, make sure to update its Device Record with the new ip address. |
|
Finding out Practical Automation Ticket printer current IP address
|
Option #1 - Using the Practical Automation Tool
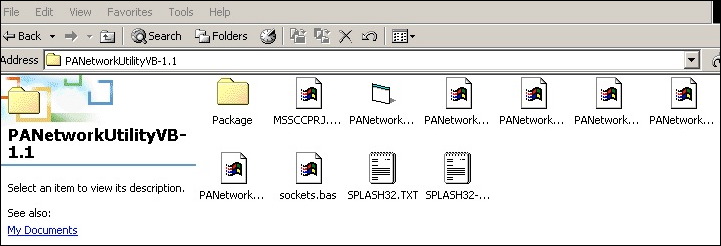
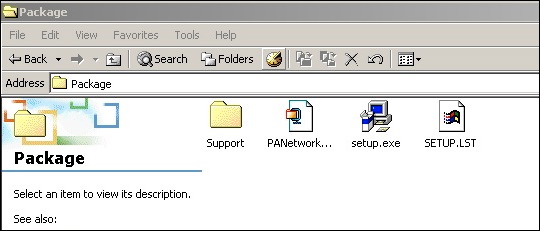
- Download the installer for the Practical Automation Tool from http://www2.artsman.com/Software/PANetworkUtilityVB-1.1.zip.
- When the download is complete, extract the ZIP file into a new folder anywhere that is easily accessible.
- Open the folder.
There will be a number of files.
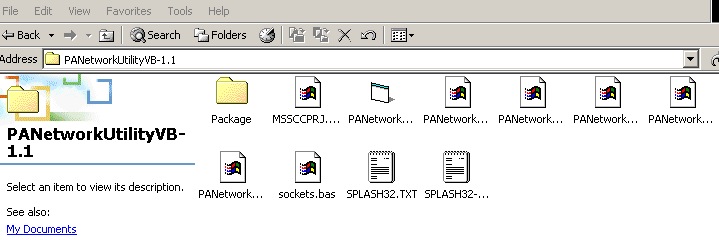
- Open the folder labeled Package and find the file labeled setup.exe.
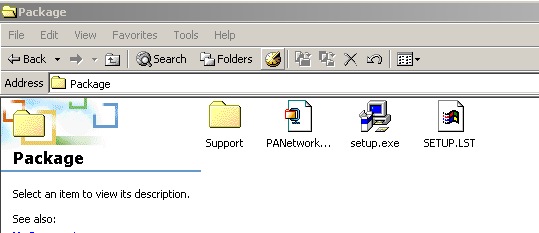
- Double click on the setup file to run it, and complete the installation.
- After the installation is complete, return the previous level in the folder that the Practical Automation Tool was extracted to.
Do this by pressing the Back button or the Up button.
- Setup the Practical Automation Printer, power it up, and connect it to the network via a hub, switch or router.
If a hub, switch, or router is not available, a crossover cable between another computer and the printer will be needed. A crossover cable is not a standard ethernet cable. It has a different pin configuration and is used to connect servers to servers or routers to routers - not machines or printers to routers. Macintosh computers can auto-negotiate standard ethernet cables into crossover cables, but Windows machines cannot. If at all possible, use a hub, switch or small router to create your own small network of computer to router / router to printer configuration.
The default address of the printer is 192.168.1.1, (which is a commonly used IP address). Make sure that the printer will not conflict with something else on the network before powering it up. If another device is using the same IP address, it is recommended that you use a crossover cable to another computer rather than hooking the printer into the network.
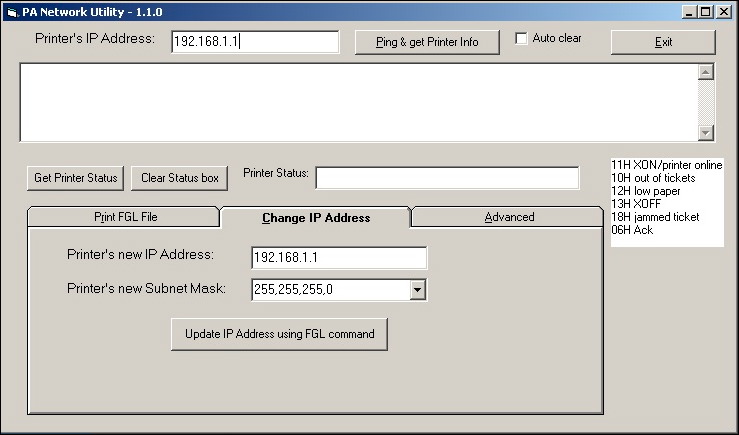
- In the Practical Automation Tool folder, double click on the PANetwork program to start it.
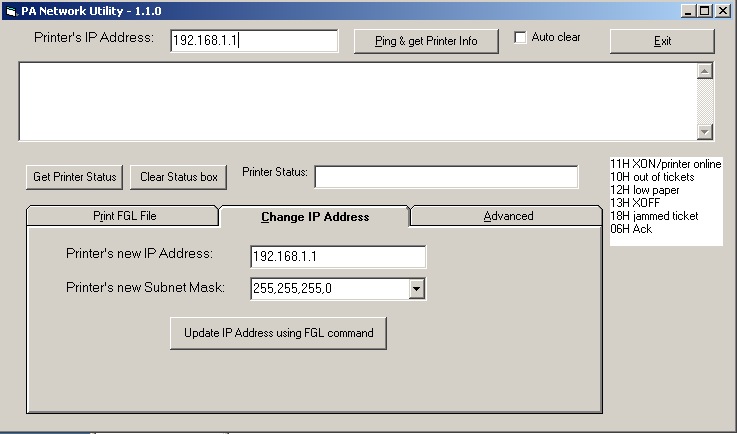
- At the top of the screen, enter the IP address 192.168.1.1, and then click the Ping & Get Printer Info button.
This will connect you to the printer.
- Near the bottom of the screen, click on the Change IP Address tab.
- Change the IP address and subnet mask as necessary.
- Click the Update IP Address using FGL Command button.
Once the settings are saved, the IP address at the top of the program will need to be changed to reflect the new IP address, and to re-connect to the printer.
- To verify the settings, turn off the printer. Hold down the F0 button and turn the printer on.
A ticket will print containing the IP address of the printer.
- Once everything is set, each user will need to be adjusted in Theatre Manager to connect to the new printer.
Click here for more information on changing a user's ticket printer settings.
Option #2 - Using a Web Browser
- Change the IP address of the computer temporarily to 192.168.1.xx where xx is anything you want except 1 (for the ticket printer is using 192.168.1.1). You may want to take a screenshot or write down your existing settings so you can reset them after you are finished.
Arts Management recommends that you provide a static IP address to the thermal ticket printer. This can be obtained from your IT Support. Having a static IP address ensures each time the ticket printer is turned off and back on again, the Theatre Manager's workstations will be able to communicate properly with it.
a) On a Macintosh go to Apple >> System Prefs >> Network,
b) On a PC go to Network Places >> Properties >> Local Area Connection >> Properties >> TCP/IP >> Properties
c) Set your Built-In Ethernet to become Manually set at 192.168.1.2 (anything but 192.168.1.1) and subnet of 255.255.255.0
d) Turn off your wireless connection
- Setup the Practical Automation Printer, power it up, and connect it to the network via a hub, switch or router.
If a hub, switch, or router is not available, a crossover cable between another computer and the printer will be needed.

The default address of the printer is 192.168.1.1, (which is a commonly used IP address). Make sure that the printer will not conflict with something else on the network before powering it up. If another device is using the same IP address, it is recommended that you use a crossover cable to another computer rather than hooking the printer into the network.
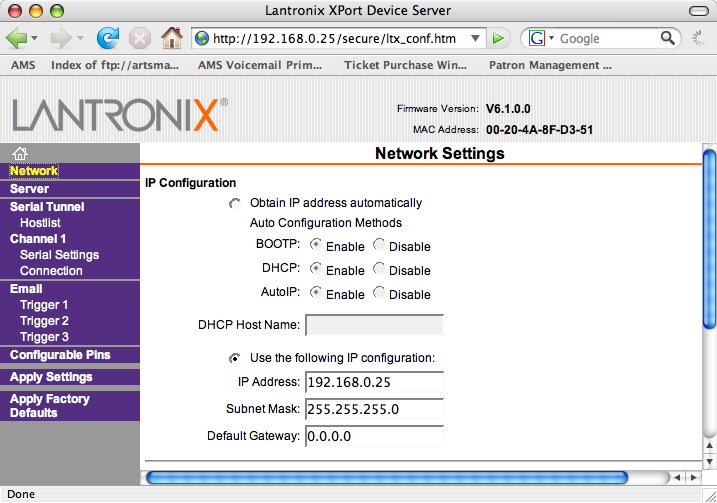
- Open the computer's web browser, typically either Internet Explorer or Mozilla Firefox or Chrome. Do not use Safari as it will not be effective.
- In the address bar of the web browser enter the following IP address: http://192.168.1.1 and press the Enter key.
A prompt for user name and password should appear. Leave these fields blank and press the Enter key.
A new page will open showing the Printer Configuration.
- Click on the link labeled 'Network' to adjust the IP configuration.
- Change the IP to the new static address, and adjust the subnet if necessary.
- Click the OK button at the bottom of the screen.
The word 'Done' should appear to the right of the button confirming the settings are saved.
- Click the Apply Settings button to update the printer.
The printer should reset once the settings have been updated.
- Turn the printer off and back on one time to ensure that the settings have correctly updated.
- To verify the settings, turn off the printer. Hold down the F0 button and turn the printer on.
A ticket will print containing the IP address of the printer.
- Once everything is set, each user will need to be adjusted in Theatre Manager to connect to the new printer.
Click here for more information on changing a user's ticket printer settings.
- Reset the IP settings for your computer to what they were before you started.
Reset the Printer to Factory Defaults
To reset the printer EEPROM settings to factory default, Press the following key sequence:
- On power up, press [F1] to enter Diagnostics.
- Press [F0] for Special Functions.
- Press and hold [F1] for 5 seconds until 5 rapid beeps are heard.
- Release the button and cycle the power.
|
Click the icon to download the ITX 3000/2000 Printer User Manual. |

Disable SNMP on Practical Automation Ticket Printer
 |
Disabling any unused service from the network, as per PCI DSS standard 2.2.2, may require you to disable the SNMP service from the ticket printer. This would only apply to 'Ethernet' ticket printers as parallel, serial, and USB cabled ticket printers do not offer the SNMP service. |
If you are required to disable the SNMP service, there is an application/utility called the "Device Installer" that will allow you to make these changes. You can find this utility at http://www.lantronix.com under Support/Downloads. Download this application/utility to update the software within the ticket printer.
Please contact your local IT department for assistance making this change.
IP Ticket Printing Setup - Mac
|
Finding out Practical Automation Ticket printer current IP address
|
Mac OS
For the Mac OS, you perform the following steps:
- Connect the printer to the computer using a crossover cable or to the network by connecting through a hub.
- Temporarily change the computer's IP address to 192.168.1.xx where xx is anything other then 1 (the ticket printer default is 1).
- Go to Apple >> System Preferences.
- Select Network.
- Double click Built-in Ethernet.
- Change the IP Address to 192.168.1.2 (anything other then 192.168.1.1) and the Subnet to 255.255.255.0
- Close the window and save changes.
- Open a web browser and enter the address for the router (http://192.168.1.1).
- When prompted for a user name and password leave then blank and login.
The configuration page opens.
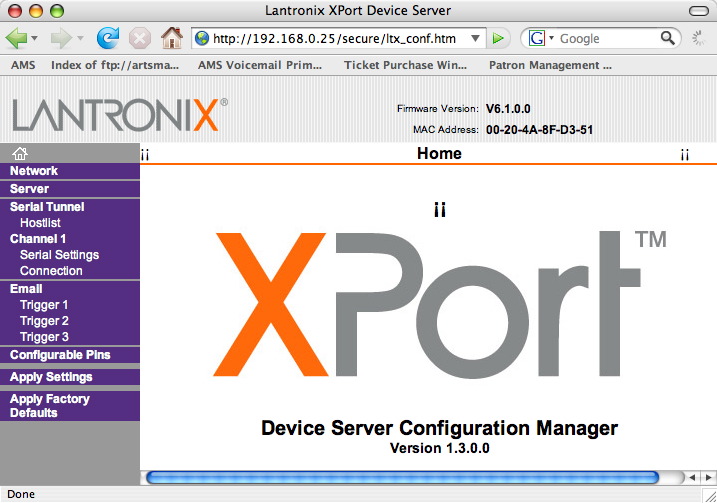
- Click Network in the top left side of the window.
The IP Address and Subnet Mask for the ticket printer will be displayed.
- Change the IP Address and Subnet Mask.
- Click the Ok
 button at the bottom of the screen.
The work done will appear next to the OK button.
- Click Apply Settings in the lower left side of the window.
Wait for the settings to take effect.
- Close the web browser.
- Turn the ticket printer off and on.
- Change the computer IP Address back to it's original setting.
- Turn the ticket printer off and on.
- Login to Theatre Manager.
- Go to Setup >> Users and Access >> Employee Preferences. Click the
Ticket Printer tab.
- Change the ticket printer IP Address.
- Click the Save
 button.
The ticket printer has now been set for this user and is ready to print. The Employee Preference window can be closed. Each user will need to see the ticket printer under Employee Preferences.
Practical Automation/BOCA Printer
The first time printing tickets since logging onto Theatre Manager for that session, a confirmation window will appear, otherwise the tickets will automatically print.
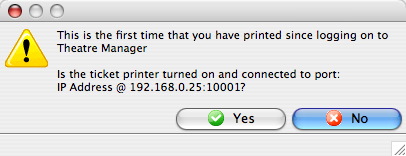
- Verify the printer is turned on and connected to the computer.
- Click the Yes
 button.
IP Ticket Printing Setup - Windows
Windows OS
To configure a printer for the Windows operating system, you perform the following steps:
- Connect the printer to the computer using a crossover cable or to the network by connecting through a hub.
- Turn the ticket printer on holding down the [F0] button on the printer.
This prints a ticket with information about the printer and it's IP address. The factory default tends to be 192.168.1.1
- Download the installation file.
The installation file can be found at http://www2.artsman.com/Software/PANetworkUtilityVB-1.1.zip
- Extract the file from the zip archive.
- Open the Package folder and run the Setup.exe file.
Follow the prompts to complete the install.
- Temporarily change the computers IP address to 192.168.1.xx where xx is anything other then 1 (the ticket printer default is 1).
- Open Network Places.
- Right click and select Properties.
- Click Local Area Connection.
- Click Properties.
- Select TCP/IP.
- Click Properties.
- Change the IP Address to 192.168.1.2 (anything other than 192.168.1.1) and the Subnet to 255.255.255.0
- Click OK till the desktop is reached.
- Move back to the previous folder and run the PanNetwork file (Third from
the left).
- Enter the ticket printer IP address at the top of the window.
- Click the Change IP Address
 tab.
tab.
- Change the Printer's New IP Address and the Printer's New Subnet Mask.
- Click the Update IP Address Using FGL Command
 button.
- Change the computer IP Address back to it's original setting.
- Turn the ticket printer off and on.
If you disconnected this workstation from the primary network as noted above, reconnect it at this time.
- Login to Theatre Manager.
- Go to Setup->System Tables->Devices and search for a list of all devices you have.
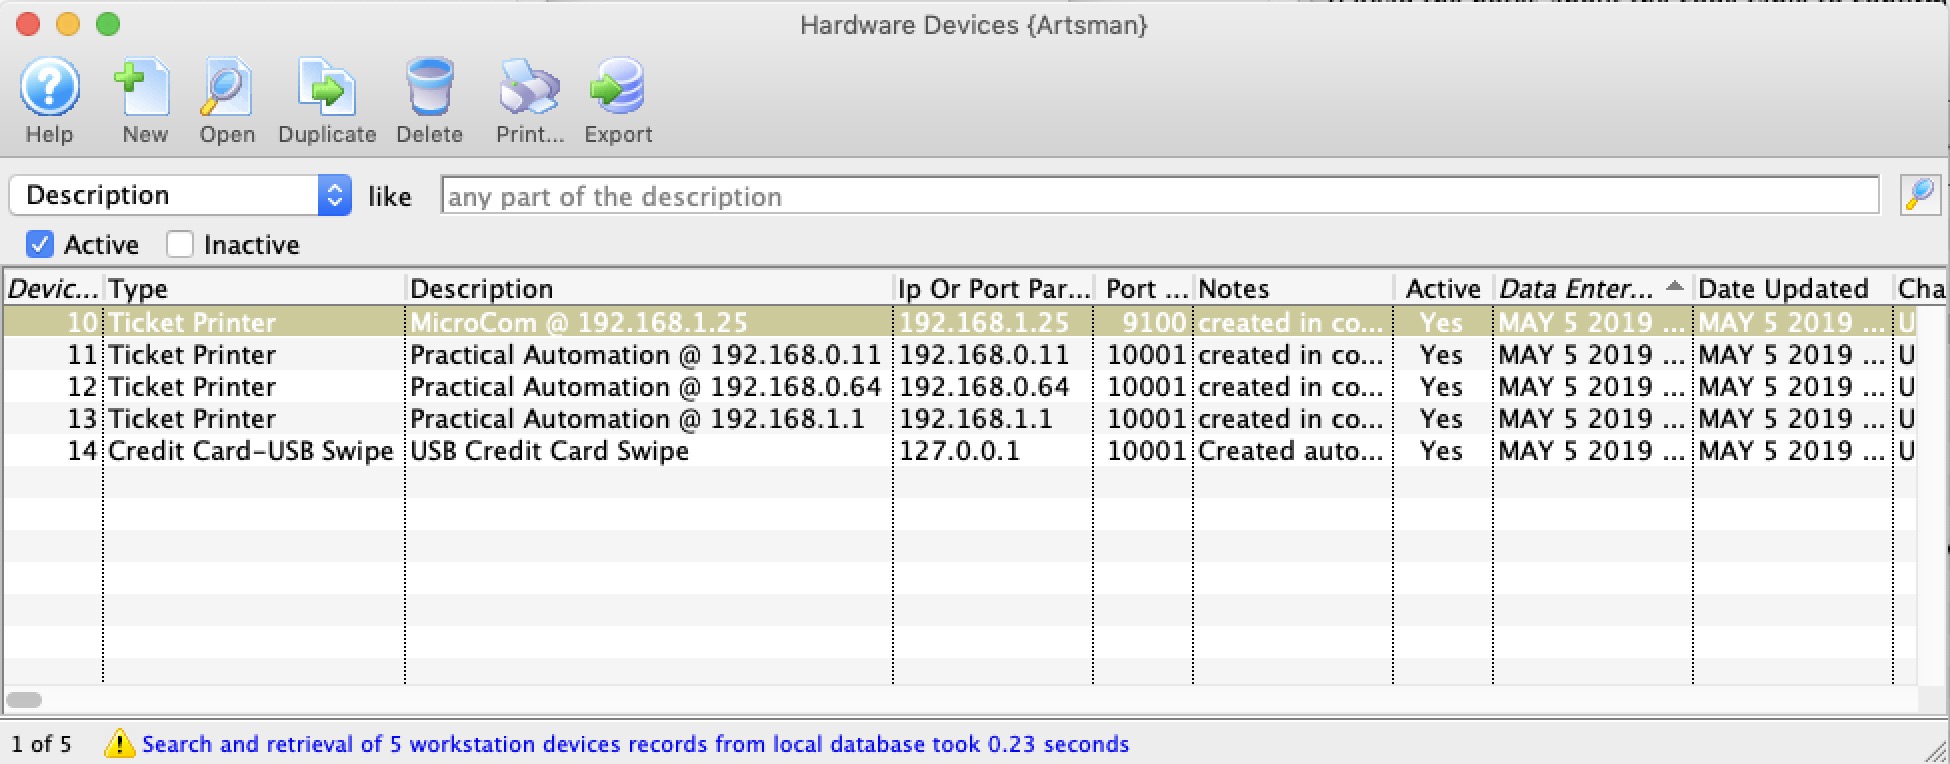
- If this printer is in the list of devices, then edit it. If not, insert a new printer device. Refer to Device setup for more information.
Change the IP address in the appropriate spot
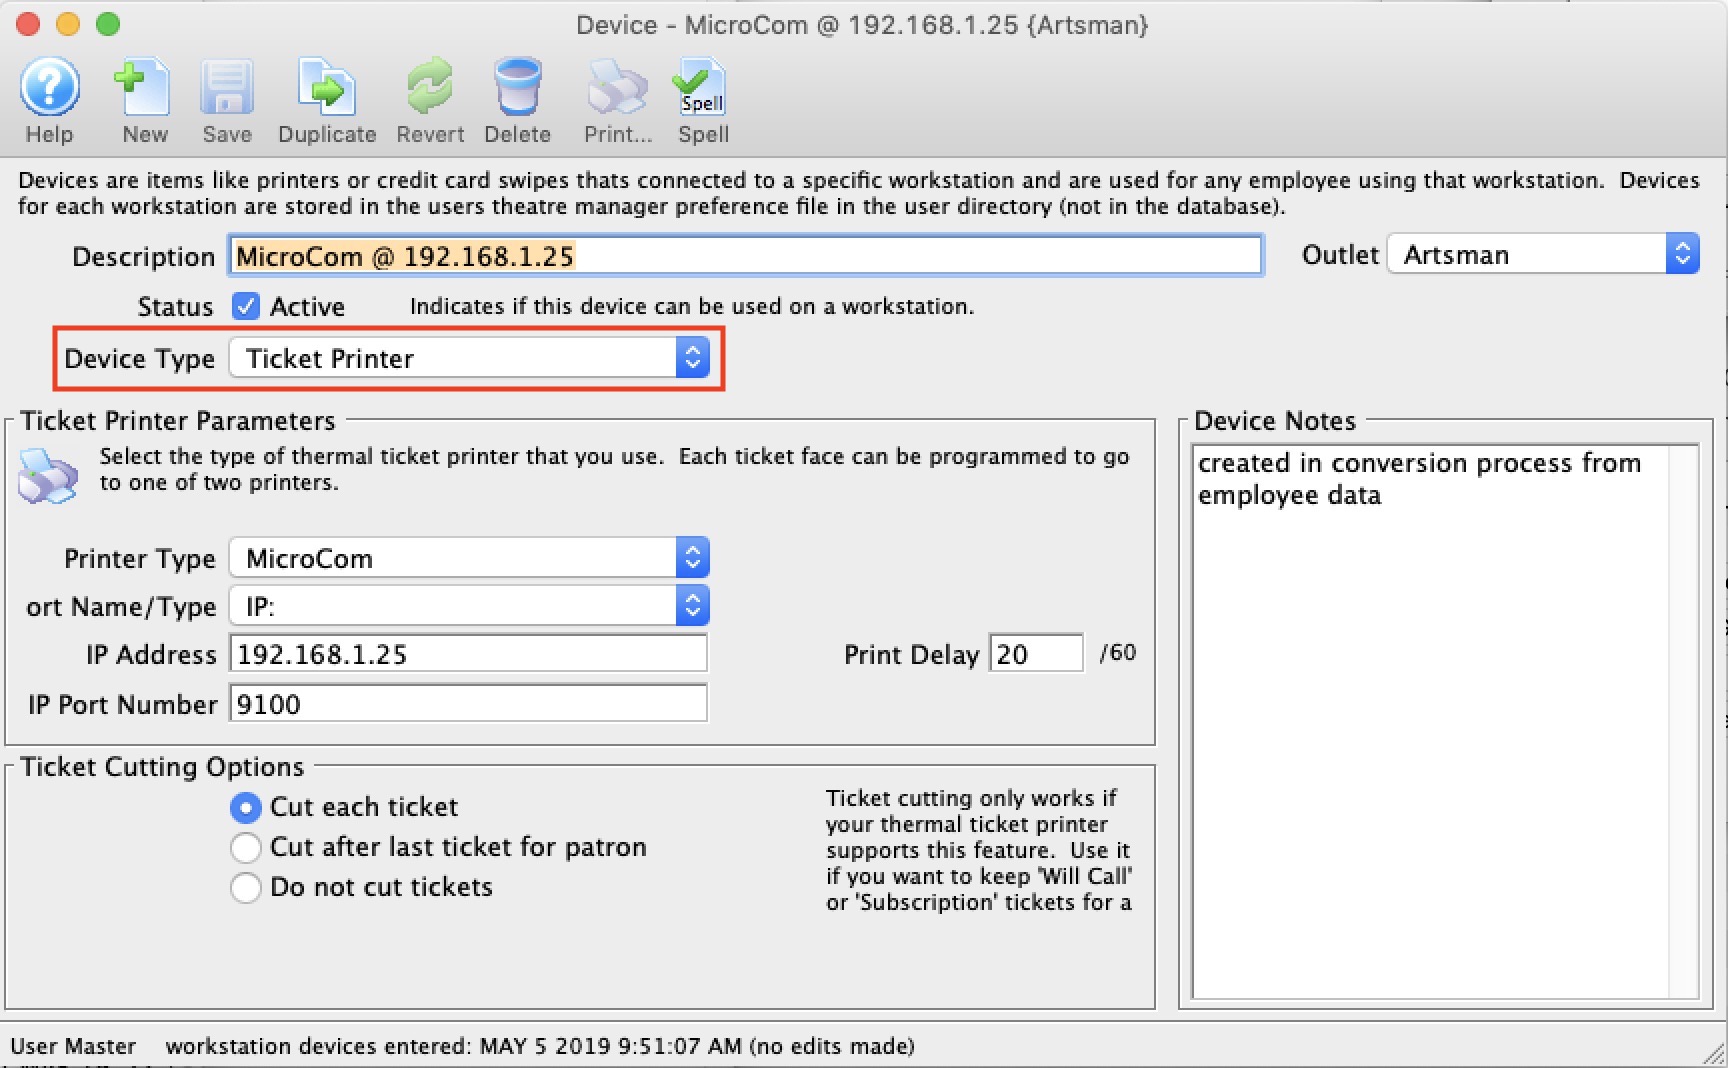
- Any employee using that device in their hardware setup will now use the revised IP address - so it changes it for everybody.
|
If you are connecting through a hub (and not using a crossover cable), it may be necessary to use only the hub between the workstation and the printer - disconnecting the workstation from the primary network. Since the printer comes with a default IP of 192.168.1.1, this IP may already be in use by another router on your network. This will cause an IP conflict and you won't be able to affect the IP address of the printer. Be sure to download the PANetwork Utility prior to disconnecting from the network. |