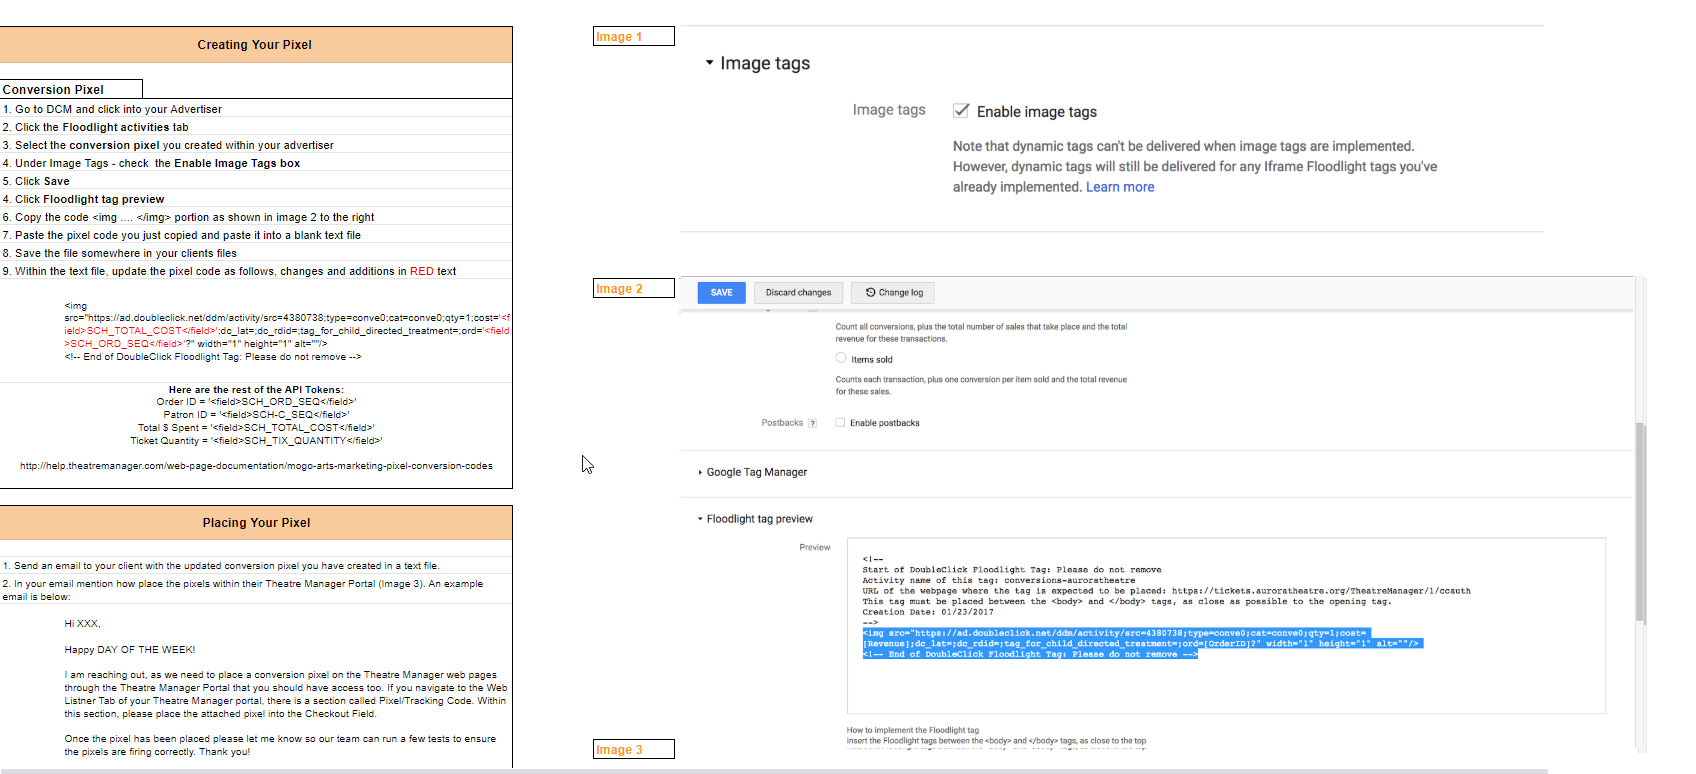
Mogo/Facebook/Google Marketing Pixel Conversion Codes
 |
The following is a general reference for placing pixel code within Theatre Manager so that they appear on the appropriate web pages. |
 |
For employees of MogoArts, your pixels have been used in web pages at a number of Theatre Manager venues. Please refer to Mogo's internal corporate Wiki Pages that describe your internal processes for Theatre Manager. An image has been provided. |
 |
Variables can be used within pixels to get actual cart values. |
Implementing Tracking Pixels
The general steps for implementing pixels are:
- Get your pixel code from MogoArts, Facebook or Google. There will likely be at least 2 or 3 of them
- There are source pixels that you place on your referring web site as part of the campaign. Eg, you might have a facebook pixel on a facebook page.
- There may be middle pixels that you place on your marketing web site - which is where the Facebook or mogo pixel refers you to.
- On your marketing web site, you would have information on the event and a buy button that takes you to the Theatre Manager commerce pages. Refer to making links for your marketing page.
- The end of the process is the final pixel on the checkout page.
Pixels:
- are created entirely by your pixel company or your marketing representatives
- are maintained by your pixel company.
- can contain Variables referencing cart data, if thats what you need to track
- are most often pasted into Theatre Manager's Company Preferences->Web Listener tab, most likely in the Checkout field.
- The pixel company may also have pixels they want placed in every page. Google is an example for page tracking
- can be placed in aggregate. If you want both Mogo and Google pixels, paste them into the appropriate section of Theatre Manager web listener preferences.
- TEST your web pages from beginning to end and complete a transaction. Then verify that the data from your pixels is getting to your pixel tracking web site (eg MOGO or Facebook).
Other Cautionary info on Tracking Pixels
 |
Mogo, Facebook, or Google pixels can be placed in Company Preferences->Web Listener tab as required to accomplish what you want without needing to edit any web pages. You can also edit web pages directly if you have unique requirements. |
 |
Conversion pixel codes imbedded in iFrames are not allowed by the Credit Card PCI Council on web pages due to a security risk called Click-Jacking (effectively a man-in-the-middle attack vector).
If the MOGO pixel provided is with an iFrame, please inform them to give you one that is javascript. For your own safety, Theatre Manager web pages do not support embedded iFrames because the PCI Council forbids it. |
Confirming Tracking Code Placement
A tracking code added to the Header or Footer field in Theatre Manager should be visible in the source code of all pages on the ticketing site. Code added to the Checkout field would be visible on the final page of the sales process. A sample link would be:
MogoArts Internal Wiki Documentation
 |
This is not an endorsement of pixels from MogoArts. |
We have seen MogoArts' internal documentation wiki. We are not sure of the exact web page, we believe it is called 12_44_43-Vendor - Ticketing Wiki - Google Sheets2222. It contains instructions that look like the image below.

Variables in Pixel Pages
 |
** NOTE: All field references need to be added to the pixel code using <field> tags. An example would be
<field>SCH_ORD_SEQ</field> |