Mating the Scanner to Your Network

Click the icon to down load a PDF instruction sheet of this page.

Setting up a scanner requires two things to be done.

  1. The first is mating the scanner to your network and making it acceptable to your routers (all routers if you have multiple and if necessary).
  2. The second is getting the communication and parameters set up.

Mating the scanner with your network

We expect you are running a closed network - where you cannot log on unless your router has the mac address of the scanner entered into it and your scanner is set up to connect to that network using the SSID and WEP password for the wireless router.

You will need to involve your network support people to complete some of this part of the setup. Once done, it should not have to change again.

These instructions focus on the part of the setup relating to the scanner.

  1. Turn the scanner on.
  1. Look for an icon in the bottom right corner of the scanner. This is dark blue and has a red ! in it. Click on it.

    If you do not see this icon, start the AMS Ticket program. Choose Setup. On the setup screen is a button called Wireless that also shows the same options in the next steps.

  1. A menu pops up. Pick the WLAN Profiles option. You use this to set up you connection to your wireless router.
  1. You will see a screen that looks like below. This indicates that the device can have a number of profiles (or settings) that allow it to connect to your wireless hub. Before continuing, you will need to know your - Wireless SSID, Encryption Method and Password (in hex, perhaps).

    Click the Edit button to edit the default setting.

  1. It opens up at the Mode tab.

    Leave the profile name default.

    Change the 802.11 ESSID to be the SSID name of your router. If you are not sure what this is, ask your network support person.

  1. Click the Encryption tab.

    Pick the type of encryption that your router is using. If it is none, then you are fine. If it is WEP, then you will need to type in the 'key' given to you for your router as well as indicating the key length.

  1. Click the IP Config tab. Most wireless routers allow you to set this as DHCP and will give you an IP address automatically. If not, ask your network support person what manual IP address settings you need to type in here in order to get connected to the network.

    Click OK.

  1. When you return to the main window, the icon will have a green bar in it. Click on it and pick the status menu item.
  1. You should now be connected to the network and able to begin the scanning process. Your screen will display the signal strength. If you see green, close the window and you are finished. If you see red, there are parameters that need fixed. First, go back and check your IP settings, password and SSID to make sure that they are correct.

    Check these with your network support person and ensure this device is allowed to talk to the wireless hub before calling Artsman Support.

    For example, depending on how the security is set up in the router, you may need to enter the MAC address into the router or, depending on the signal strength, you may need to be closer to the router.

MC55A addendum for Settings

The MC55A has Windows Mobile 6.5 (r) installed and has a few quirks as the interface is far less intuitive. Please adjust communication settings from within the Ticket Scanning program using the following general steps starting from the 'Theatre Manager Setup' window.

  • Ensure you have loaded the latest software for your scanner model. (For MC55A,as of July 2011 this is 2.0.0.06)
  • To WARM boot the device - press and hold the red power key for 5 seconds.
  • To cold boot the device - press the power button, W and C simultaneously. (you probably will never have to do this.)

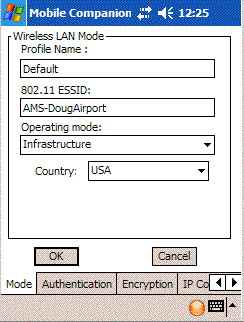
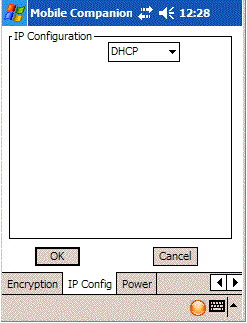
Create and Managing a profile

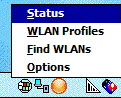
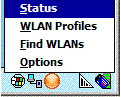
Using the wireless button, select Manage Profiles

  • Press on the screen until the popup window to 'Add' a profile appears. You will see a window titled Wireless LAN Profile Entry
  • Enter a Profile Name
    • (for example - ticket scanning)  If you enter your network name, it is less secure as the network name should be private.>
  • Enter the ESSID (Network Name) of your network.
  • Click Next
  • Select the following:
    • Infrastructure - For operating mode.
    • USA for country, or whatever your router will allow
  • Click Next>
  • WPA2 - Personal for Security Mode (this must match your router)
  • Click Next
  • Encryption Type and Pass Phrase are dependant on what your router settings are
  • Click Next
  • ipv4 address type, check all the boxes, especially obtain IP Address Automatically. However, if that doesn't work, give each scanner a unique IP address suitable for your network.
  • Click Next
  • For Transmit Power, change the settings to Power Plus
  • Click Next
  • Change Battery usage mode to CAM
  • Click Save
Now that you have a profile, time to select it and use it. Press and hold on the profile until the popup appears and click 'Connect'. The icon changes if you have active connection. You may need to 'x' out of this window to continue. Before you do, please refer to for last minute settings that you might need to check.
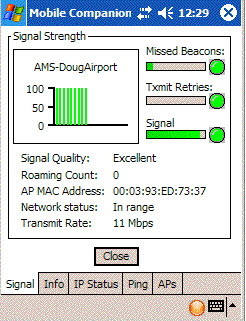
Testing the Signal

Pressuming you are connected, click the Wireless button again in the ticket scanning program.

  • Scroll down and select Wireless Status
  • Pick Signal Strength - it should be a green bar (you wuld prefer excellent as the signal strength). The higher the signal, the better/faster scanning will be.
    • If you have no signal strength, then go back to the top of this page and adjust your network parameters, IP settings, etc so that you can connect to the network
  • If you have signal strength, then click the 'blue' arrow at the top right of the screen to go back to the previous window
  • Select Option 3: IPv4 status . On this screen you should see that you have an ip address from your router. If not, start at the top of the help page, verify the profile and make sure you are connected to your network
  • Click the blue arrow to go back
  • Click the quit option to get back to the ticket scanning program

Testing the Network

  • Click the Wireless button on the ticket scanning setup window
  • Scroll down and select Wireless Diagnostics
  • Select ICMP Ping
    • It may have an ip address in there, so try ping it and see if that works
  • Enter the ip address of the apache machine
  • Click start test to se if you can communicate
    • If you cannot ping the Theatre Manager Apache Server, you need to adjust your router to allow communication from the scanner to the apache server. You may also need to adjust your Profile, so back to the top of this help page.
  • Once you are able to ping the Theatre Manager Apache machine successfully, Stop the test
  • Click the Back button at the top (or OK button at the bottom) until you get into the Theatre Manager Setup Window

Once the network settings are done, then the next step is to try and end to end test. You will need to start at least one Theatre Manager Web Listener. For the purposes of the test, it is better that only one be started.

Testing a Scan

On the Web listener window, there is a pop-up at the bottom middle of the screen beside the Show Detail button. This is the log Level selection which is normally set to Error. Change the setting to say Ticket Scanning . The Web Listener will now report more messages, including those sent by a scanner. It is helpful in the diagnostic process.

  • Set the Web listener to Ticket Scanning error log level
    • Take the scanner near the screen so you can watch the listeners responses
  • On the Wireless device,ensure you have entered the Theatre Manager Address correctly - it will typically look like 192.168.0.xx/TheatreManager/1 as per these instructions
  • Set up the port, user initials and password as required. We recommend leaving the Performance as zero (0) as it means scan any event for the current day.
  • Click the Save button on the Theatre Manager Setup Window. This takes you back to the main window.
  • Click the scan button to take yo to the normal scanning interface
  • Type in 12345678 as the ticket number. Then click the green arrow to test the scanner. It is very likely that you'll see a stop icon.
  • You should also see an error message on the scanner indicating any problems (eg, invalid password, wrong ticket number or what have you. Please look at the Theatre Manager web listener and see if the message on the log line is similar to the message on the scanner. You should also see lines in the Web Listener Log that are 'Checkin/Out' messages and may display things like 'Scanner Synchronized Time' etc.
  • If you see no messages and you got this far, then you probably need to go back and look at network and firewall settings -- assuming that the scanner is mated with the network properly

Real Life Testing

The final step in the test process is to take the scanners to locations where you will use them (if you see messages that the scanner is communicating in the previous section).

  • Print off several dozen real tickets for any event - enough that each ticket scanner has a few tickets to practice with. The tickets may be for the same seat or different seats - you just need some to get a continuous string of acceptances.
  • Set the performance parameter on the scanner to this event
  • Stand where you will be scanning
  • Check the signal strength as per the instructions above and make sure it is sufficient
  • Try scanning people into the venue and out of the venue
  • Test all scanners individually
  • Test all scanners working at the same time to make sure there is no interference or reduction in performance if all are working at the same time. If there is a reduction in speed, you might need to boost the wireless access point's antenna, or you may want another listener or two temporarily. This depends on number of scanners and wireless signal

Training

The scanners do work, as there are hundreds in use. However, we recommend that you have a training practice session a few days before using it on your first real event. Have the ushers come in and try it. Help them scan in and scan out people so that they are familiar with the basic operation.

Then try the scanners on a small event first - it is almost a certainty that there will be minor problems when real patrons are involved. Patrons bring tickets to the wrong event and your ushers need time to adapt to the controls that a scanner brings.

Once you have a few smaller events under your belt and feel comfortable, then you are ready for all events.

Scanner Prefs-Motorola MC50/55

Google bought Motorola in may 2012 and subsequently sold it to Lenovo. These scanners are no longer PCI compliant due to low encryption capabilities.

Note: the Motorola scanners are no longer supported.

Replacement scanners are the linea pro, which is also more reliable and versatile.

Accessing Setup 
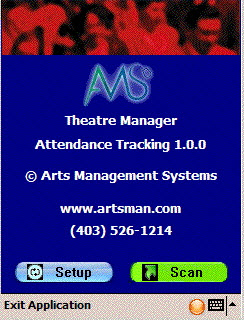
Once the software is installed and the scanner is mated to the network, you can click the start menu, programs and the click on the AMS Tickets application.

It may take a couple of seconds or so to start as the scan program is synchronizing time with a time server and making sure the clock on the program is set properly. When it does start, you will see the screen at the side. Now we can set up scanning for an event / play. This must be done in advance of each performance that you are scanning tickets for.

All that needs to be done is set up some parameters.

Click the 'Setup' button on the screen.

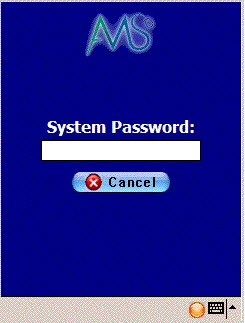
  You will be asked for a system password to change the settings for the performance. Type '123' (this can be changed) and once the password is right, the next window will automatically appear.
Sample Setup 
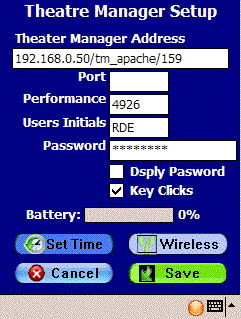
When you open the preferences window using either of the two methods above, you have some fields that must be filled in. These are below (Press the orange button on the keyboard twice to turn the num-lock on mode):
  • IP address: this is the URL address of the web listener that will be responding to checkin and checkout requests. You can enter the inside address of your nginx server or the server/firewall. The address will look something like 192.168.xx.xx/TheatreManager/1 or tickets.yourvenue.org/TheatreManager/1.
    • the tickets.yourvenue.org is the same value you place in company preferences under the web settings.
    • The '1' is the company outlet number. In multi-outlet venues, this number will be different for each outlet.

    The default configuration in apache is to elevate requests to https. You will have to change the apache httpd-balance.conf file to prevent this is you have these scanners.
  • Port: this is the port number that the web listener 'listens on'. Normally blank
  • User Initials: this is the upper case initials for the user id in Theatre Manager doing the scanning. This person does not need to be able to log on to TM for any other reason. You might wish to create a generic ID for this purpose (because the password in this screen is clear text)
  • Password: the password used for these User Initials to log on to Theatre Manager.

    Passwords are case sensitive per PCI compliance. Please ensure you get the case correct.

  • Performance #: You can enter the performance number that you are scanning for or leave it empty. Both options affect which tickets will be accepted by the scanner. Please refer to the scanner rules for more detail.
  • Other Buttons:
    • Key Clicks: check this to that you receive audible feedback from typing numbers.
    • Set Time: forces the time on the Windows Mobile device to match the time on the Web Listener. Effectively this will be the same as the time on the database server. If you do not set this, it will occur automatically each time you start the ticket scanning program.
    • Wireless: opens the wireless setup information as per the top of this page.
    • Cancel: does not save the changes to the memory of the device
    • Save: saves the changes.
 

There is one other preference that can be set before we begin scanning. This indicates whether we are scanning the person into the venue, or scanning them as they leave to indicate that the ticket was not used

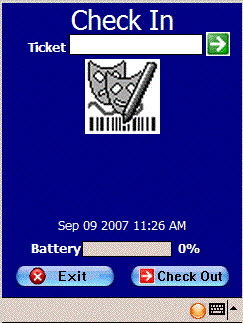
You can access this option directly from the main screen where the scan & setup buttons are. Click the 'Scan' button and you will see a screen like the one on the left.

At the bottom is a 'checkout' button with a red arrow. This means the mode is currently 'check in' and you click this button to change the mode to 'checkout'. It will also change the arrow at the top from green (checkin mode) to red (checkout mode)

If there is a green arrow with 'check in' at the bottom, then the current mode is 'checkout' mode. Click the 'Checkin' button to change the mode to checkin.

Theatre Manager Server Settings For Motorola Scanners

The Motorola Scanners rely on port 80 to scan tickets. The Theatre Manager Server, by default, elevates all traffic to Port 443. For this reason additional settings need to be added to the Theatre Manager Server through the Director to allow for scanner communication on Port 80.

Q: Why are there specific settings for the Motorola Scanners?

A: The Motorola scanners do not support secure connections to the Theatre Manager Server web server. The process below outlines how to setup an unencrypted side-entry point to the DMZ web server, while still maintaining a secure connection to the primary web server. If you’d like to have end-to-end security then please email sales@artsman.com for information on the updated, and fully secure, iOS scanners.

Settings

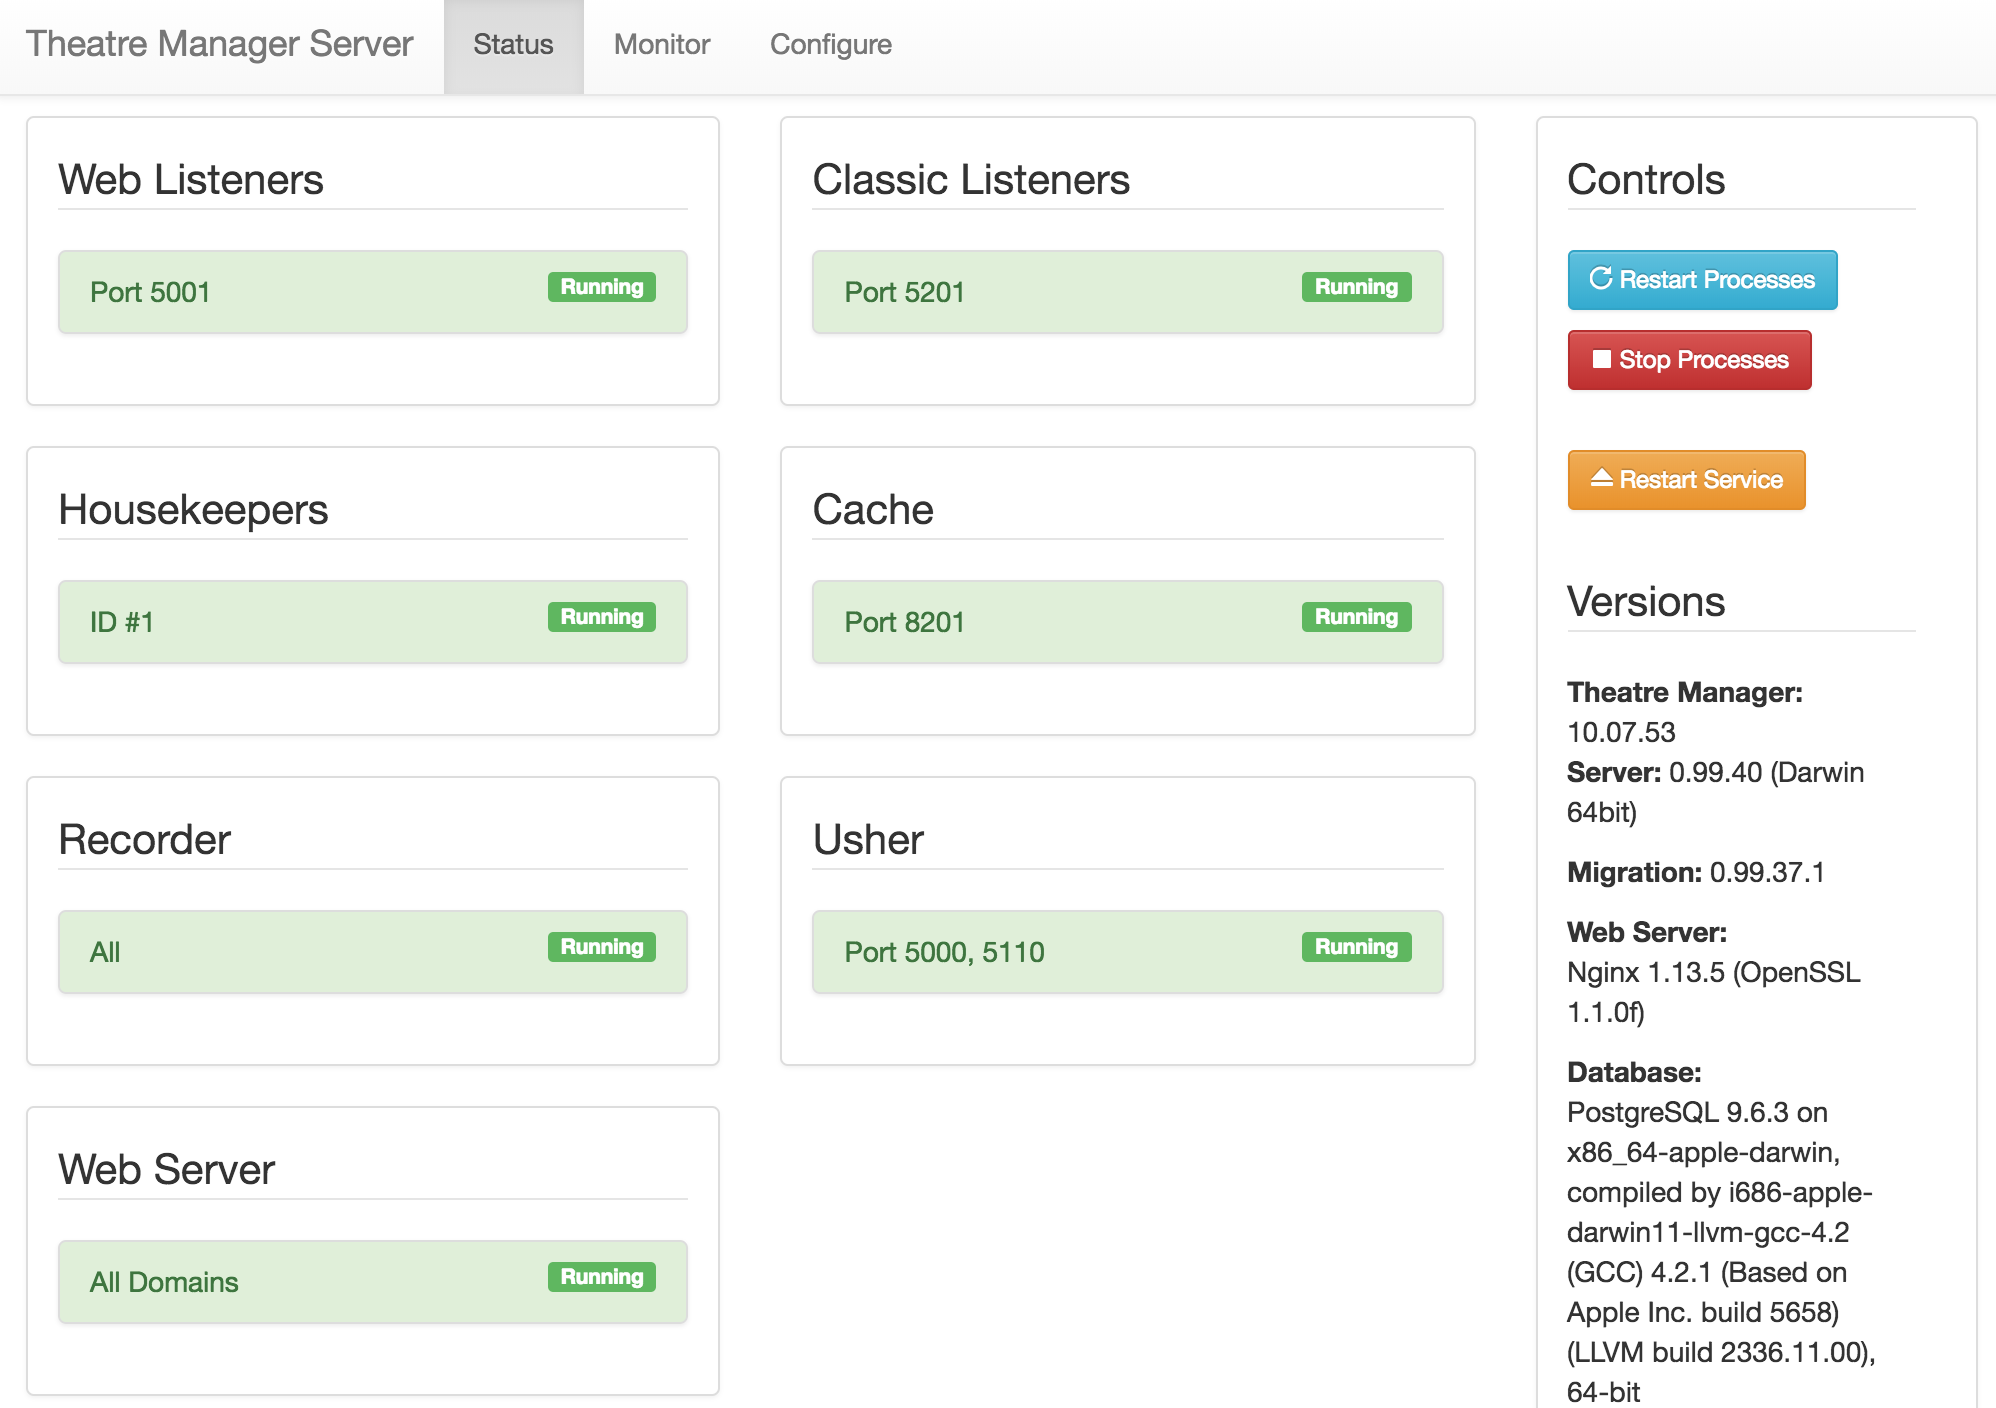
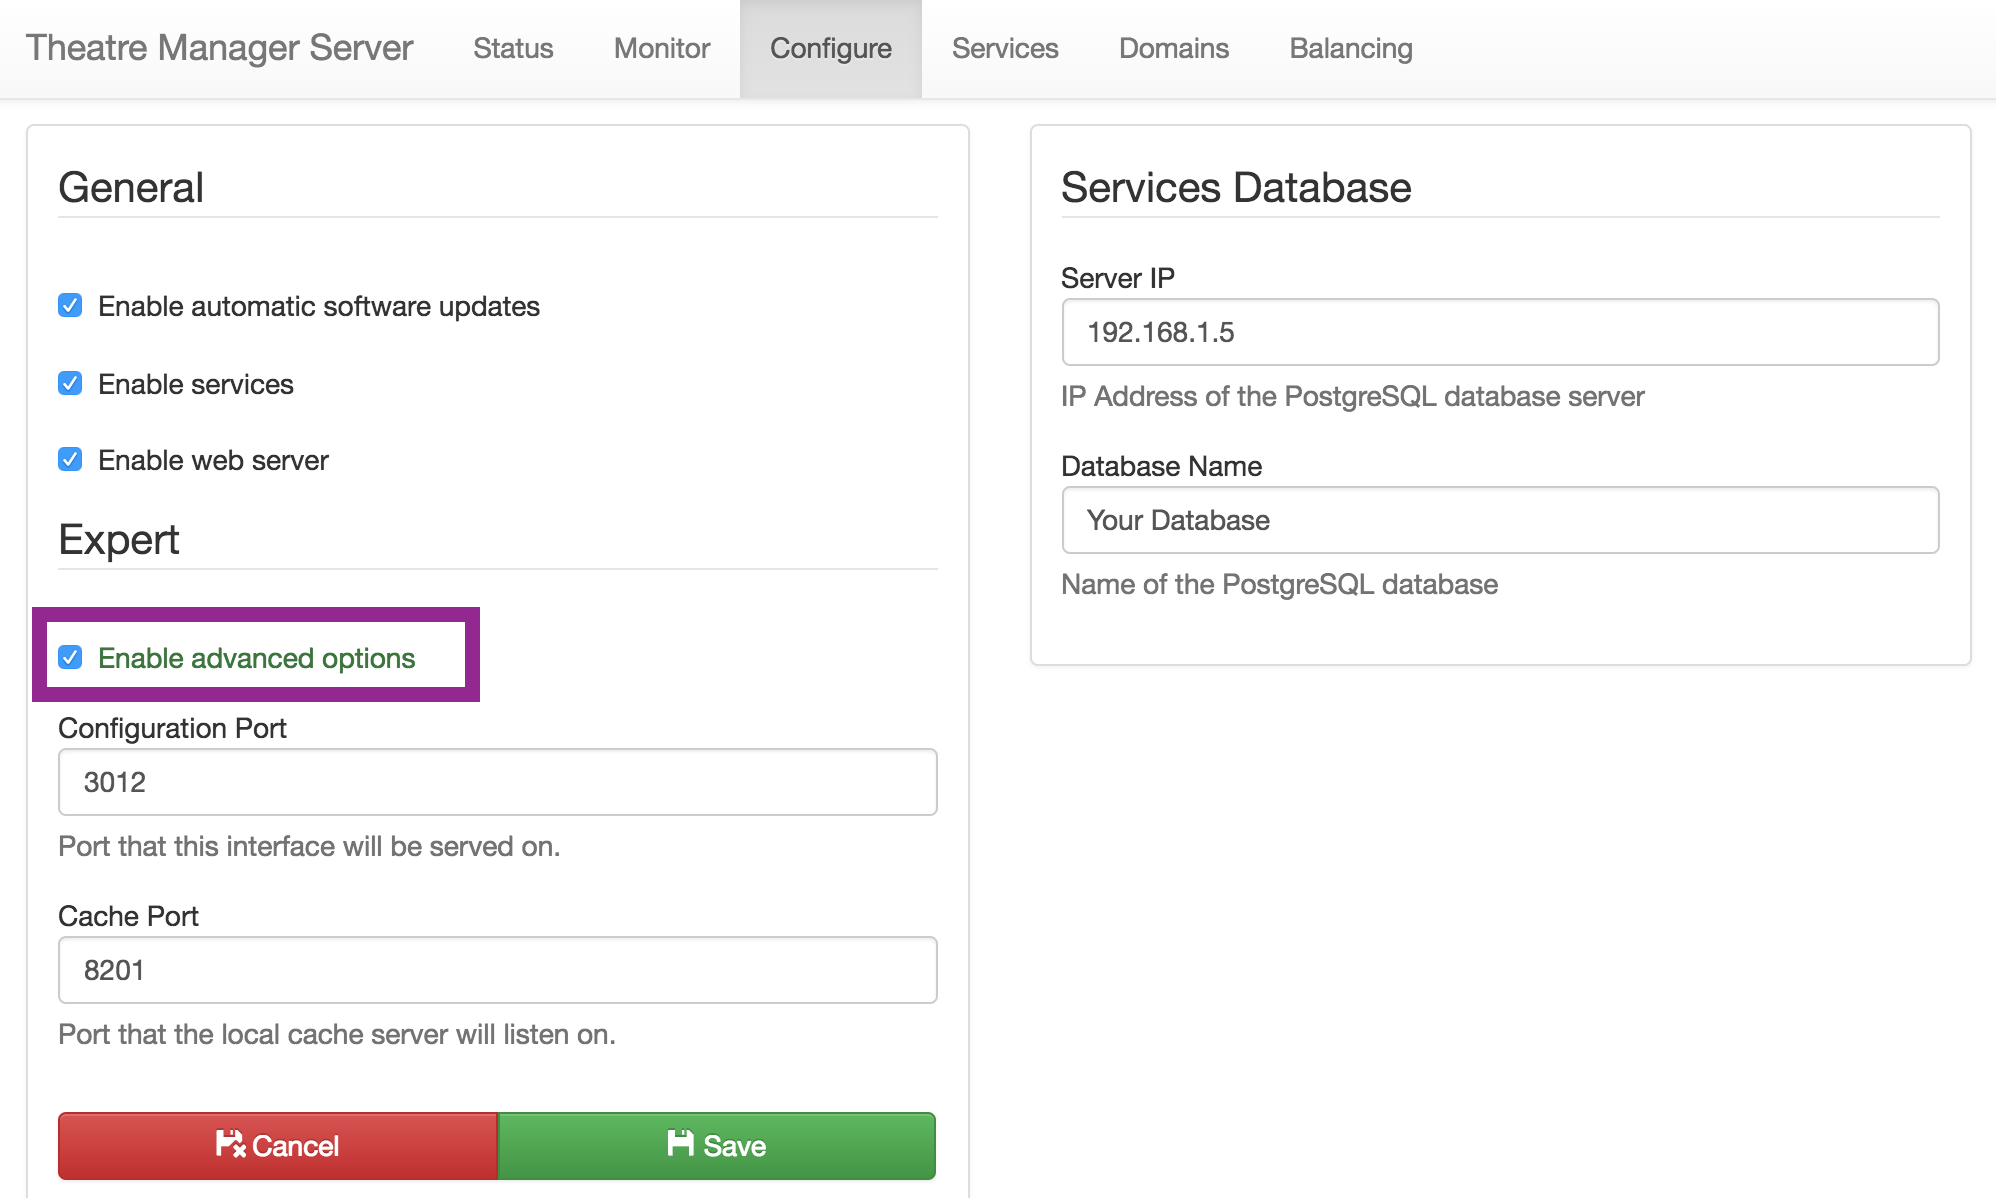
  1. On the Web Server computer, open the Theatre Manager Server Director in a browser by visiting http://127.0.0.1:3012

  2. Select the Configure tab.

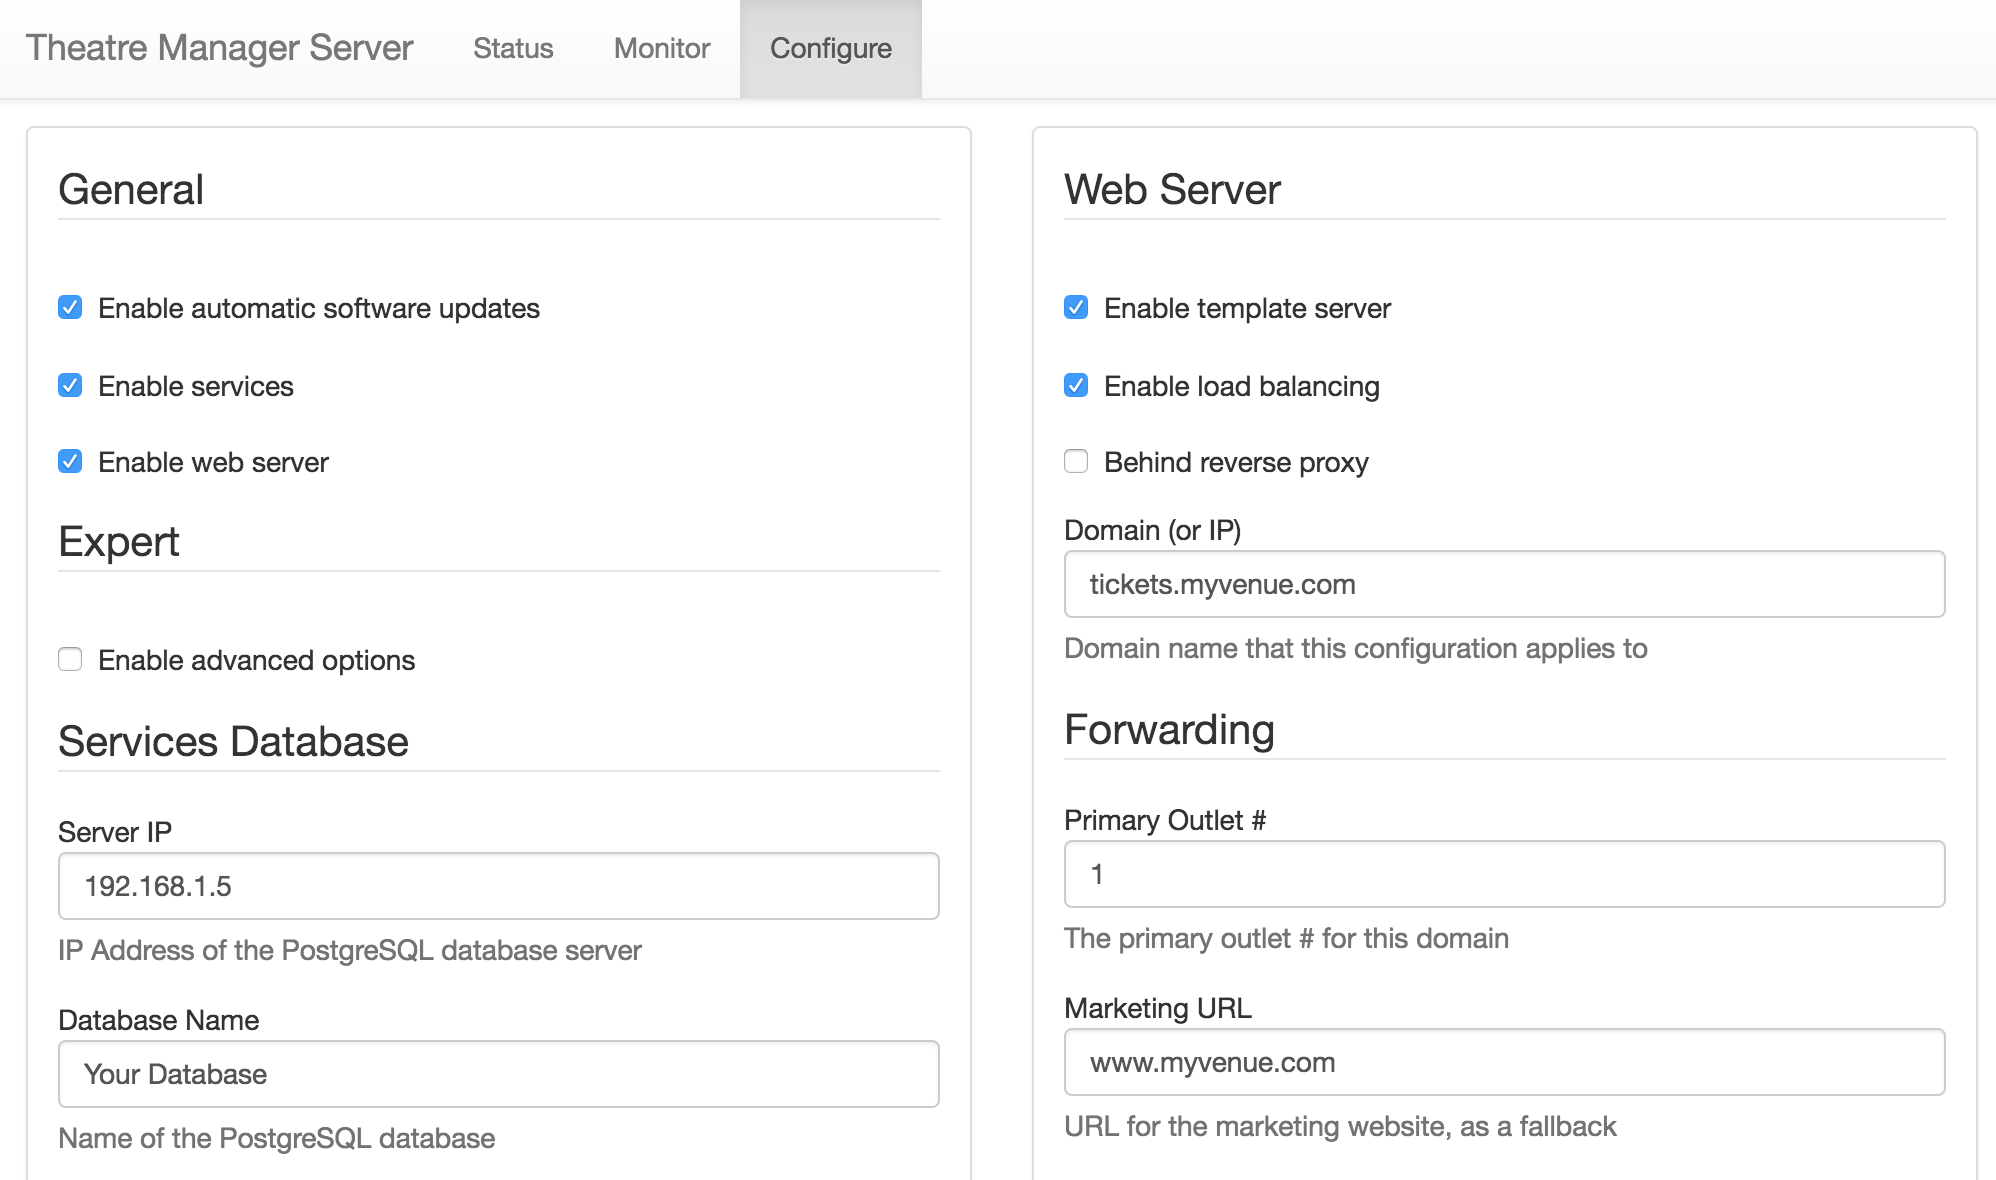
  3. Check the box for Enable advanced options and click Save at the bottom of the left column. This will open up more tabs within the Director window.

  4. Select the Domain tab at the top of the Director window.

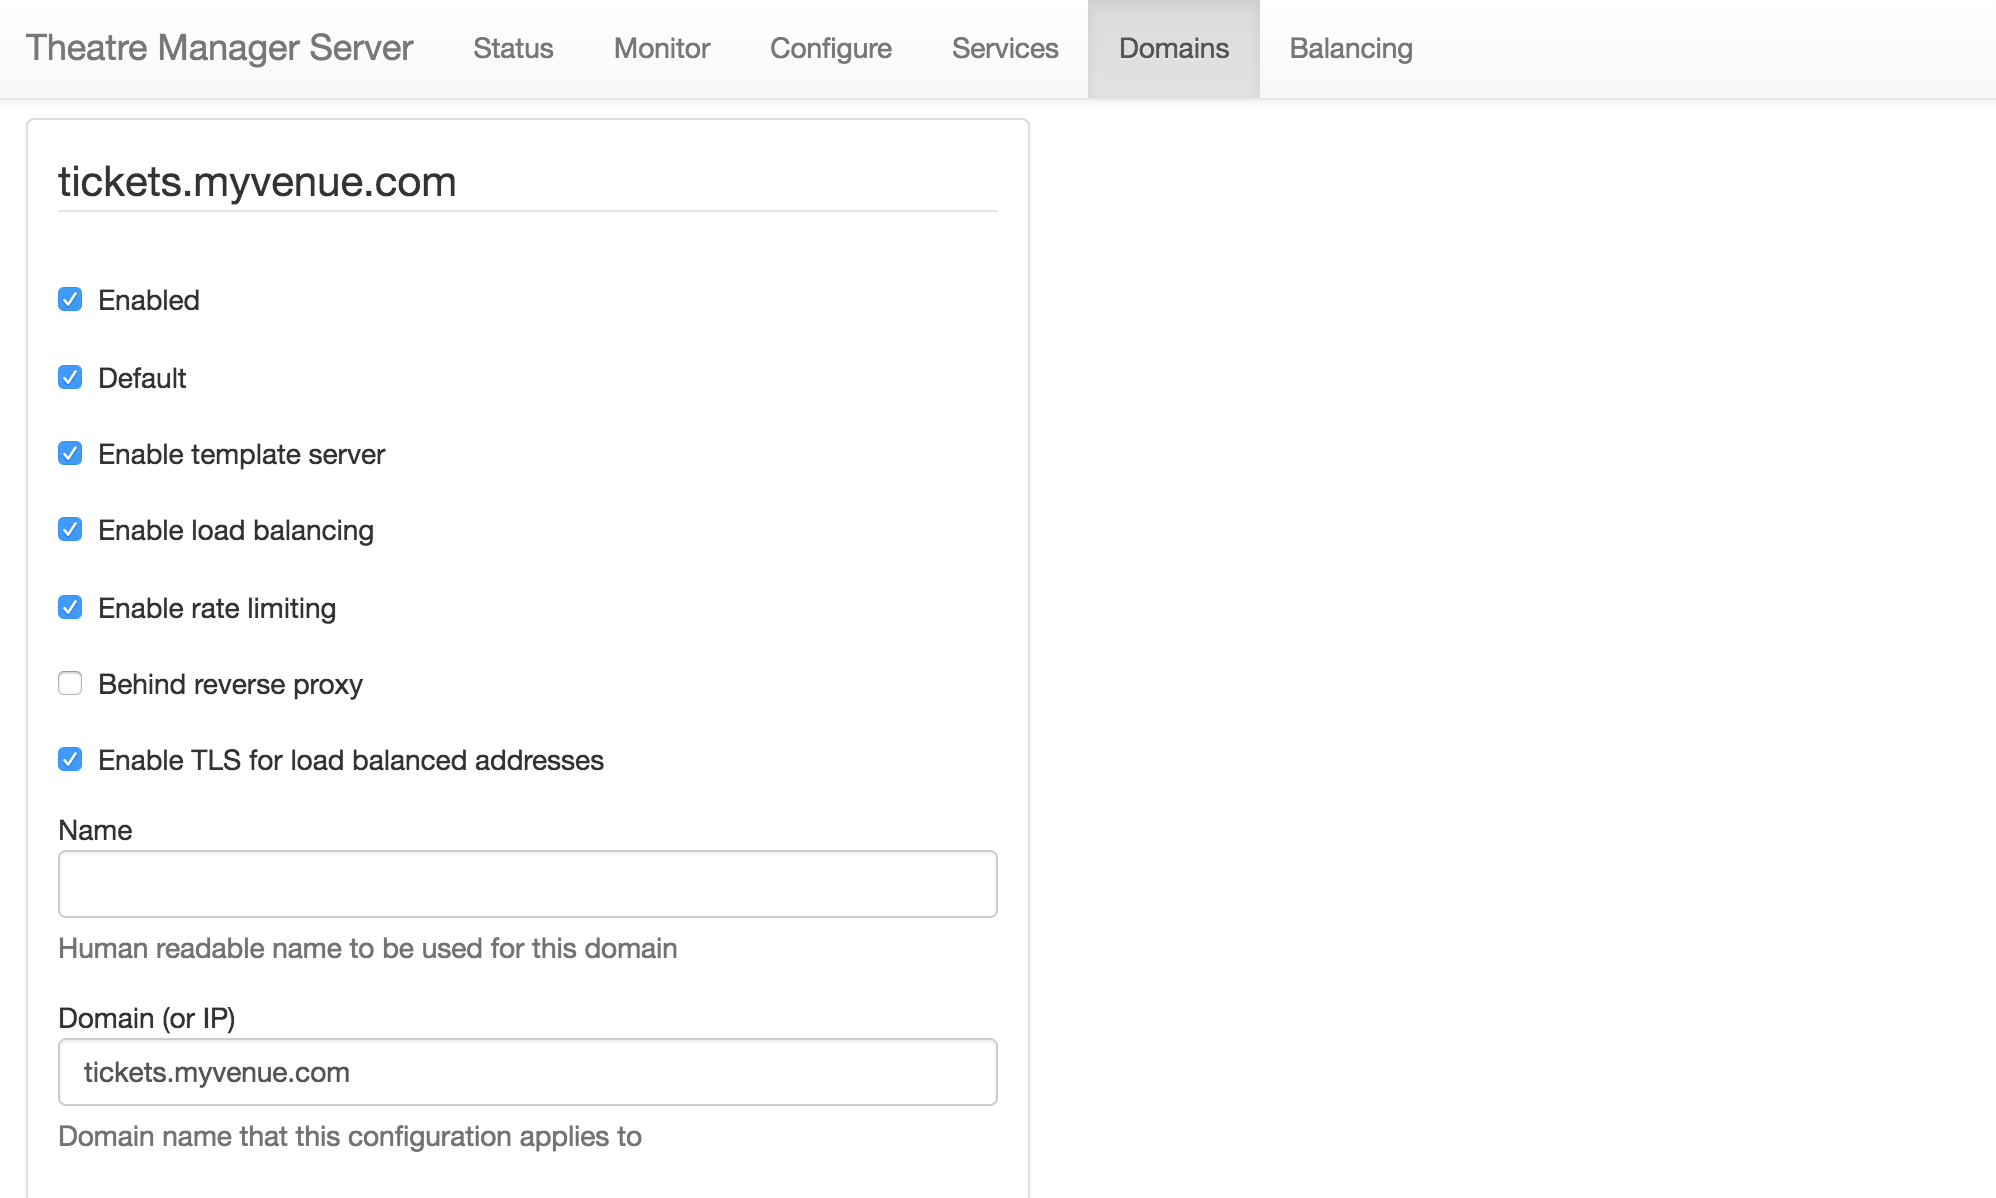
  5. Scroll to the bottom of the window and click the Add Another Domain button.
  6. Fill in the following details for the new domain:
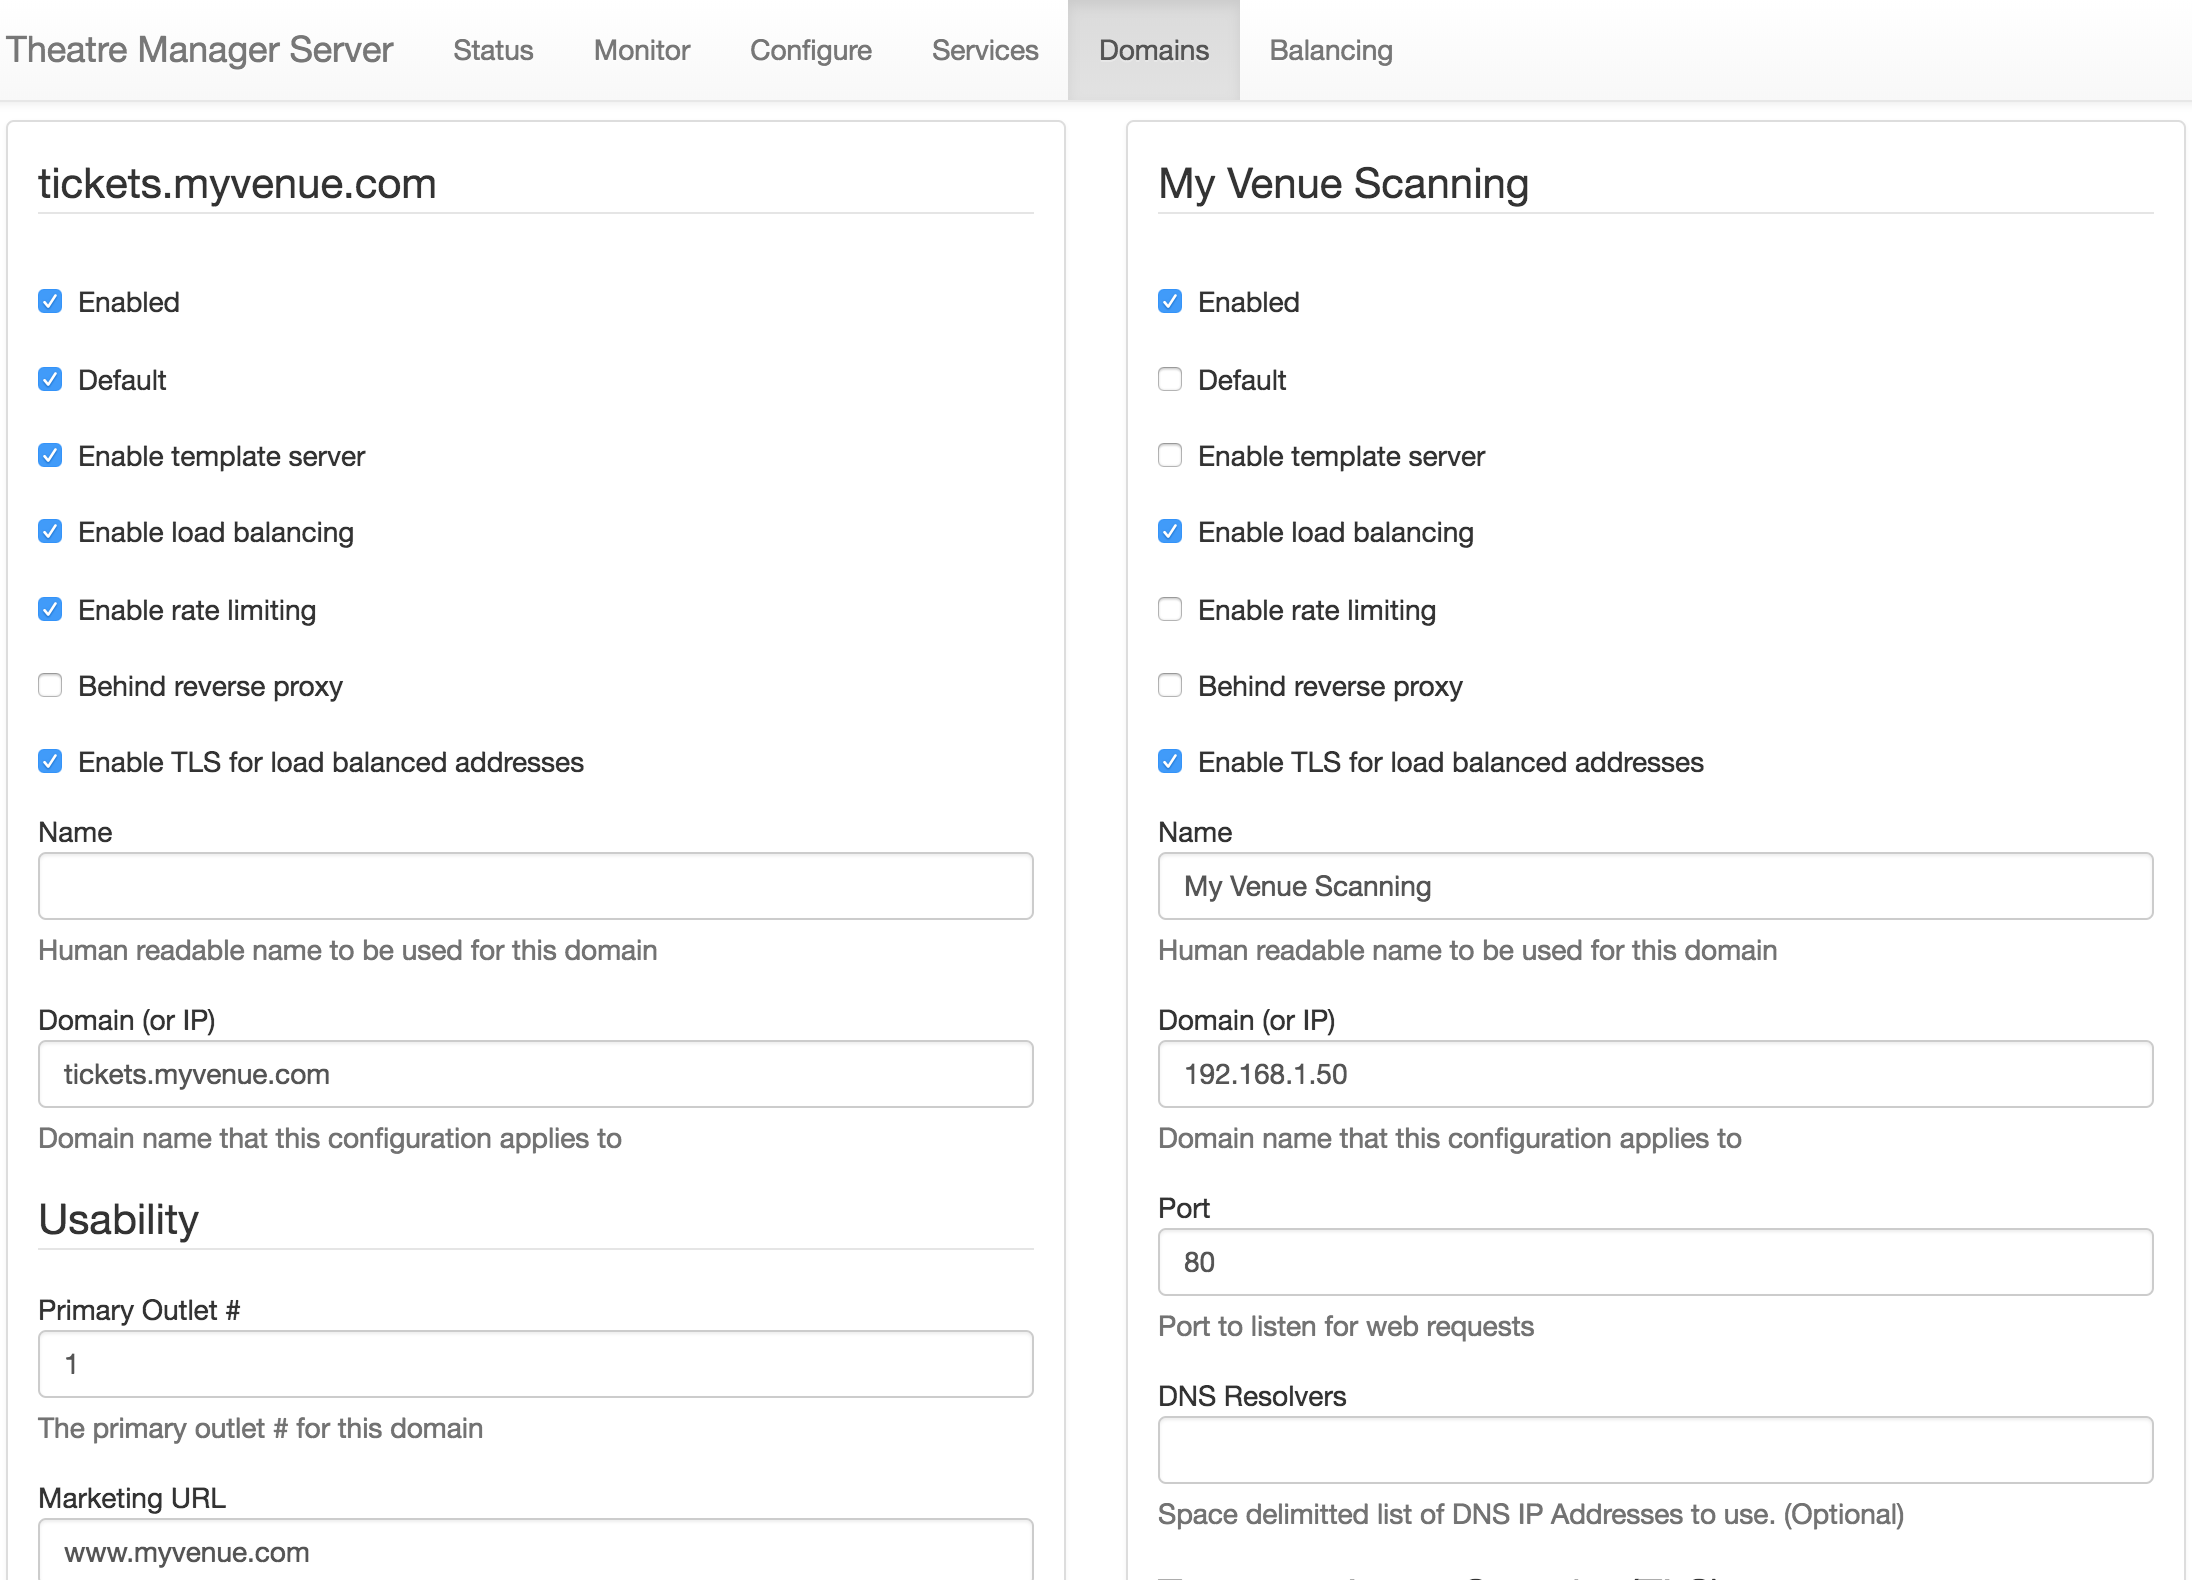
    • Check the Enabled box.
    • Check the Enable load balancing box.
    • Check the Enable TLS for load balance addresses box.
    • Enter a Name for this connection. It may be something like Your Venue Scanning.
    • Enter the Domain (or IP). This should be the IP address of the Web Listener.
    • Enter 80 into the Port field.
    No additional information needs to be entered below this.
  7. Click the Save button at the bottom of the right column.

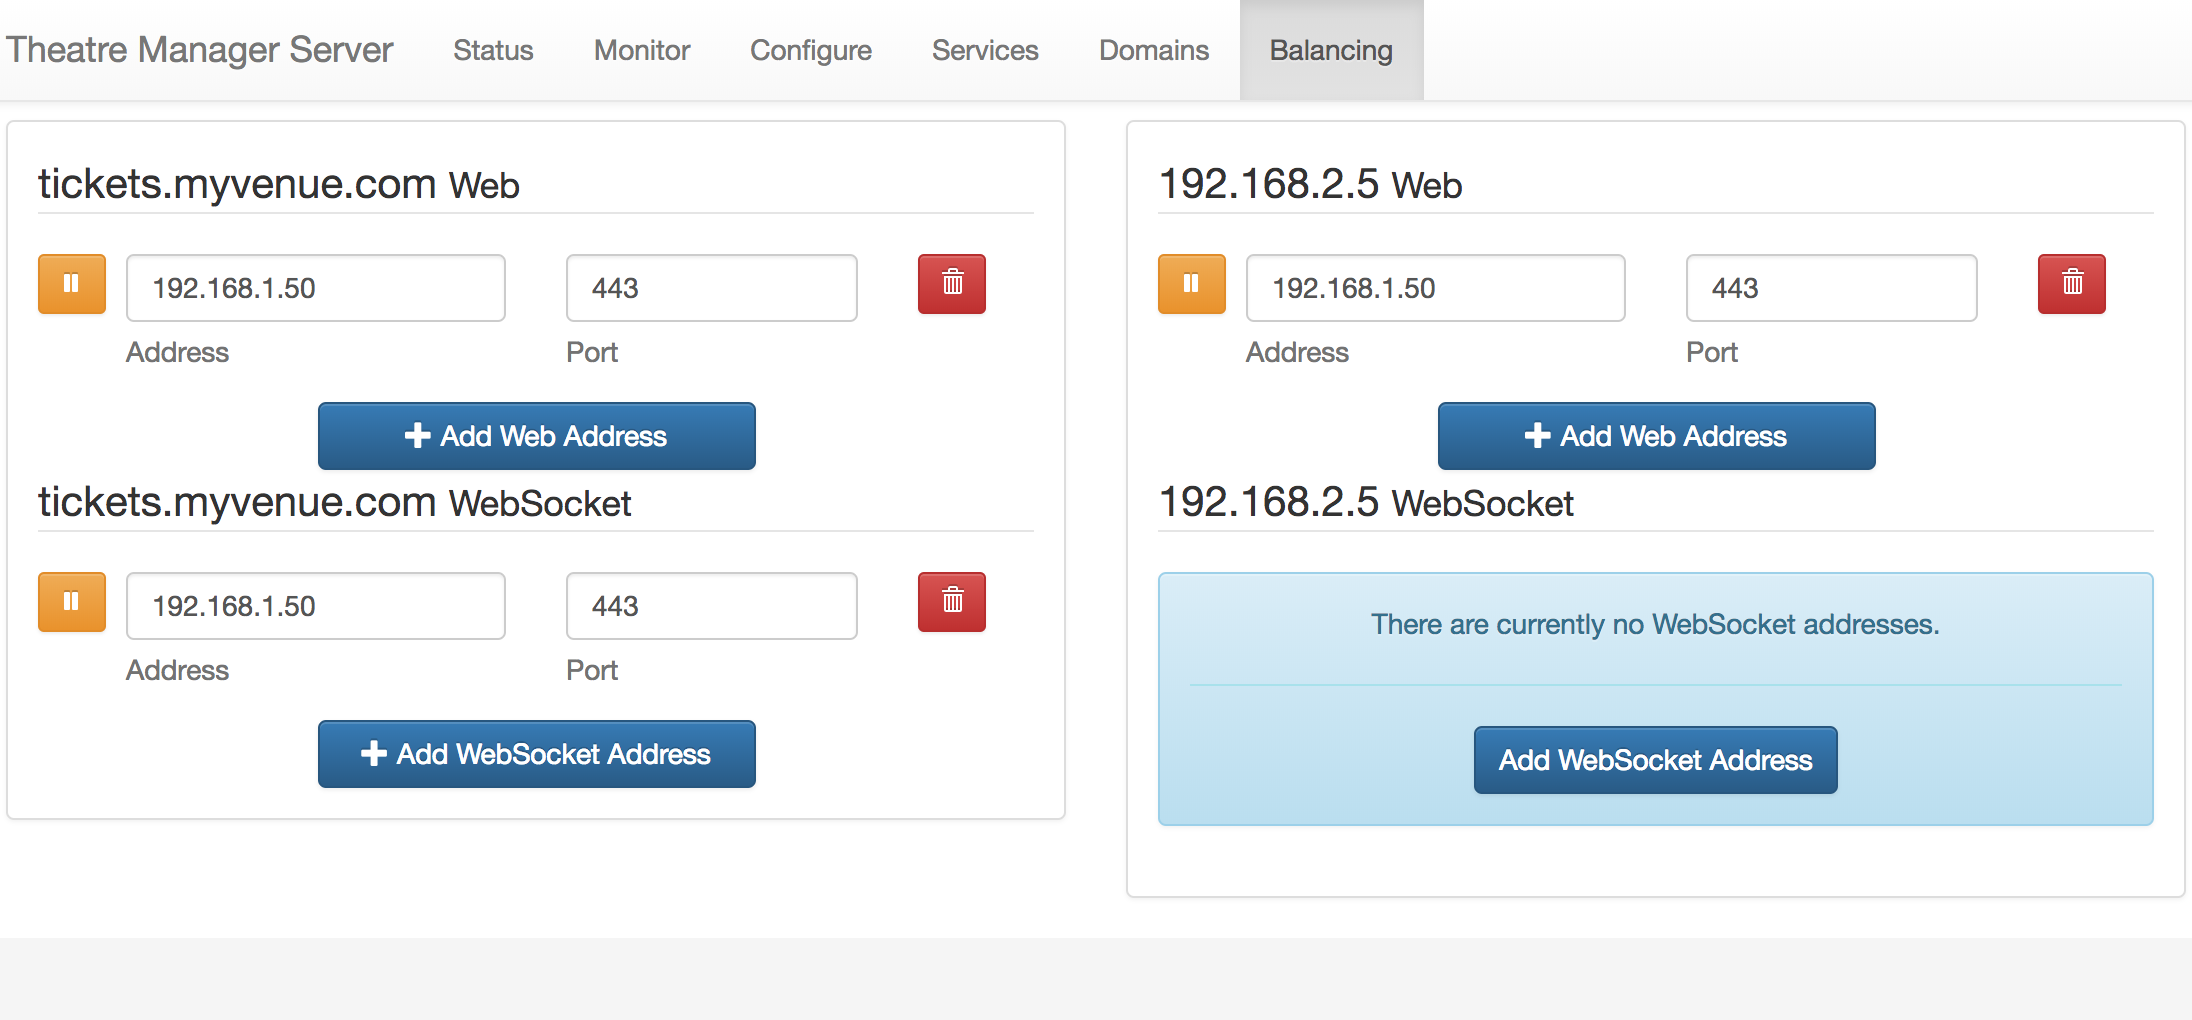
  8. Select the Balancing tab at top of the Director window.

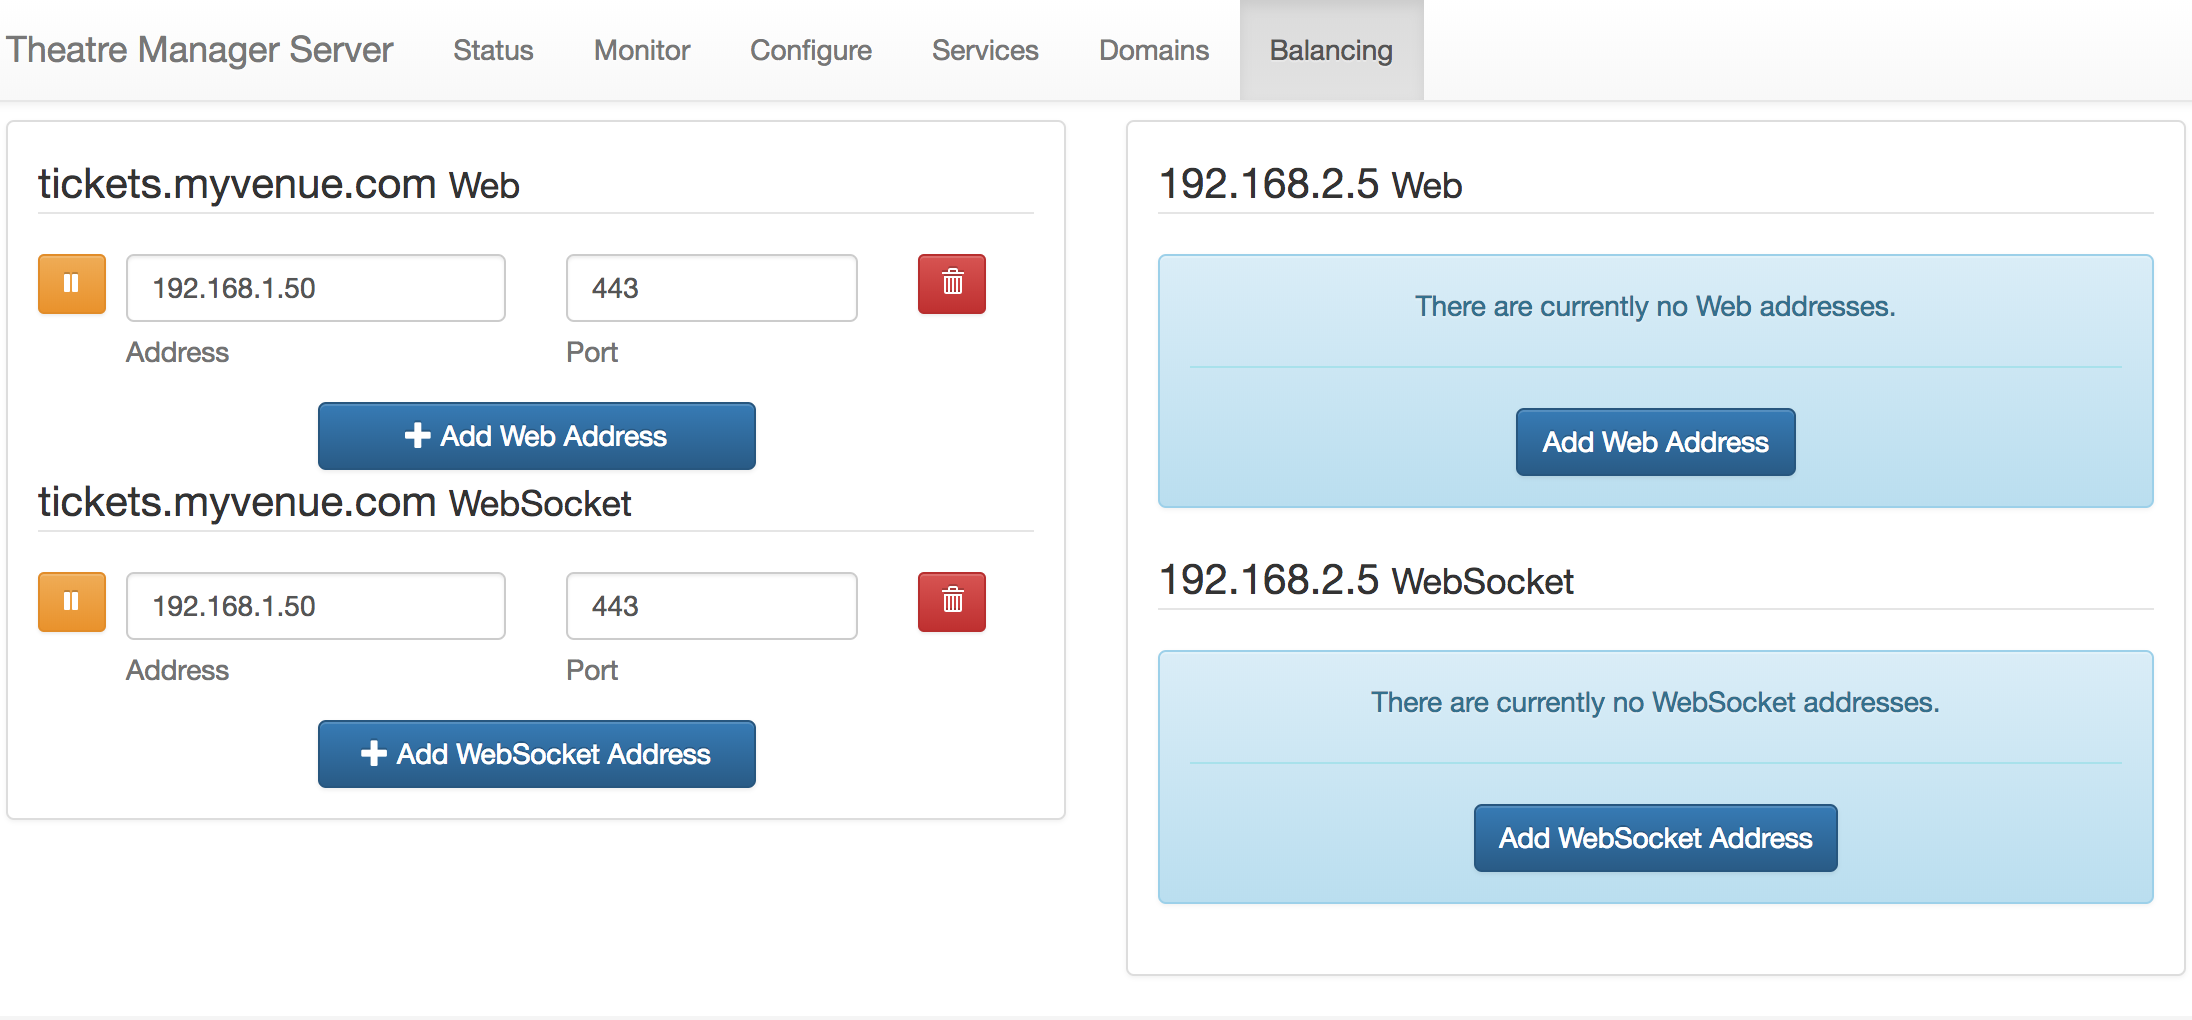
  9. Click the Add Web Address button under right column.
  10. Enter the following details:
    • Set the Address to be the IP address of the Web Listener.
    • Enter 443 in the Port field.
    • Click the Save button at the bottom of the right column.

The Theatre Manager Server is now read to scan tickets using a Motorola Scanner.