Detail Editing Subwindow
When you click on one of the tasks on the Gantt chart, or click the Detail button on the toolbar, the detail editing subwindow displays at the bottom of the project window.
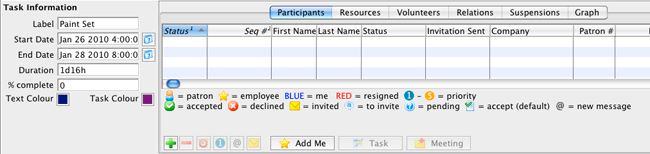
The lower part of the window is divided into two sections. The left side is Task Information.
- Click here for more on Task Information.
The right is made up of six tabs. They are:
- Task Participants - Click here for more information on Task Participants tab.
- Resources - Click here for more information on the Resources tab.
- Volunteers - Click here for more information on the Volunteers tab.
- Relations - Click here for more information on the Relations tab.
- Suspensions - Click here for more information on the Suspensions tab.
- Graph - Click here for more information on the Graph tab. .
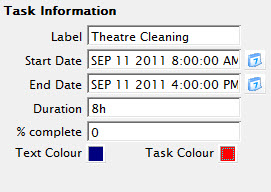
Task Information
With any items in this window, as soon as you leave a field or make a selection the information is saved and the screen is updated and saved for the task.
In this window you can change:
| Label | The Label given to the Task. |
| Start Date | The starting date/time for the task. Enter the date and time or click on the Calendar  button to make any change. button to make any change. |
| End Date | The starting date/time for the task. Enter the date and time or click on the Calendar button to make any change. |
| Duration |
The duration of the task in the format 4w 3d 2h 1m. Adjusts as the starting or ending dates and times are changed. |
| % Complete | Indicates the amount of the task that is complete (as entered here or in the task window). |
| Text Colour |  The colour of the text that displays on the task bar in this window. Click the colour box to change the colour. The colour of the text that displays on the task bar in this window. Click the colour box to change the colour. |
| Task Colour | >The Colour of the task bar displayed in this window. Click the colour box to change the colour. |
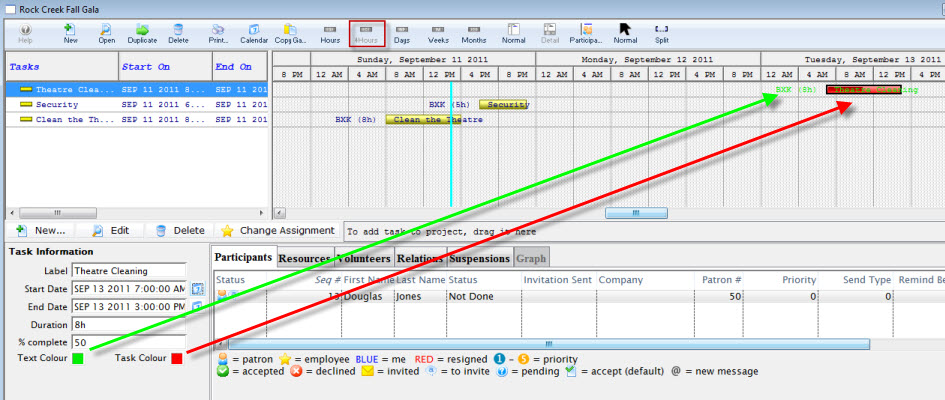
Task Participants
This is the same subwindow used in the Task Detail window. You can attach people to the task and set other information appropriate for the participants in the task.
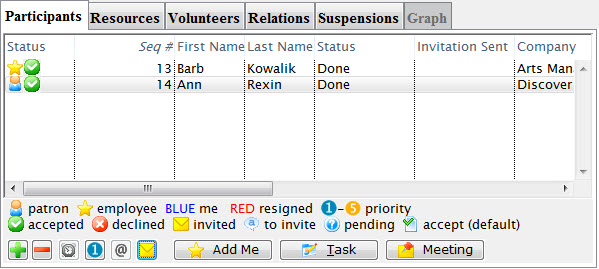
With any items in this window, as soon as you leave a field or make a selection the information is saved and the screen is updated.
Click here for complete information on this window and its funtions.
Resources
This is the same subwindow used in the Task Detail window. You can attach resources to the task and set other information appropriate for the resources in the task.
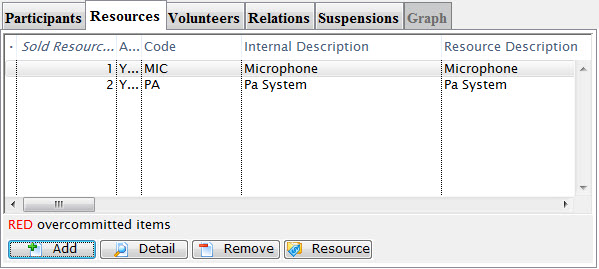
With any items in this window, as soon as you leave a field or make a selection the information is saved and the screen is updated.
Click here for complete information on this window and its funtions.
Volunteers
The Volunteers tab displays volunteers for the currently selected task.
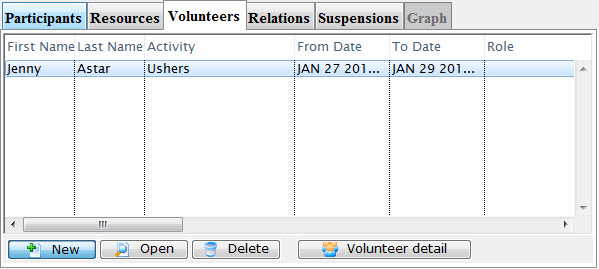
Parts of the Volunteers Tab
 |
Click the New button to add a volunteer to the task. Click here for information on adding a volunteer. |
 |
Opens the Activity history window for the selected volunteer. Click here for more information on Activity History. |
 |
Clicking the Delete button, deletes the selected volunteer history record. |
 |
Opens the Volunteer History record for the selected volunteer. Click here for more information on the Volunteer History Window. |
In this tab, you can add new or delete volunteers, and view the volunteer record.
With any items in this window, as soon as you leave a field or make a selection the information is saved and the screen is updated.Add a Volunteer
You can add participants to a task in this window. To do so, you perform the following steps:
- In the Volunteers tab, click the New button.
The Volunteer List window opens.
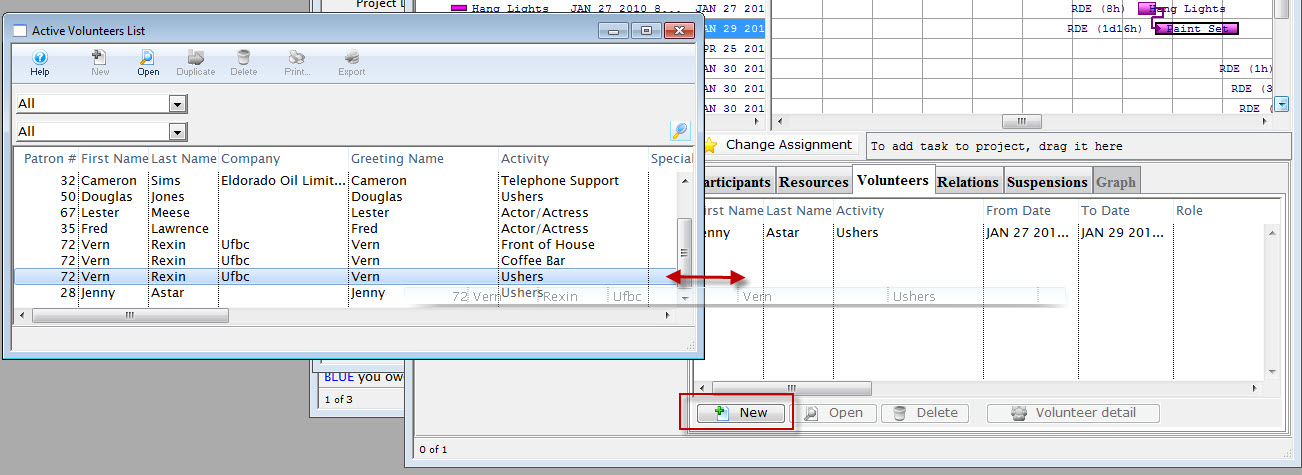
- Choose the volunteer to add to the project task and "drag" and "drop".
With any items in this window, as soon as you leave a field or make a selection the information is saved and the screen is updated.
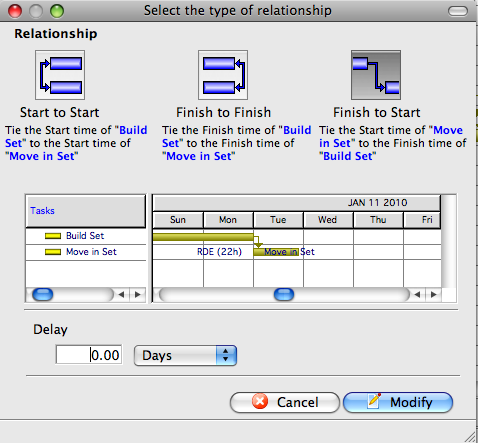
Relations Tab
This window shows you the relationships between different tasks. In this tab, you can only edit or delete relationships, you cannot add them.
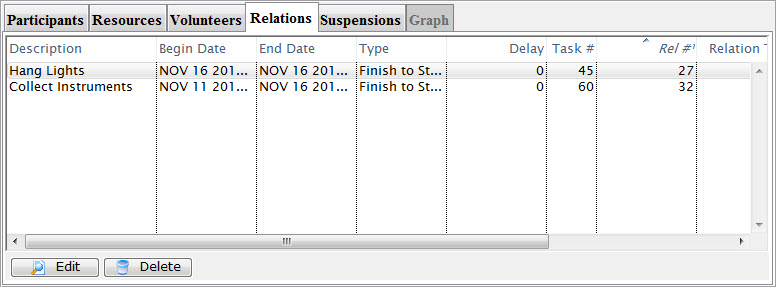
This window displays the types of relationships available between tasks. You can select which type and indicate any delays.
If you select Start to Start, the starting time of one task is tied to the starting time of the other. In other words the starting time of the second task cannot start any earlier than the starting time of the first task.
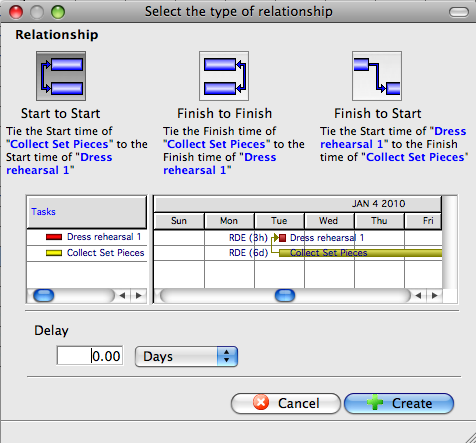
You can also implement a delay such that a certain number of days, hours, or minutes must elapse before the second task begins.
If you select Finish to Finish, the ending time of one task is tied to the ending time of the other. In other words the ending time of the second task cannot start any earlier than the ending time of the first task.
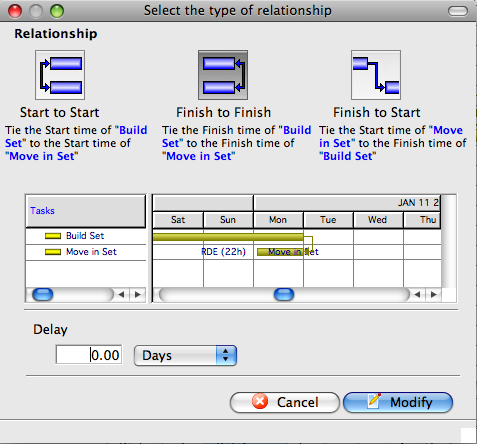
If you select Finish to Start, the starting time of one task is tied to the ending time of the other. In other words the starting time of the second task cannot start any earlier than the ending time of the first task.
Once these relationships have been set up, as you drag one task or the other in the Gantt chart, the same temporal (time-based) relations are maintained. Moving or changing starting or ending dates of one task may move or change dates on another task, based on the relationships you have set up.
A task can have relationships set up between any number of other tasks, but there can only be one relationship between any two given tasks.
With any items in this window, as soon as you leave a field or make a selection the information is saved and the screen is updated.
Adding and Deleting Task Suspensions
At this time, you can only have a single suspension of a task. If you need more than that, break the task down into multiple tasks.
To add a suspension to a task, you perform the following steps:
- Open the project by selecting it from the Project list. Then, in the Project window, click the Gantt
 button.
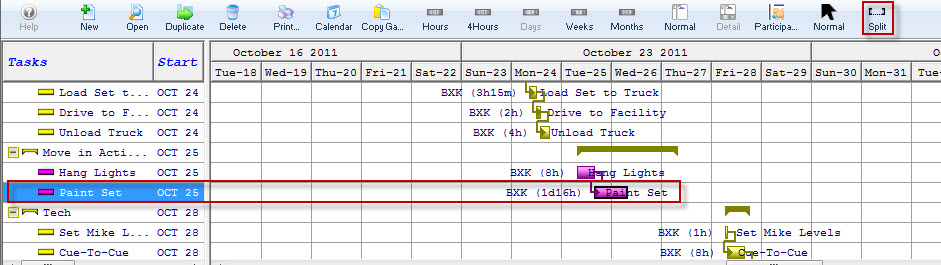
- In the Gantt Chart, highlight the task to be split. Use the right click context menu selection split
 or click the Split
  button on the toolbar / ribbon bar.
The edit details screen opens to the suspension tab.
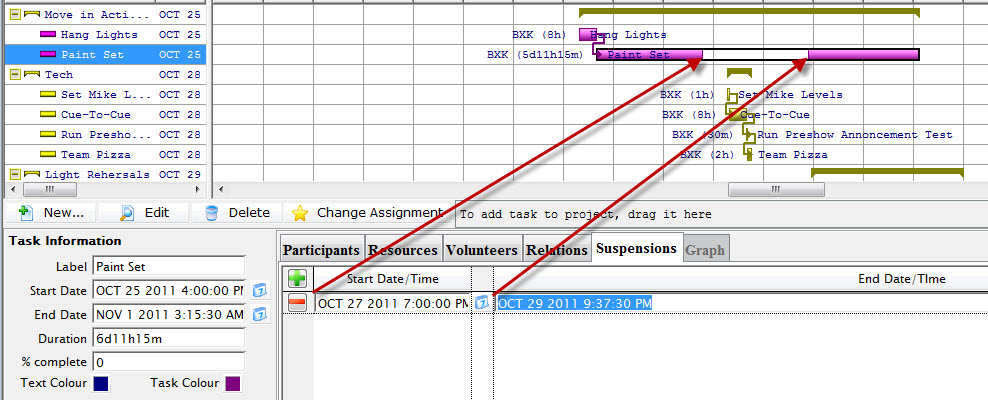
The task information containing the details for the suspension is displayed on the left.
- Make any adjustments.
They are automatically reflected in the Gantt Chart and the date ranges on the left.
You can edit a suspension by editing the date/time for the starting or ending of the suspension or by clicking on the calendar and making your selection. You cannot enter dates/times outside the boundaries of the task itself.
Once a suspension has been created, you can drag the bounds of the suspension from within the Gantt chart.
With any items in this window, as soon as you leave a field or make a selection the information is saved and the screen is updated.
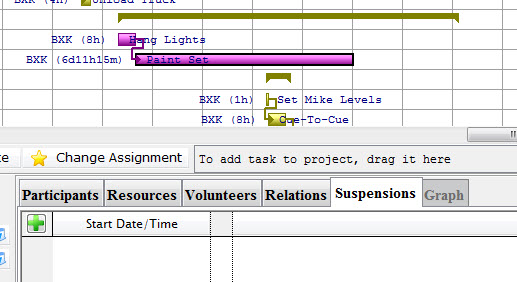
Delete the Suspension
To delete a suspension, you perform the following steps:
- Open the Gantt Chart and click on the suspension you want to delete.
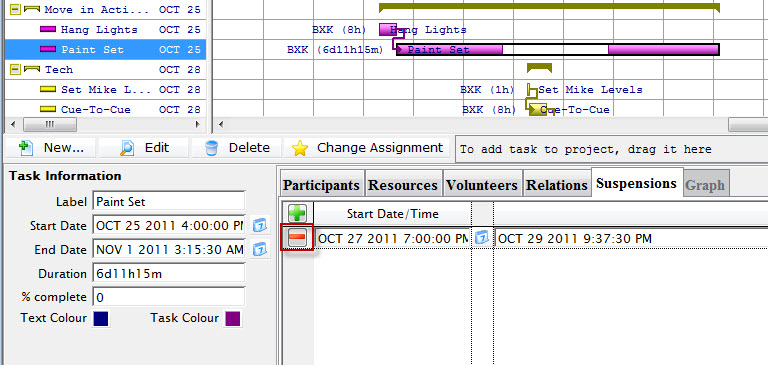
The Detail Editing subwindow opens to the suspension.
- Click the Remove
 button.
A confirmation dialog opens.
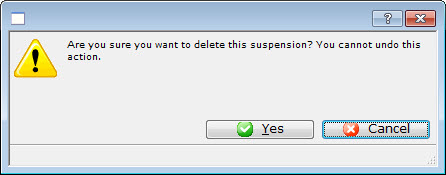
- Click Yes to remiove the suspension.
Graph
Graphing is not yet available.