Employee Till Balancing
The Till Balance feature allows you to have all employees balance their own tills at the end of each shift. This speeds up the End of Day and removes the room for error when employees may have already left for the day.
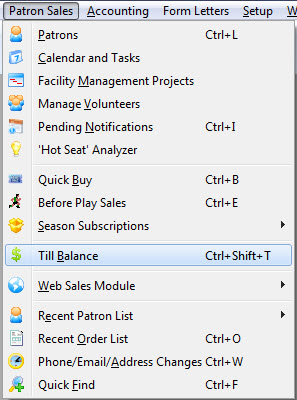
- Open the Till Balance window.

- If this employee has had one or more shifts since the payments have
been deposited, the following window will appear (if not, proceed to step
4).
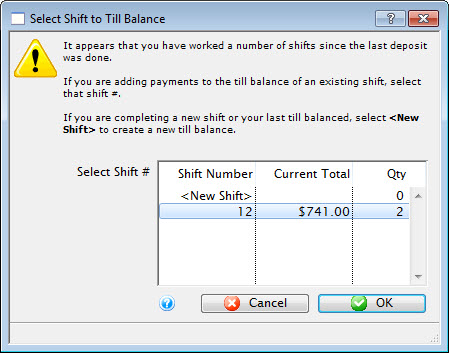
When a shift's till is created, it is assigned a unique number. If the employee has entered one or more payments since the last time they balanced a till, and the payments have not been posted in the end of day process, the employee has the option to:
- Assign the payments to the same till as they previously balanced. This means that all money taken across a number of days is simply being lumped together into one till #.
- Create a new shift till for the unbalanced payments. This means you are putting new money into a new till #.
- A combination of the above by putting some money into an existing till and the rest into a new till. You can do this by
- selecting the existing till
- removing all but the 'new' payments you want to add to that existing till
- indicate that the till now balances with the selected payments.
- Anything not balanced in one till will be left to the balance in another till.
- Anything marked as not balanced in an existing till will be taken out of that till. It can then be put into another till (new or otherwise), effectively providing at way to move money between employee till numbers.
-
Select the Shift # and click the OK
 button.
The Till Balance window opens. For more information on the Till Balance window, click here.
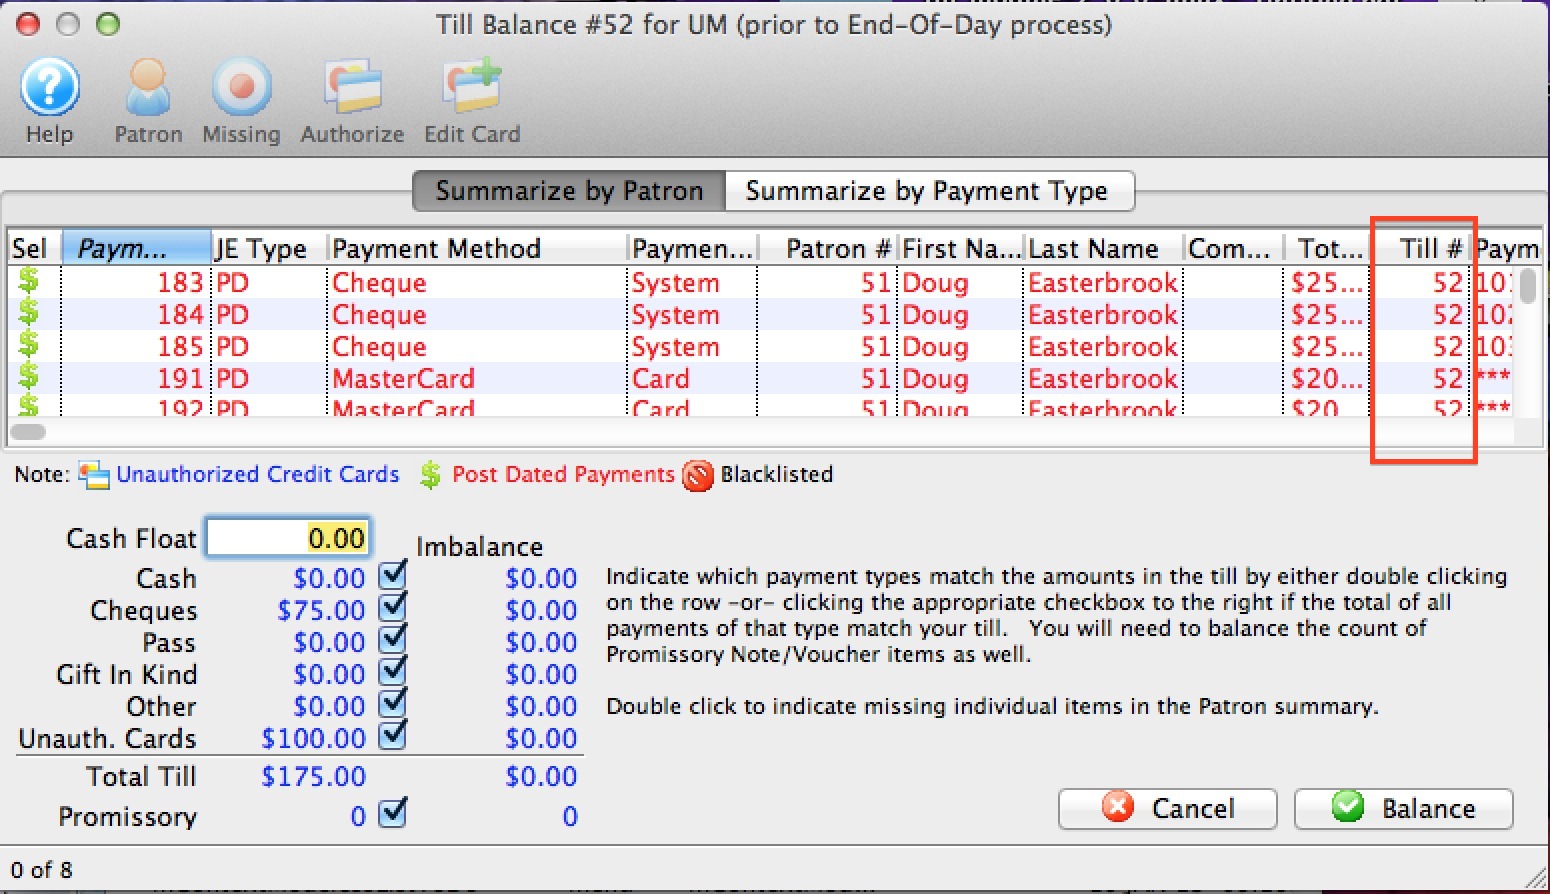
- Once all payments are marked as being in the till a number should appear under the Till # column. The Imbalance column at bottom left will also have $0.00 for each item.
- Click the Balance
 button.
- Mark which report to print and click the Reports
 button.
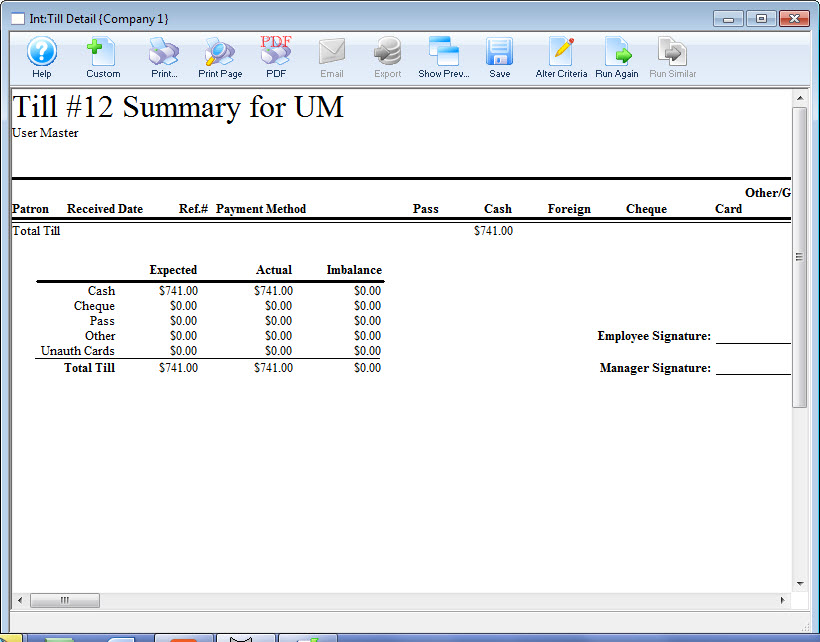
The Till Summary is suggested.
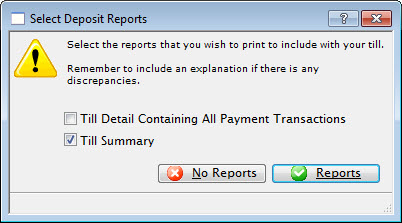
- Bundle the Till Report with the monies that were received by the employee until the time that the deposit is run.
Till Balance Window
 |
Only physical payment methods where this is a chance of discrepancy appear in till balance. This includes Cash, Check, Pass/GC, and other payment methods. The reason is that a manual tally of these payments may point out instances where the value on the check and the value entered into Theatre Manager may be different. It gives a chance of correction at source.
Credit Card payments processed through your merchant account will NEVER show in the till balance window because they can never be for the wrong amount. (The system created the amount and sent to the bank, so there is no possible discrepancy in amount in the system). Post dated credit cards may appear as a convenience to allow the user to authorize them (although this is usually done in end of day). It may be useful if emergency mode was enabled for part of the day.
|
Parts of the Till Balance Window
 |
Opens the online Help for this window. |
 |
Opens the selected Patron |
 |
If enabled, marks the selected payments as missing. |
 |
If available, authorizes the selected credit card. |
 |
If available, allows you to change the card that a post dated payment is being changed to. |
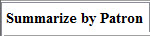 |
Displays the summary table by patron. |
 |
Displays the summary by the type of payment |
| Patron # | The patron number for that patron that this payment is assigned to |
| First Name | First name of the patron this payment is assigned to |
| Last Name | Last name of the patron this payment is assigned to |
| Company | Company name of the patron this payment is assigned to |
| Total Paid | Amount paid by the patron, using this payment method |
| Till # | Has this payment been marked as being in the till? The default is blank, which will change to the till number once the payments are marked manually as being in the till |
| Card Number | The card number/ check number of this payment |
| Payment types | Where you mark (using the check boxes) the payments as being physically in the till. Any payments that are not in the till should be marked as such. You can batch mark payments of a certain type as being in the till, then double click specific payments to remove them |