Creating a General Ledger Sales Entry
The Revenue Date Ending is be the last revenue date orders are to be selected for the sales entry. Orders which have been realized as revenue and have not been journalized will be selected if they are on or prior to this date. Refer to Default Data General Ledger Setup for more information on determining when an order is realized as revenue. The current date will automatically be displayed in the revenue date field.
When balancing is done the day of the sales, the date used will be the current date.
When balancing is done the day after the sales, the date used will be the previous days date -- the date the sales were entered. If correcting ticket orders caused new ticket orders, ticket exchanges, or ticket refunds, then the date used will be the current date -- when this is performed, new ticket sales that have been realized as revenue will be included in the sales entry creation.
It is recommended that if the balancing is performed the day after the ticket sales, then new ticket sales are not entered until the previous days sales are balanced. Creating the sales entry creates a general ledger entry that summarizes the sales revenue. A separate entry is created for each date which sales, exchanges, and refunds were recorded. When the entries are created daily and no corrections are made after posting, only one entry per day is created. When entries are created the day after sales, and corrections caused new orders, exchanges, or refunds to be created, two sales entries will be created for the same revenue date. One entry is created for the date of the original sale and the second entry is for the corrections entered the day after. The two sales entries must be manually combined when balancing to the deposit entry. If several days passed since the last Create Sales Entry was created, several sales entries are created, one for each day ticket activity was recorded.
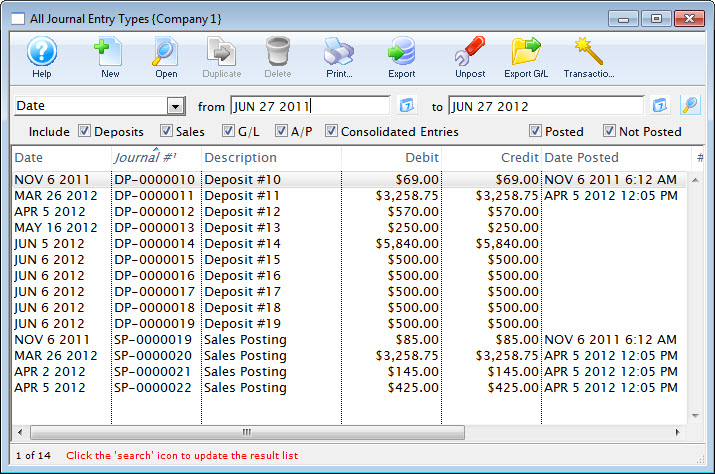
- Open the Main Menu Accounting >> Create Sales Entry.

The Journal Entry Types window opens.
- Click the New
 button.
A G/L Entry Detail window opens.
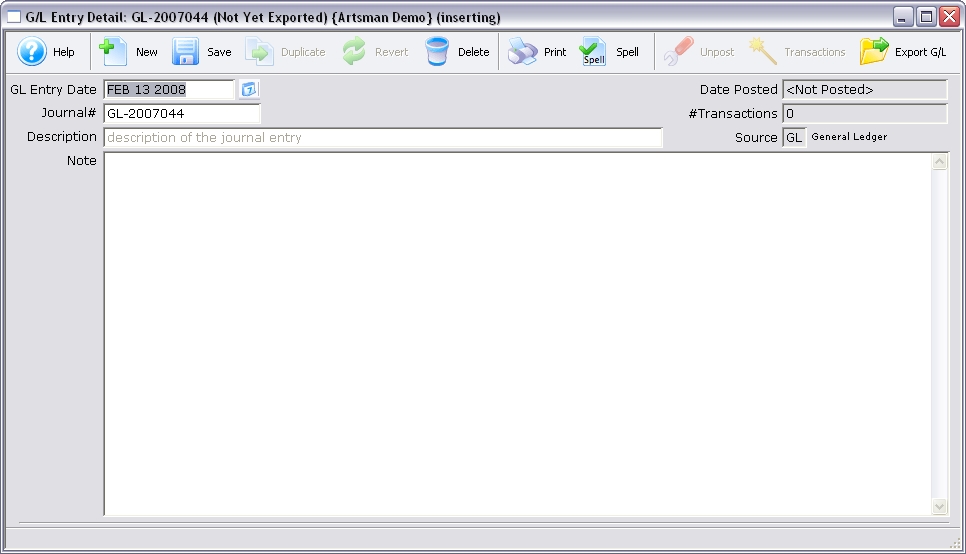
- Enter a Description of the entry and a detailed Note highlighting the reason for the entry.
- Click the Save
 button.
The entry is now created.
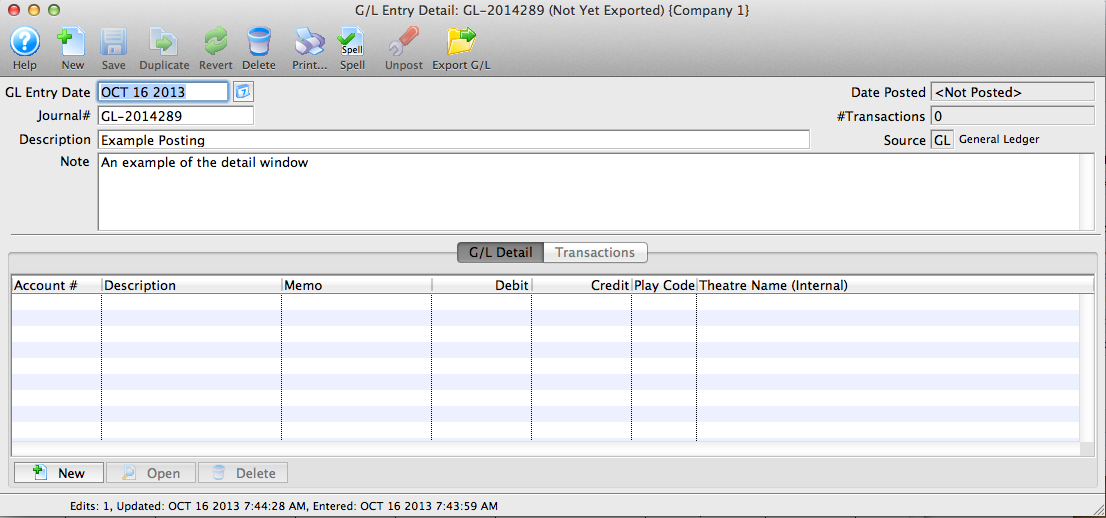
- The GL Entry window will change to allow you to add lines to the entry.
- Click the
 button at the bottom of the entry to add debits and credits as needed.
A balanced entry will require the debits and the credits to add up to the same value. If the debits and credits do not balance it will cause the End of Day to be out of balance. The entry will need to be corrected before you can Post to the GL.
- Add the details to the G/L Account Detail
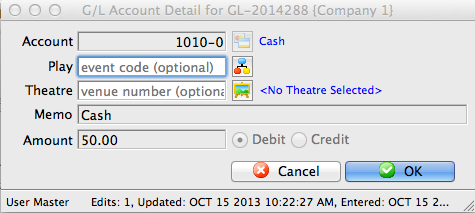
- Account: The GL Account for this Credit or Debit
- Play/Event (Optional): The Play, Event or Game that this entry applies to
- Theatre/Venue (Optional): The Theatre or Venue that this entry applies to
- Memo: A short description of why this entry is being made
- Amount: The credit or debit amount for this entry
- Debit or Credit "radio" buttons: Allows you to choose whether this is a Debit or Credit entry.
- Close the entry to save the changes.
|
Note: By adding the optional Play or Venue values, the GL entry can be tagged to that specific event or venue. Therefore, you can adjust values manually, as well as calculate the revenues by Venue. This could be helpful if you wish to compare how well Venue A does, compared to Venue B. |

During the next End of Day, when the Post to GL step is done the entry will be journalized and posted.