Step 2: Configure the PostgreSQL server parameters
The general steps are:
- Edit the pg_hba.conf file to indicate which IP addresses may talk to the database server
- Edit the postgresql.conf file to adjust some memory settings for performance
 |
An easy way to determine key config parameters is to use pgtune and paste the results at the bottom of the postgresql.conf file (don't forget to add ssl=on and Bonjour=on to the results). |
PG_HBA.conf file
In order for clients to connect to the server, their IP address must be in the allowed list of users. The two common authentication methods that you will see being used for Theatre Manager clients are MD5 and trust.
- MD5 does md5 password authentication and should be used for just about all entries to this file.
- Trust allows clients to connect without password authentication; the only 'trust' entry should should be for the local server machine and/or localhost.
| 1. |
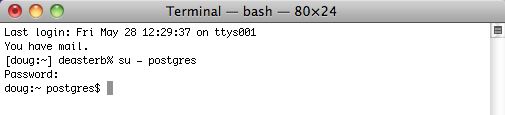
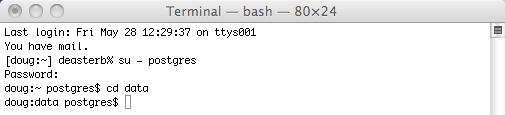
The first changes to make involve the pg_hba.conf file and the postgres.conf file. To do so, you'll need to use VI (a text editor) and be the postgres user in Terminal. To do this, start Terminal and type
su - postgres enter the password
|
| 2. | Go to the postgres data directory by typing
cd data
|
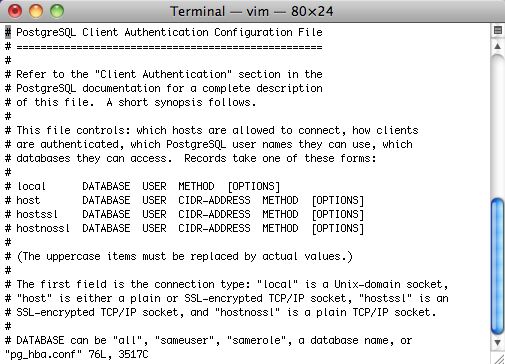
| 3. | Edit the postgres pg_hba.conf file that contains the addresses to listen on. Type
VI pg_hba.conf (full pathname is /Library/Postgresql/[version]/data/pg_hba.conf) You should see a page of information. If you do not, then type 'Shift Q' and then just a 'q', after which you can start the process over. If you see the list of text similar to the right, then: Use the down arrow on your keyboard to go to the very end of the file.
|
| 4. | 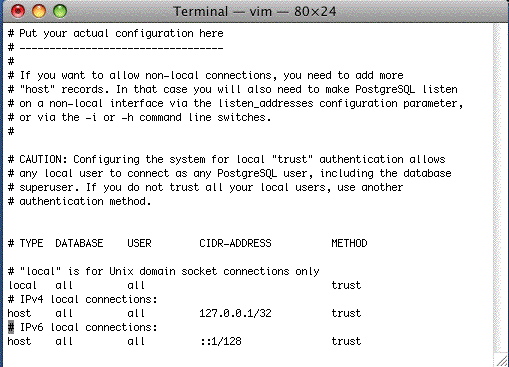
When you are at the end of the file, use the up arrow on your keyboard so that you are right after the first line in the IPv4 settings, where it says 'host all all 127.0.0.1/32 trust'. In the example the cursor is on the '#' on the line after. type the
key and the message at the bottom will change to Insert. |
| 5. |
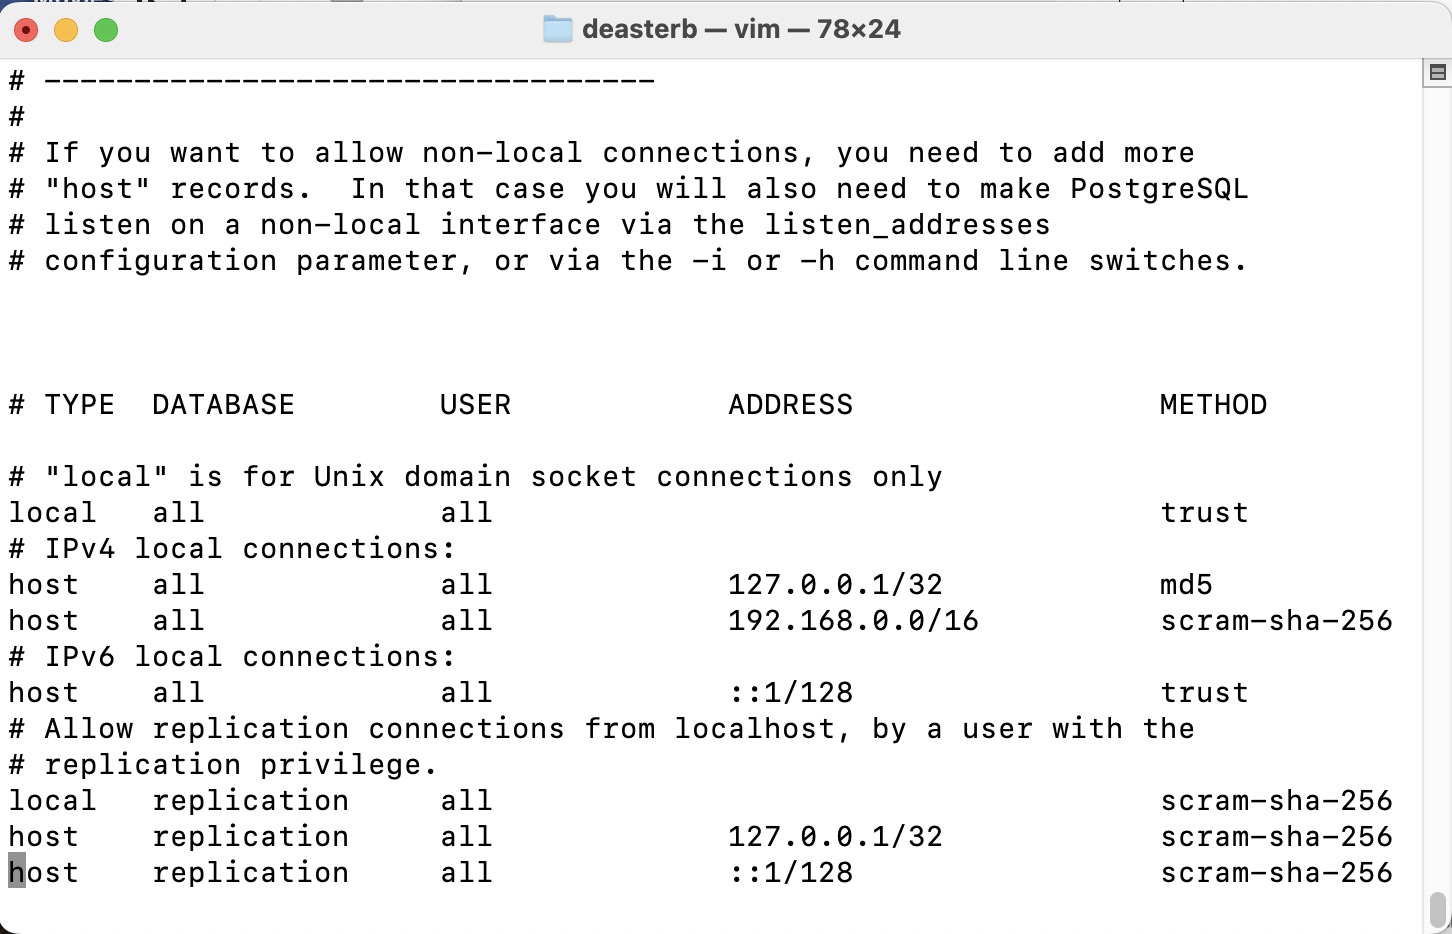
Edit the pg_hba.conf so that its final settings are similar to the window on the right. Type directly into Terminal so the data looks like the window above. Use the Delete key to get rid of characters. You will likely end up typing the following lines where the first one is your subnet. This is the most typical example we've seen at venues NOTE: For the 127.0.0.1/32 option, edit the handshaking to be MD5 at the end of the line to allow backups to run unaided. NOTE: If your machine uses IPv6 (the new internet IP setting standard), you may also need to set ::1/128 to be TRUST instead of md5. If so, edit that line to look like:
NOTE: You may also need to edit the local all all line from md5 to TRUST. This can be determined if the backup script will not run without a password after changing the settings above for 127.0.0.1 and ::1/128. The line you added (or need to add) are for:
At the end of the subnet, the /24 refers to a complete subnet when you want any machine on the subnet to access the database as per CIDR rules. This is what is used most often. The /32 refers to a particular machine. If you use this option, you will need to provide the exact computer IP that you want to allow to access the database. |
| 6. | 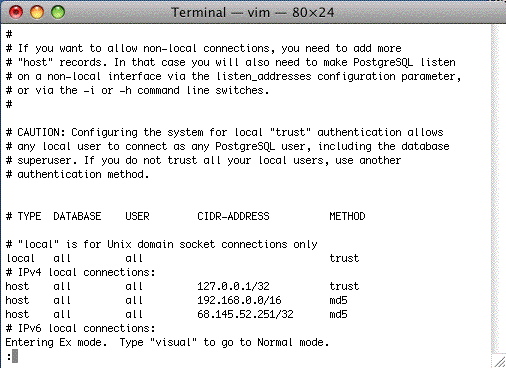
At the end, type, in this order: hit the esc key (the insert mode will dissappear) Shift Q (the window will show the 'Entering Ex mode' message) wq and the window will clear.
Reference for settings in the pg hba.conf file https://www.postgresql.org/docs/current/auth-pg-hba-conf.html |
| 7. |
In the command line, type the following to reload the configuration:
pg_ctl reload Terminal will say 'server signalled' |
POSTGRESQL.conf file
Note: you can also use pgadmin as described in the Windows setup to make these changes if you prefer.
Another was to get the key config parameters is to use pgtune and paste the results at the bottom of the postgresql.conf file (don't forget to add ssl=on and Bonjour=on to the results).
| 1. |
You will need to start by changing to the postgres user in Terminal. To do this, start Terminal and type
su - postgres enter the password
|
||||||||||||||||||
| 2. | Go to the Postgres data directory by typing
cd data
|
||||||||||||||||||
| 3. |
This will use VI to edit it. Type when the list appears, type to go into insert mode and use the up and down arrows to find the options below
Find and edit the parameters in the list below and change them to the suggested values, if they are not already set to that value.
For any setting that is about disk space or memory, you can type 1GB, 1000MB, or 1000000KB - they are all equivalent. Do not leave a space between the number and the memory amount at the GB, MB or KB; otherwise, Postgres will not start. |
||||||||||||||||||
| 4. |
use pgtune to get some optimized parameters for your machine and replace the values below. It is probably better to append the results from pgtune at the end and filling any missing settings at the bottom.
Reference for postgres.conf file parameters https://www.postgresql.org/docs/current/static/runtime-config.html |
||||||||||||||||||
| 5. | Once the changes are made, type, in this order:
hit the '' key (the insert mode will disappear) (the window will show the 'Entering EX mode' message) and the window will clear and you will be back at terminal |
OSX Self Signed TLS Certificate
Making your own Self Signed TLS Certificate
It is generally best to create your own certificate. It takes about 30 seconds to do, and has the advantage that the certificate is unique to your database.
Start a terminal session, type the following 2 commands, and then follow the instructions as prompted. You can copy/paste the command.
|
cd /Users/Shared openssl req -newkey rsa:4096 -nodes -keyout server.key -x509 -days 365 -out server.crt |
Answer all the questions you are asked and when done, find the files in the /Users/Shared directory called:
- server.crt
- server.key
Using a supplied self Signed TLS Certificate
We have created a 4094 bit TLS certificate and included it with the installer. While it is better to create your own, if you need one fast to get started, you can use ours and create your own later (per the step above).
Go to the /Users/Shared folder and find the files called:
- server.crt
- server.key
Installing the server.crt and server.key Files
You will need to copy the files to the Postgres User directory as the postgres user. Do the following commands in Terminal:
|
su - postgres (and enter the password when asked)
cd data pwd |
|
Make sure the results of the pwd command says that the directory is /Library/PostgreSQL/x/data where 'x' is the version of PostgreSQL you have installed. It if does not, do not go any further. and call for assistance. |
|
cp /Users/Shared/server.crt server.crt cp /Users/Shared/server.key server.key chown postgres:daemon server.* chmod 600 server.* ls -la |
In the listing, the two files should now be in the postgres data directory and all that needs to occur is to stop and restart the database.
|
pg_ctl stop -m fast pg_ctl start |