Adding Course Performances (Classes)
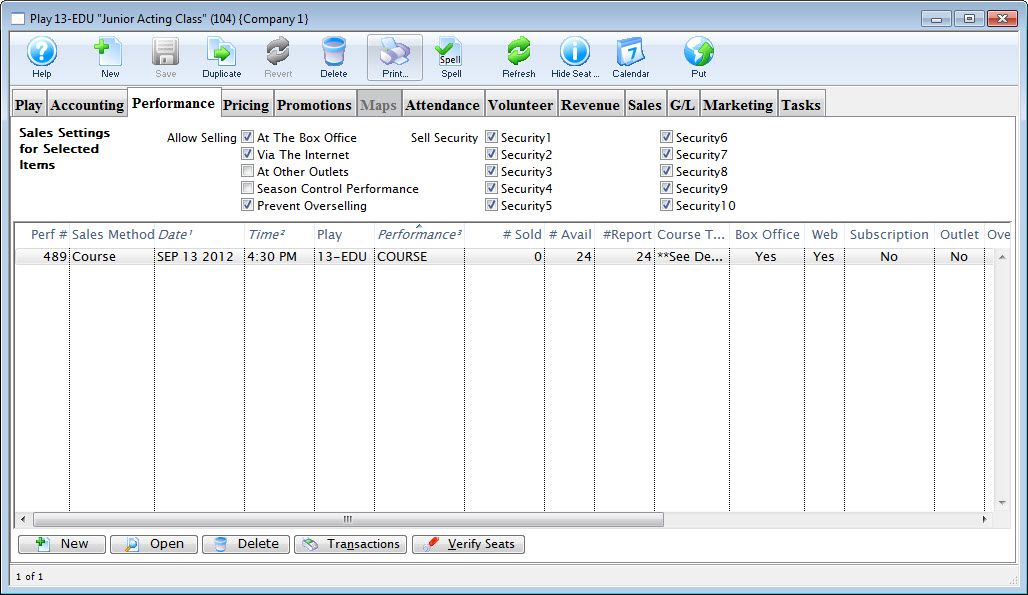
To add Performances (or Classes) to your Course, select the Performance tab of the Plays and Dates window.
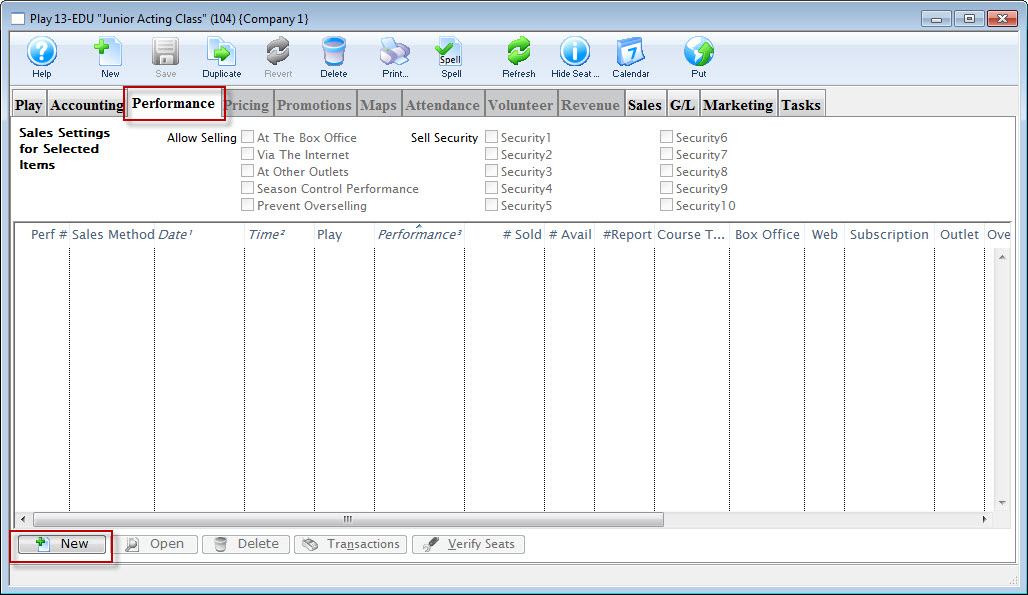
- Click the New
 button.
The Performance Wizard opens, beginning with Step One (details begin on the next page).
Adding A Class - Step One
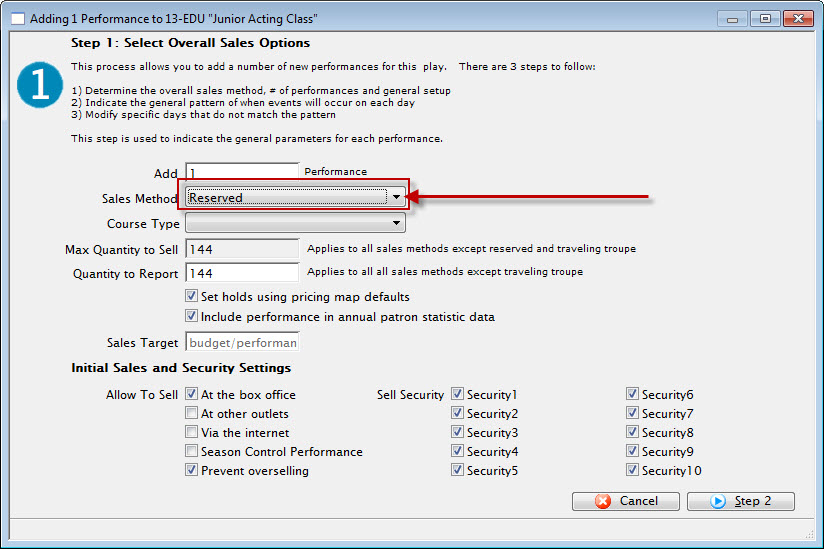
To add a class, you perform the following steps:
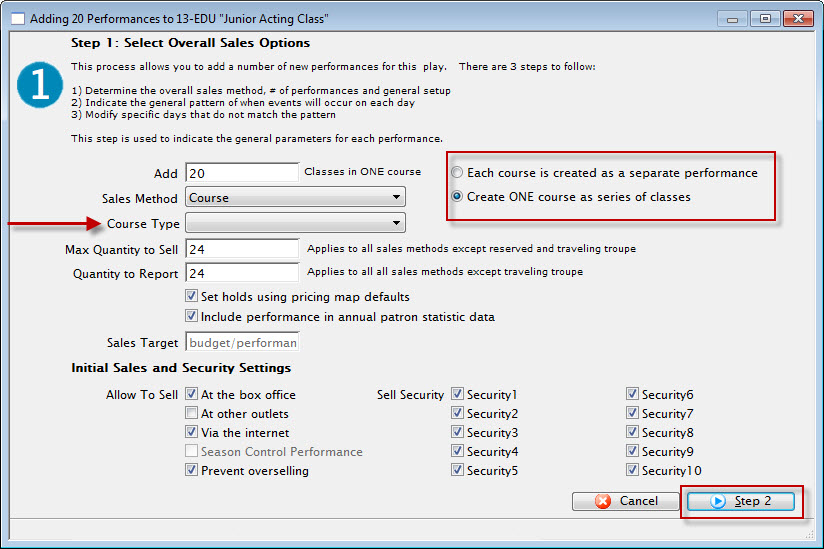
- Enter the number of Classes that will fall under this Course.
In this example - 20.
- Select "Course" as the Sales Method.
When "Course" has been selected, you will be given an option to either:

The difference is:
Each course is created as a separate performance Create ONE course as series of classes You can have multiple performances in your Course for patrons to choose from.
They can attend one session (or performance) and not the others.
This is useful if you are going to have one single class offered at several different times (just like any other event with multiple performances).
The individual classes can be sold separately
You are creating one Course that is a series of Classes
Patrons sign up to attend the whole series (this is the case in the example photos).
They purchase the entire series at once rather than separately.
Performance Field #1 is customizable. It is used for descriptions of a performance.
For example: You could use this field to group courses (or performances) by type--acting, voice, movement, etc (or drama, comedy, musical, etc).
- You can change the name of this field by following the instructions found here. In this example, the Field name has been changed to Course Type.
- You can populate options in this field by going to Setup >> System Tables >> Code Tables.
Locating the name of the field (which is whatever you have changed it to in Company Preferences) and following the instructions found here.
- The quantity to sell is based on the venue assigned to the Course.
If you think the Course may oversell the size of the venue, or if there is the possibility of adding more chairs to a venue, you can increase the quantity now.

you cannot increase the quantity to sell once the Course has been created. Changing the venue will not increase the quantity to sell.
The only way to increase the quantity is to create another event with a larger venue and move all the students out of this one and into the new one.
If there is a possibility of a higher quantity to sell, increase that value now.
- Check the boxes next to the sales outlets for the course (the box office, the internet, etc).
You cannot set a performance for sale Via the Internet until after pricing and promotions are set. You can check the box for Via the Internet at this step, but you will have to go back and edit the performance after setting Prices and Promotions and click Via the Internet under the Performance Tab of the Plays & Dates Window for the Course. For more information about this tab, click here.
- Set any appropriate Security controls for your venue.
- When you have everything set correctly, click the Step 2 button at the bottom right of the window.
Adding A Class - Step Two
In Step 2, you setup the pattern for the course. In this example, the course is running 1 day per week for 20 weeks at 4:30 pm.
- In Step Two, you set the date of the first session of the Course.
You can use the calendar lookup to the right of the data field to help choose the correct date.
- Use the sliders to select the number of Daily Performances for the classes in the course.
Make sure they correspond to the date you selected as a start date (for example, if you select Feb 1 and Feb 1 is a Monday, then you can't set Monday to zero performances).
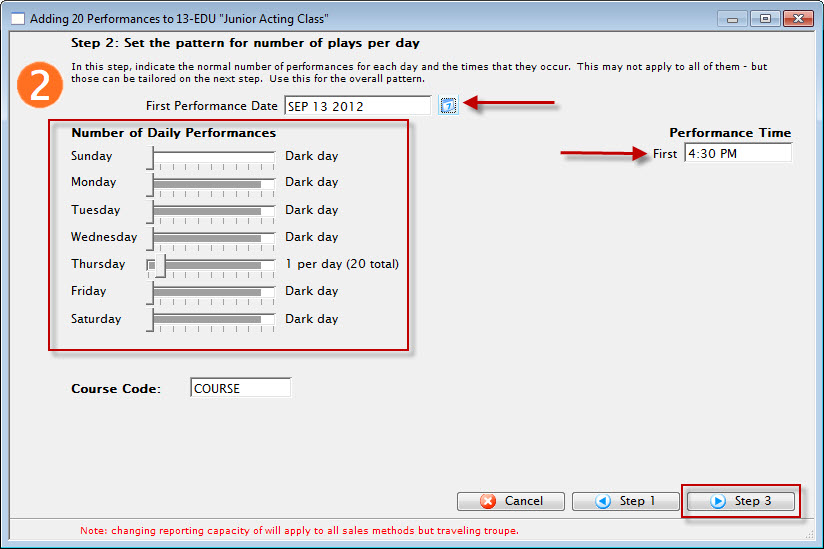
- Set the performance time for the start of each class in the course.
- Click the Step 3 button in the bottom right of the window.
Adding A Class - Step Three
In Step Three, you are presented with a Calendar View of the Classes in the Course.
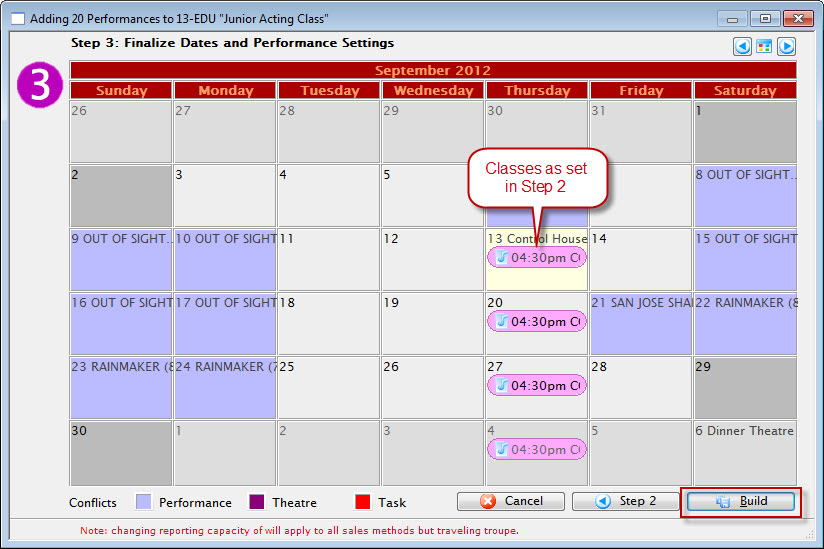
- If one or more of the classes starts at a different time than the Performance Time set in Step Two, you can drag that instance of the class on the Calendar to the appropriate start time for that class. You can also move classes to another day.
- When the Calendar looks the way you want, click the Build button in the bottom right corner.
The Build Performance dialog opens.
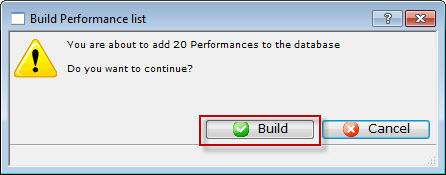
- Click the Build
 button to add your performances to the database, or Cancel to go back to the Steps.
When you have completed building your classes, you are returned to the Performance Tab of the Plays and Dates window. The Course just entered populates window.