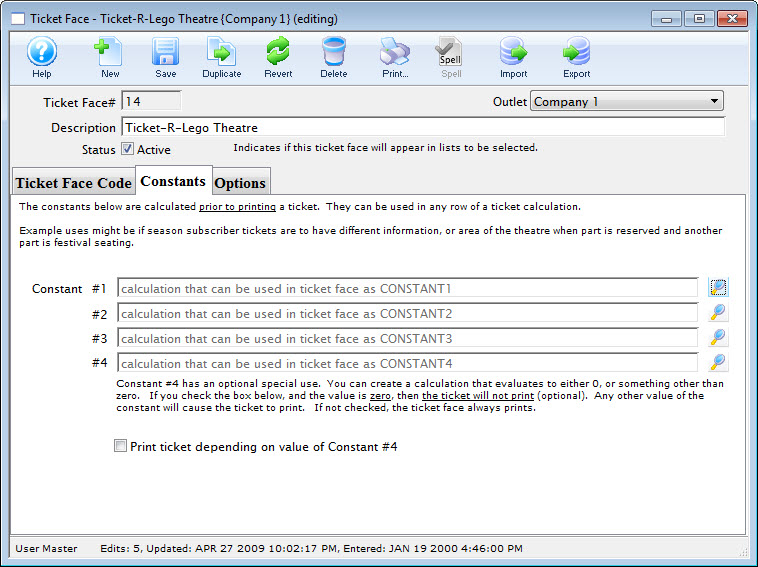
Constants Tab
You use constants to add to ticket face equations. Constants replace long lines of equation that need to be repeated or in conjunction with pick statements. A pick statement may read if the constant is not met to print one thing on the ticket but if the constant is met to print something completely different. Constants allow for more editing options and can be used as many times as is needed in the ticket face.
Parts of the Constants Tab
| Constant #1 | First constant equation. |
| Constant #2 | Second constant equation. |
| Constant #3 | Third constant equation. |
| Constant #4 | Fourth constant equation. |
 |
Opens the constant equation window. For more information on creating constants click here. |
| Print Ticket Depending on Value of Constant #4 | If the value of constant #4 equals zero the ticket face will not print. |
Ticket Face Constants
You use constants to add to ticket face equations. Constants replace long lines of equation that need to be repeated or in conjunction with pick statements. A pick statement may read if the constant is not met to print one thing on the ticket but if the constant is met to print something completely different. Constants allow for more editing options and can be used as many times as is needed in the ticket face.
An example of a constant value is:
- CON(PATRON_FIRST_NAME,' ',PATRON_LAST_NAME).
- Print the patron's first name, a space and the patron's last name.
This statement says:
Rather then having to type this information several times, CONSTANT1 can be typed to generate the patron's name. A more complicated constant may be used within the ticket face when something other then the regular ticket information is to be printer.
In addition to acting as a constant, line #4 can be set to require a value equaling something other then zero. If the value of the equation is zero, a ticket will not print. This feature can be used when a ticket is not required if a patron meets specified conditions.
Adding a Constant
- Open the Ticket Face List window.
Click here to learn how to access this window.
- Select the ticket face you are adding a constant to.
Single click on a ticket face to select it.
- Click the Open
 button.
- Click the Constants
 tab.
tab.
- Click the Lookup button.
The Constants Detail window opens.
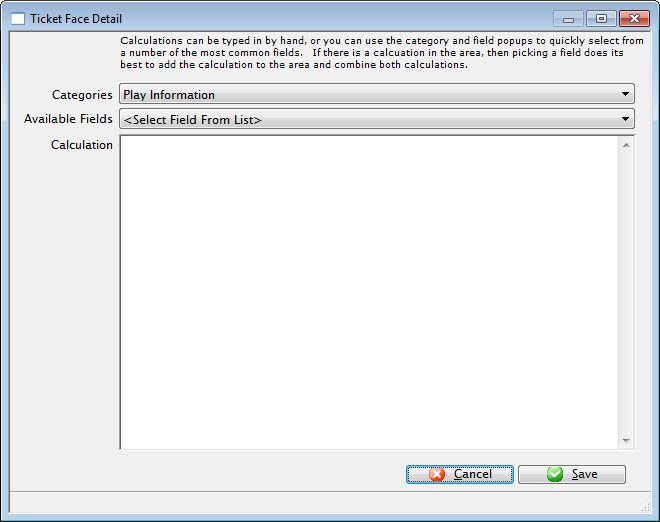
- Enter the Constant equation.
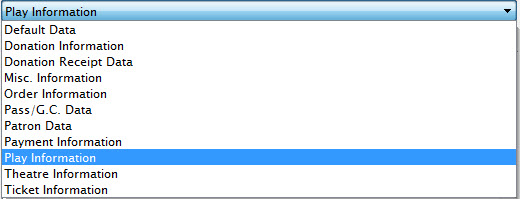
To enter information under 'Calculation', click on 'Category' drop-down list.
Once you have selected an option, click the 'Available Fields' drop-down list.
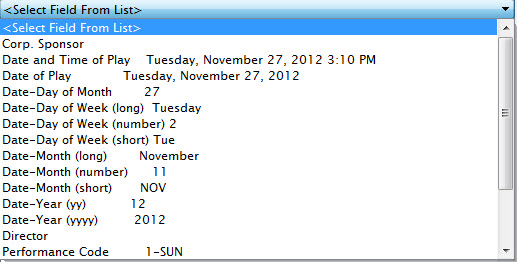
This pop-up menu has two columns.
The left column is the fields to be entered and the right column is the sample information. Select a field (for example - company name). The information that appears in the field calculation (D_COMPANY) instructs the printer to put the company name (found in Company Preferences) in this location on the ticket.
You can type this information into the field calculation, however, if all event data is typed onto the ticket face, this prevents the tickets from being able to be used for other events. Click here for more information on Calculations.
- Click the Save
 button.
The Constant has now been added to the ticket face and can be used in conjunction with other equations.