Setup for TicketTrove
In preparation for TicketTrove there are certain area's of Theatre Manager that should be updated. All changes should be made directly within the Theatre Manager database. These recommendations will help an organization stand out within the application and are available in version 9.08 of Theatre Manager and higher.
The key area's to update are Company Preferences, Events, Performances and Venue Maps.
In each of the above areas, there is an image that can be used to display on the iPhone/iPad. The order of preference is as follows:
- If there is a graphic in the event, it will display for all performances of the event. Example: a graphic for Lion King will only appear on Lion King events.
- If a graphic has not been added to an event, TicketTrove will use the graphic assigned to the theatre map instead. Example: if there is a graphic for the 'Pacficic Theatre' venue, it will be used for all 'Pacific Theatre' performances where the events do not have unique graphic's of their own.
- If there isn't a venue or event graphics, then the graphic displayed will be the graphic in company preferences. At the minimum, a company logo should be placed in the Company Preferences window within Theatre Manager. This will ensure that if there isn't an event or venue graphic, the company logo will be displayed. It will also mean if there are currently no event available for sale online the company will be uniquely branded in Ticket Trove.
Company Preferences
Editing the Company Address
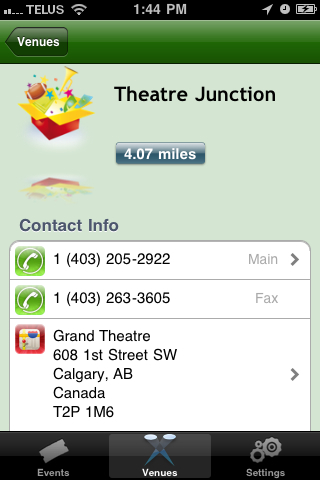
The company name, address, phone number and web site are all pulled from the Arts Management Systems database. If the information appears incorrectly please contact Diane at sales @ artsman.com
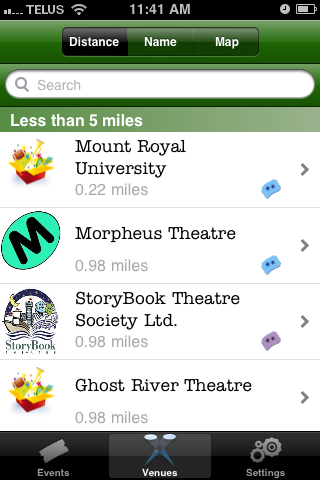
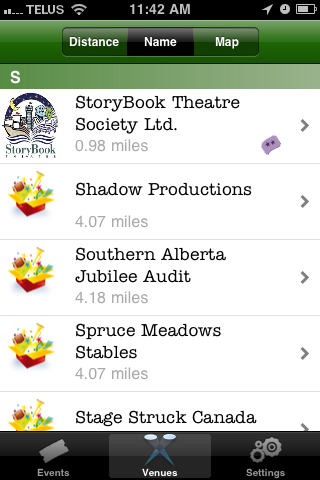
Examples of where the Address information appears in TicketTrove are seen below. The Distance references based on the devices geographical distance from the companies address.
Adding a Company Image
Add a 200 pixel width by 250 pixel hight jpeg for the company. Typically this would be a company logo. If only this picture is placed, and no other changes made, TicketTrove will use this for all events and venues. It is optional to add event and venue icons for branding if desired.
- Go to Setup >> Company Preferences.
- Select the Reports/Misc tab.
- Right click on the Company Icon for Web field.
- Select Paste From File.
- Choose the desired image. The image should be a 250h X 200w jpeg.
Below are examples of where the company image can be seen in TicketTrove.
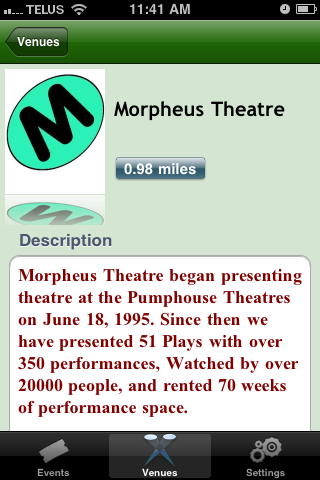
Adding a Company Description
Add a description of up to 4096 character highlighting the organization. This may be a mission statement, purpose, philosophy, marketing statement, or text chosen to represent the organization. Patrons will review this information to help decide if the organization provides their desired form of entertainment.
- Go to Setup >> Company Preferences.
- Select the Reports/Misc tab.
- Add text to the Company Overview for Web text box.
Below are examples of where the company description is seen in TicketTrove.
Event Setup
Update Event Title
Review the event title under the events tab for accuracy.
- Click the Events button at the top of the window in Theatre Manager.
- Search for the desired Event.
- Double click on the desired Event.
- Alter the Event Title to reflect the title to be viewed by patrons online.
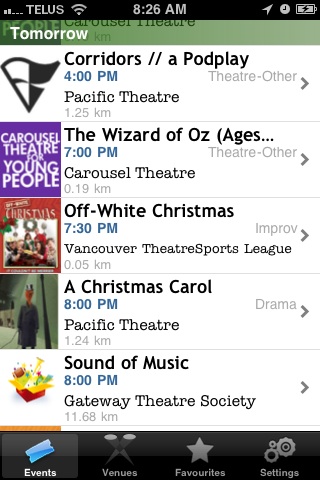
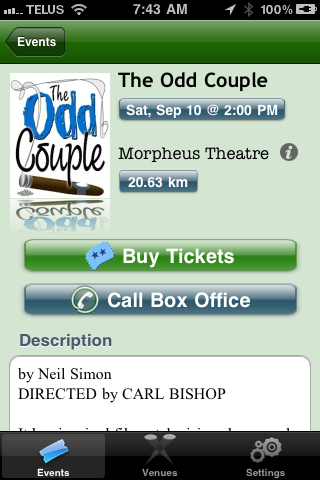
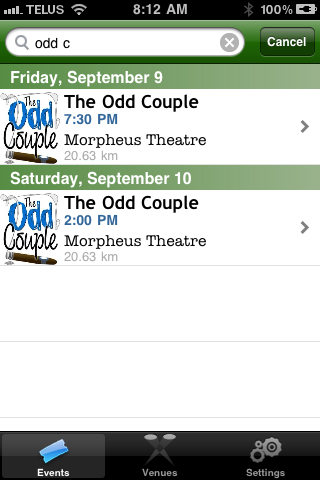
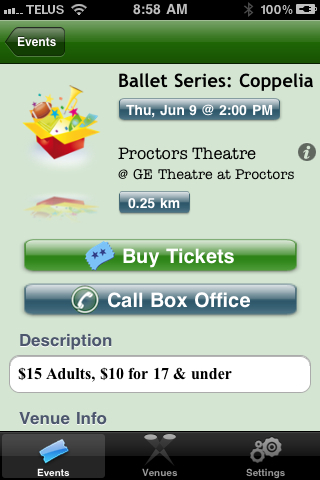
Below are examples of where the event title appears within TicketTrove.
Adding an Image to an Event
Add a 200 pixel width by 250 pixel hight jpeg that represents the event. For example, Lion King, Odd Couple, the opposing team for a hockey playoff, all have different show posters or icons. It may be decided a generic icon is to be used for all events selling online that are rentals. If an icon is not added to an event, the default 'company logo' icon will be displayed.
- Click the Events button at the top of the window in Theatre Manager.
- Search for the desired Event.
- Double click on the desired Event.
- Select the Marketing tab.
- Right click on the Play Icon for Web/iPhone App field.
- Choose the desired image. The image should be a 250h X 200w jpeg.
- Click the Put button at the top of the window. It looks like a globe with a green arrow over it.
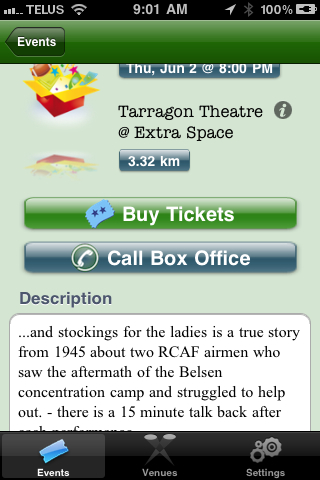
Below are examples of the event image within TicketTrove.
Adding a Description to an Event
Add a description of the Event to the external sales notes. Most times, simply copying and pasting the description from a season brochure and update it with any extra information as it becomes available will suffice.
- Dates are not required in this field as TicketTrove displays a list of dates to the patron.
- If desired HTML tags can be used in this text field to emphasize. e.g. <b>text</b> or <img href="xxxx"> to refer to images. Keep in mind the test it will be displayed on an iPhone screen.
- Click the Events button at the top of the window in Theatre Manager.
- Search for the desired Event.
- Double click on the desired Event.
- Select the Marketing tab.
- Enter the event description in the External Sales Notes field.
Below are examples of where the event description appears within TicketTrove.
Performance Setup
Making Performances Available to View in Ticket Trove
Any performance that is not marked 'for sale on the internet' will not show in Ticket Trove. If the performance can't be purchased from the ticketing web site then it shouldn't be available elsewhere. There is one exception to the rule. A performance can be marked available for sale on the internet with a FUTURE onsale date. TicketTrove will display the performance in list but tickets cannot be sold to the performance. This allows the performance to be visible, but patrons will need to contact the box office to get advance tickets to the event. That is, until, the onsale date for the performance arrives. Patrons can then buy directly from the ticketing web site.
- Click the Event button at the top of the window in Theatre Manager.
- Search for the desired Event.
- Double click on the desired Event.
- Select the Performance tab.
- Double click on the desired performance.
- Click the Sales Management tab at the top of the window.
- Check the Via The Internet box.
- Enter date in the Future Onsale Date box if applicable.
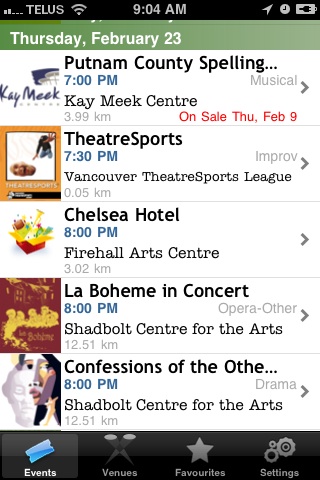
Below are examples how events available for sale online will appear in TicketTrove. The second image includes events with future onsale dates.
Venue Setup
Editing the Venue Name
Please review the EXTERNAL name of the venue to ensure it will be clear for patrons. The full venue name is recommended without additional descriptor words. e.g. use 'Venue Name' instead of 'Venue Name - for live concerts'.
- Click the Map button at the top of the window in Theatre Manager.
- Search for the desired Venue Map.
- Double click on the desired Venue Map.
- Alter the External Venue Name to reflect the full venue name as it should appear in the online sales and TicketTrove.
Editing the Venue Address
Verify the address lines contain the proper street, city, state/province (2 character code), zip and country. Please leave venue names out of the address lines as Google searches for address information directly.
- Click the Map button at the top of the window in Theatre Manager.
- Search for the desired Venue Map.
- Double click on the desired Venue Map.
- Alter the Address, City, Province/State, Country and Postal Code/Zip Code accordingly.
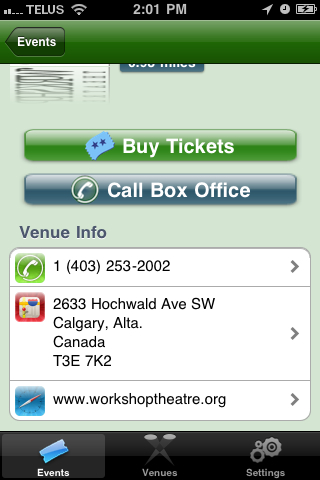
The image below displays where the venue address appears within TicketTrove. Tapping the arrow to the right of the address will display a Google Map of the venue location and the current location. Ensure the address is the physical address of the venue to prevent Google Maps from displaying incorrect information.
Adding a Venue Image
Add a 200 pixel width by 250 pixel hight jpeg that represents the branding for the venue. This only need to be done if different icons for the venues versus the company are desired. Putting nothing in the venue image field means TicketTrove will use the company icon for all venues.
- Click the Map button at the top of the window in Theatre Manager.
- Search for the desired Venue Map.
- Double click on the desired Venue Map.
- Right click on the Theatre Icon for Web field.
- Select Paste From File.
- Choose the desired image. The image should be a 250h X 200w jpeg.
- Click the Upload button next to the image field. It looks like a globe with a green arrow over it.