QR Codes and Printer Compatibility
 |
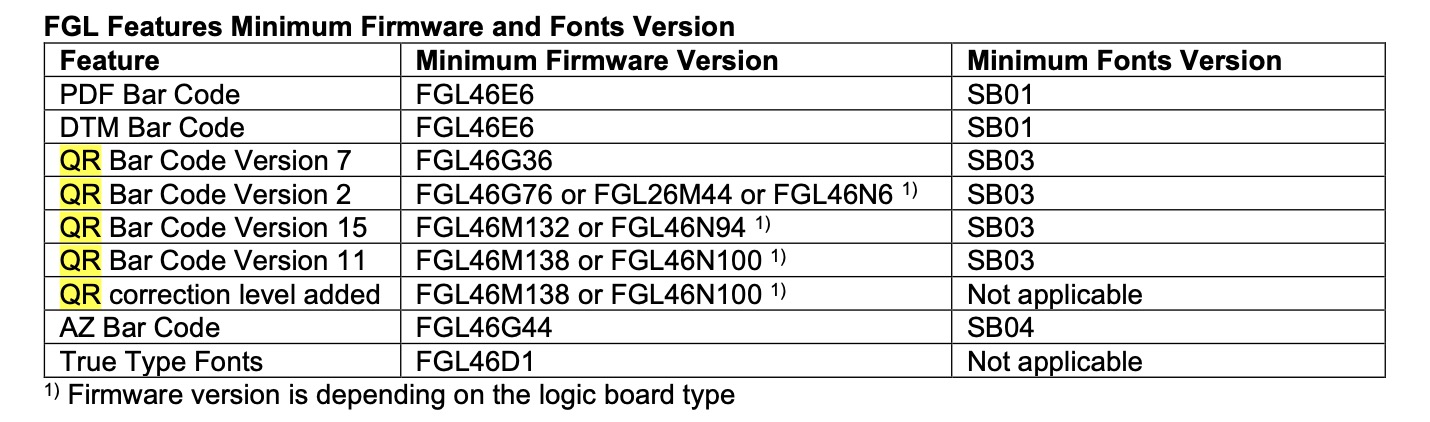
As of September 2021, we are aware of two ticket printers that can print QR codes on the ticket face:
|
|
Practical Automation does not support QR codes at time of writing and older printers are not field upgradeable. |
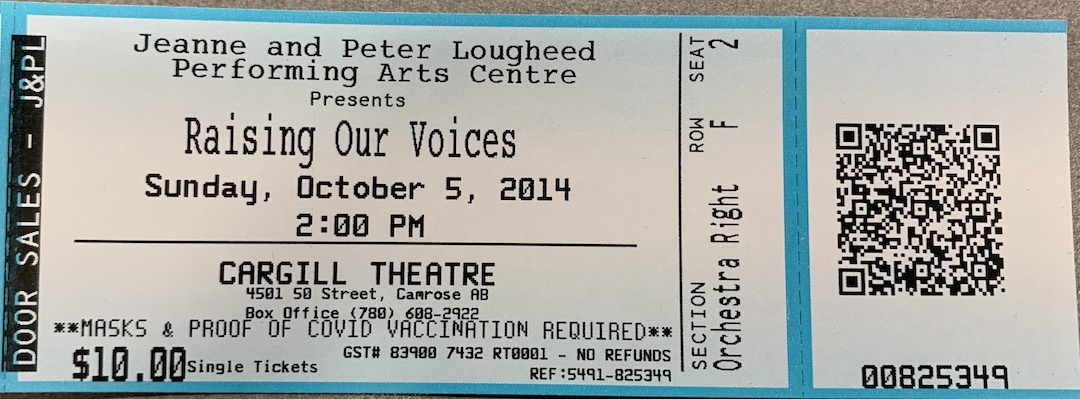
Sample Ticket with QR code
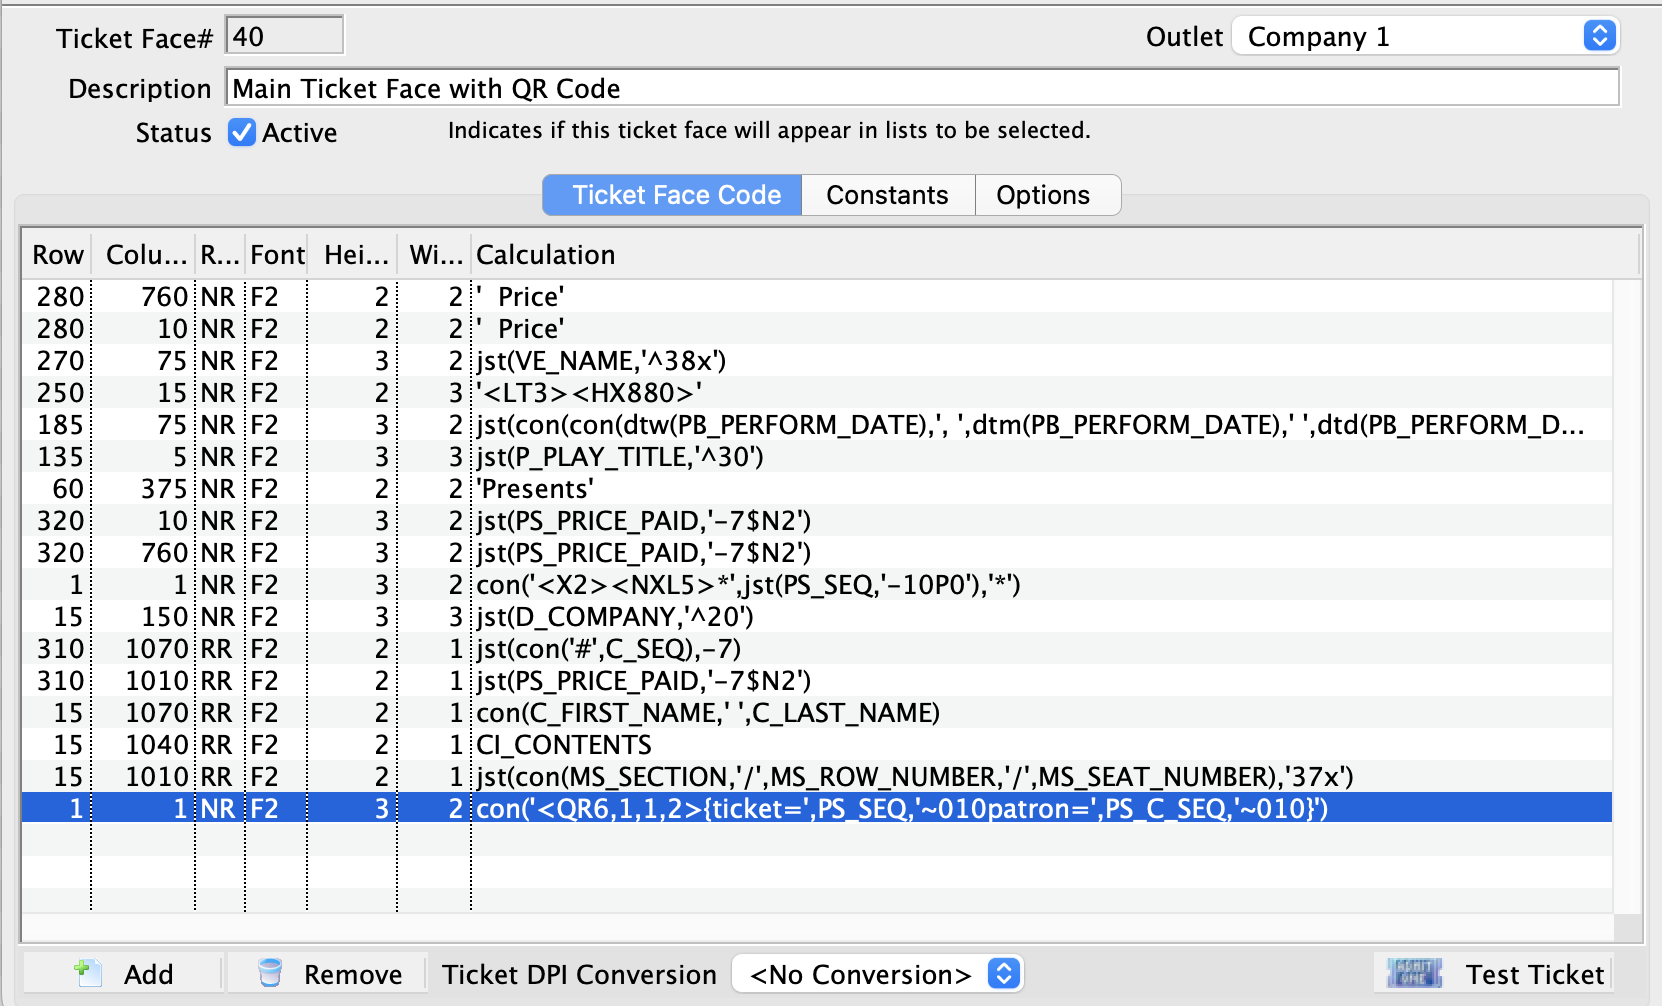
Inserting QR code into a Ticket Face
 To add a QR code to a ticket face, you need to make sure that the area yo want to print it on is big enough and is high contrast.. Usually that means an ALL-WHITE stub area. If the area you chose to print the QR code on has darker coloured background you may find scanning times increased.
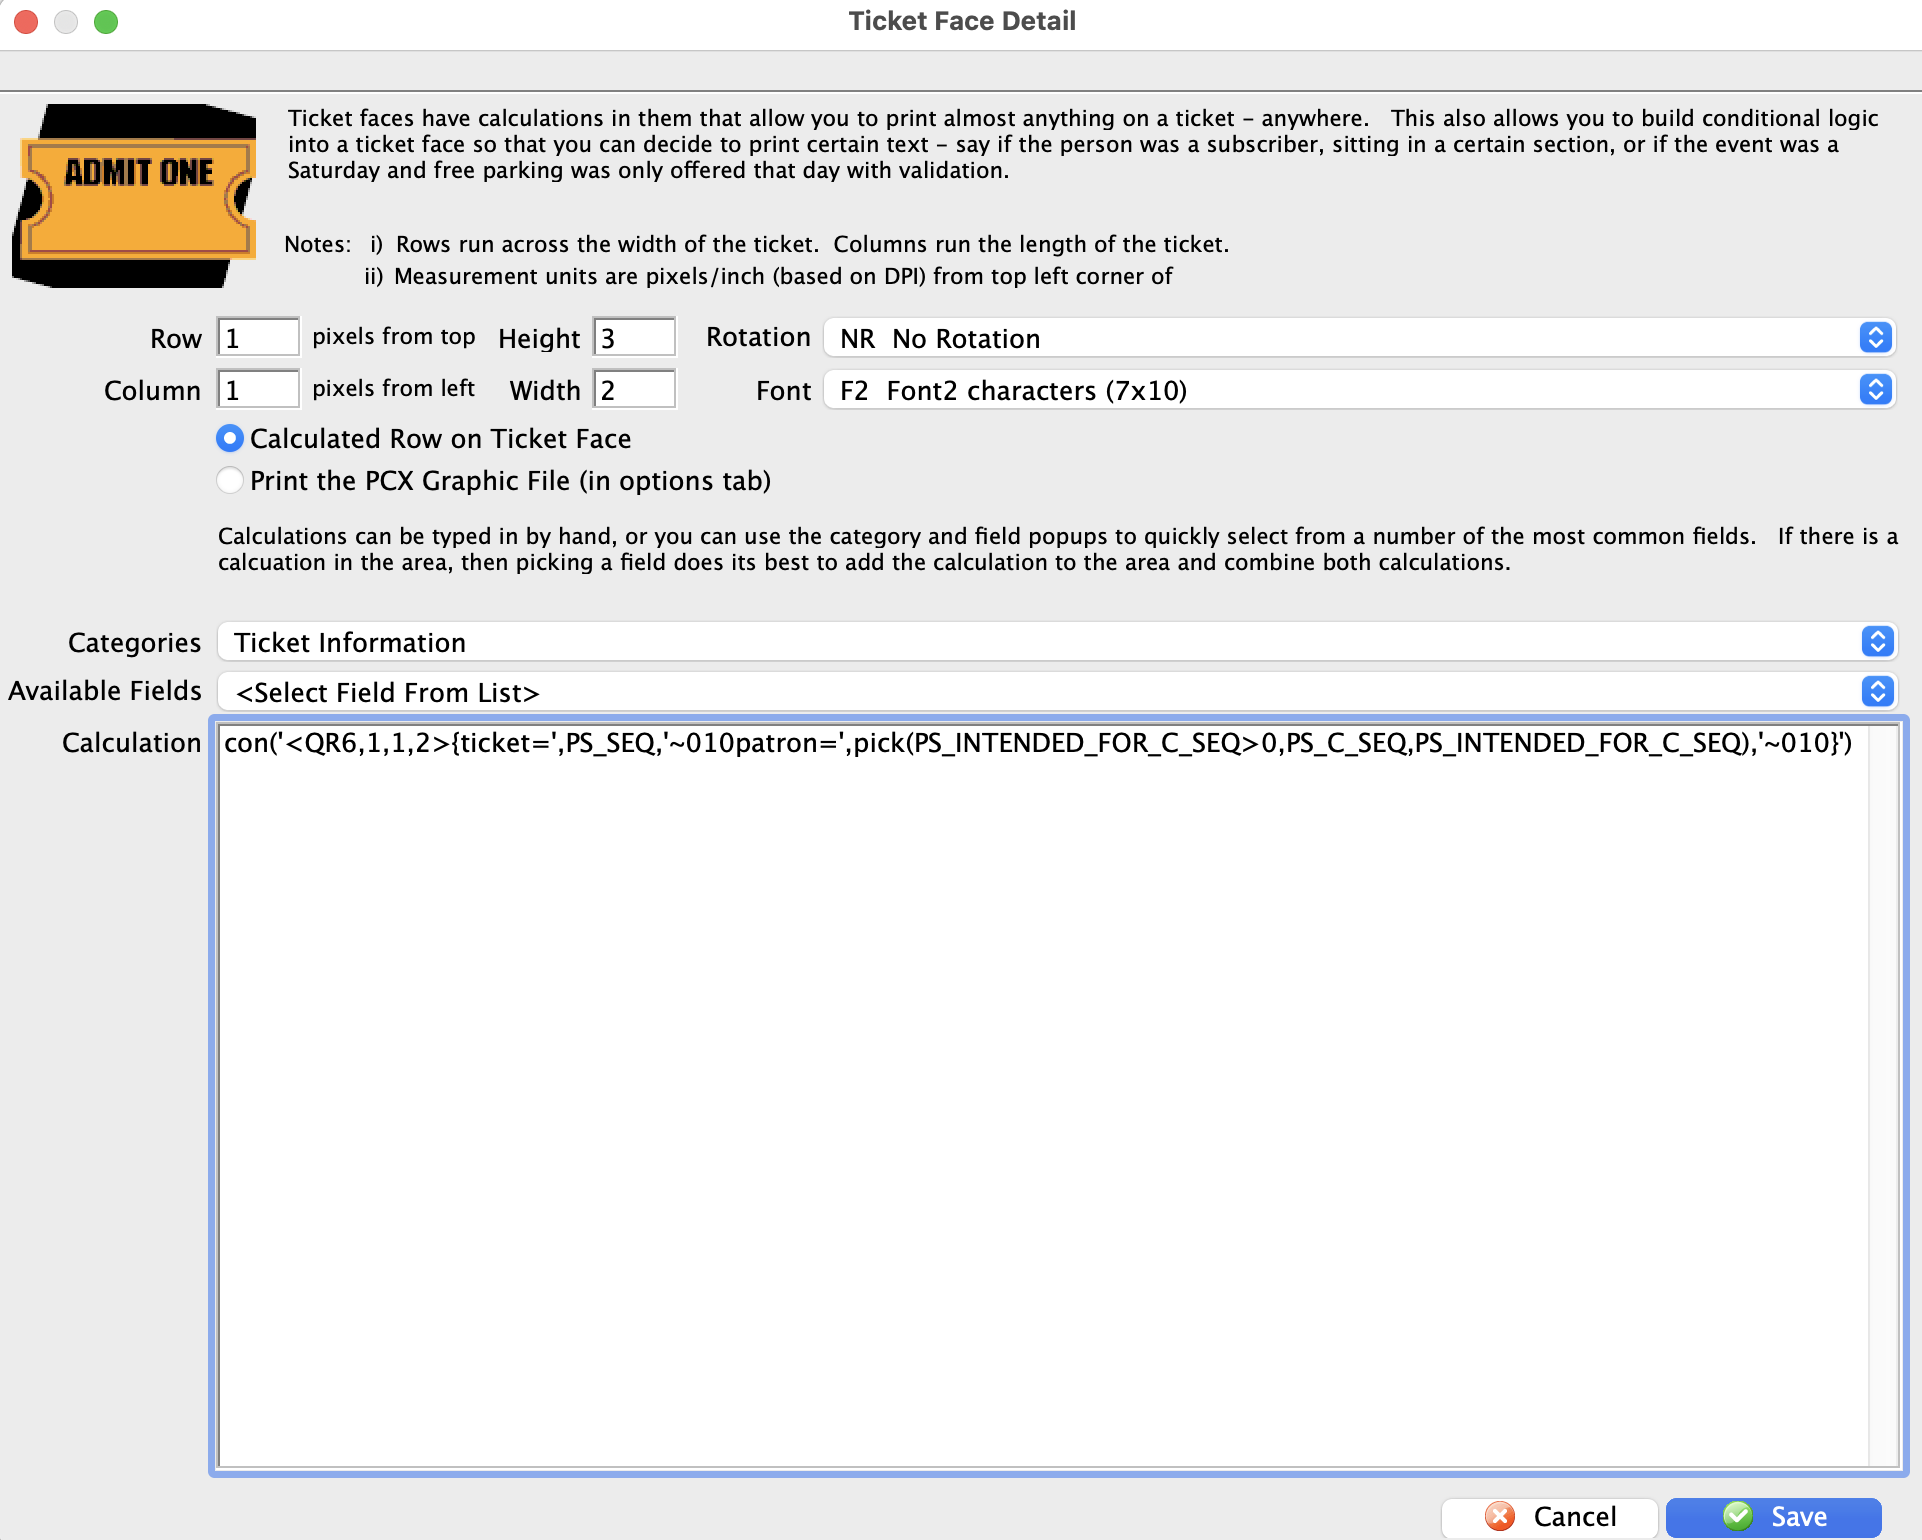
The steps are:
- Insert a new calculation line in your ticket face.
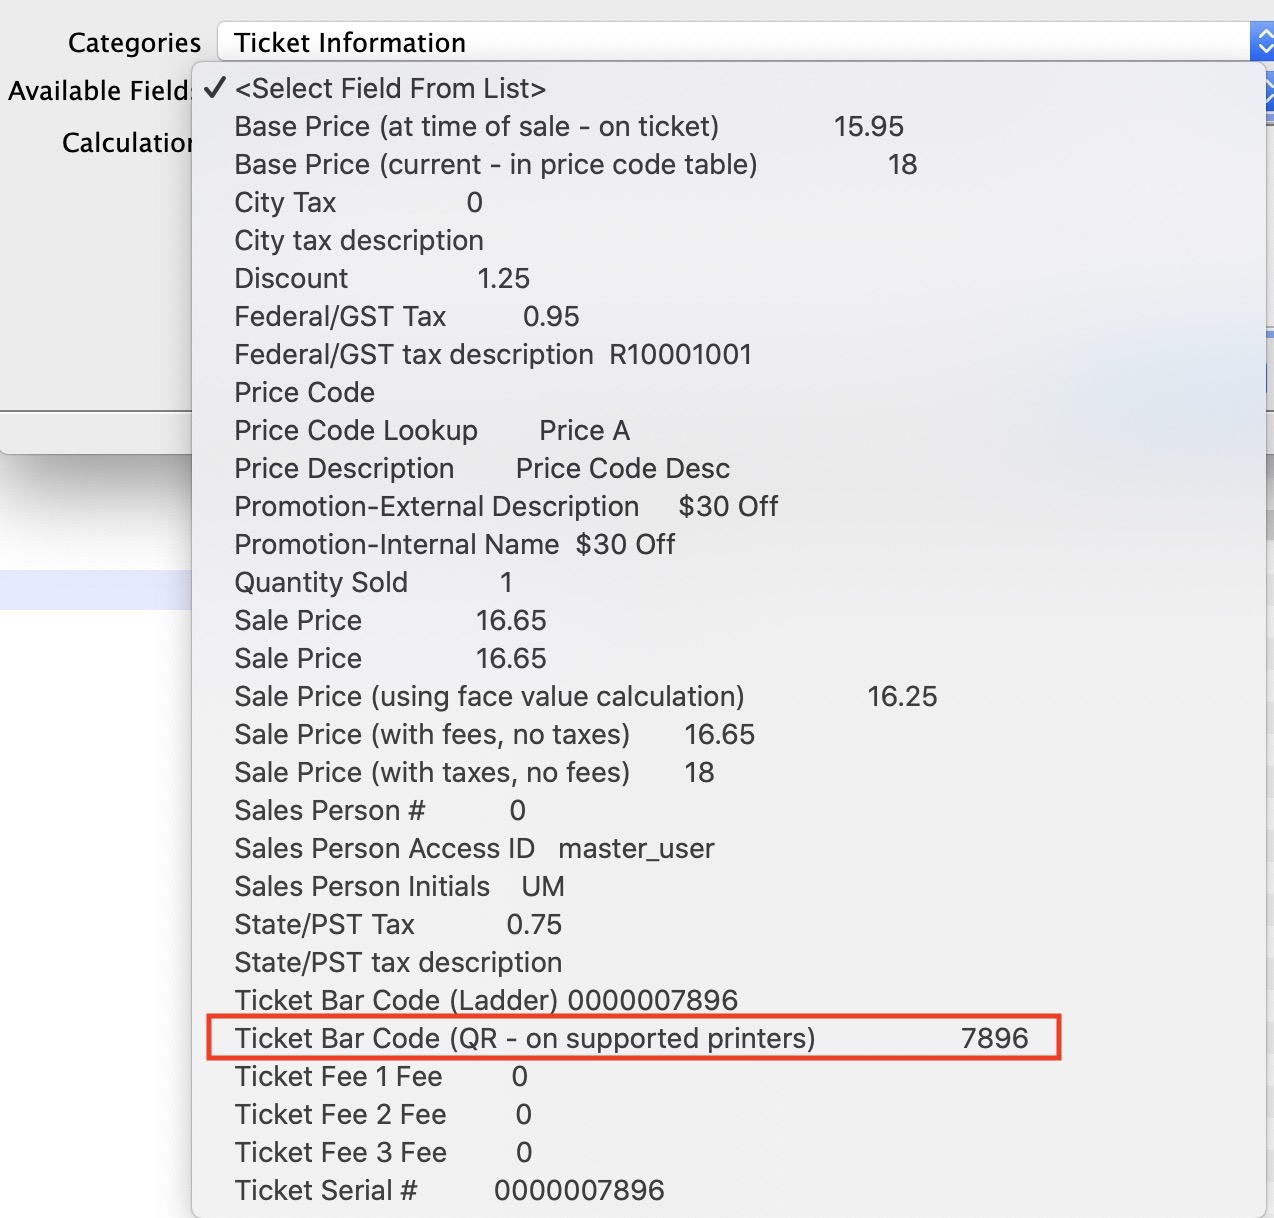
- Select Ticket Information from the Categories field
- Select QR code from the Available Fields in the image to the right.
- That will add the correct calculation to your ticket face as per the image below

If you are using a Boca printer you will need to update the default QR code with additional characters. Where the default code looks like: con('<QR6,1,1,2>ticket=',PS_SEQ,'~010patron=',PS_C_SEQ,'~010')
backets will need to be added to the con statement following the QR references to make the code look like this:
con('<QR6,1,1,2>{ticket=',PS_SEQ,'~010patron=',PS_C_SEQ,'~010}')
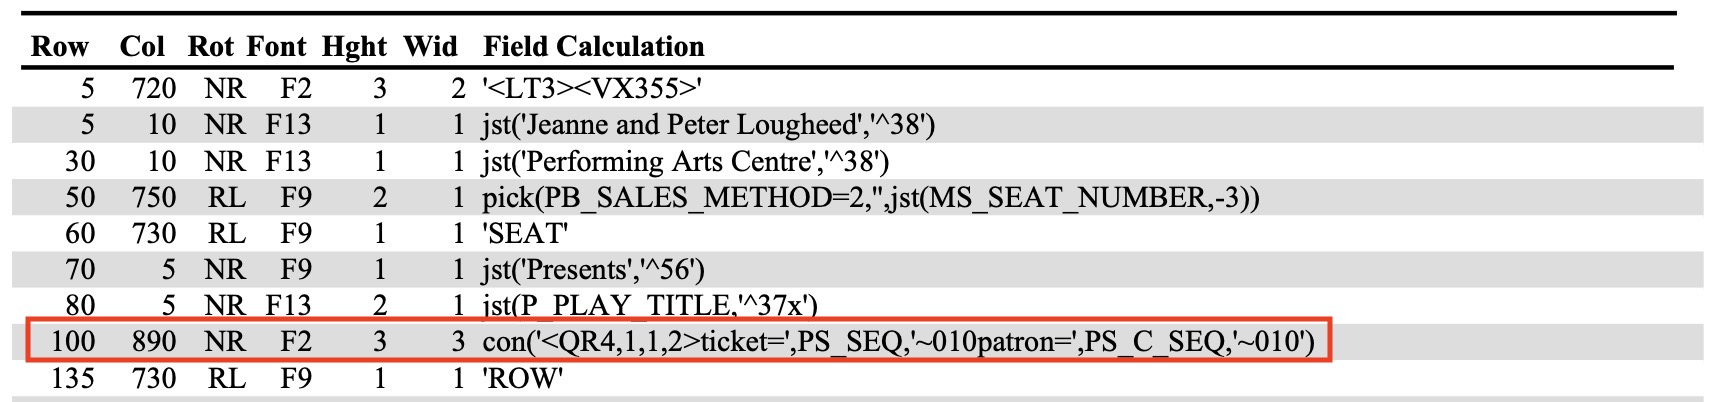
- Change the Column to about 890 or so - so that it prints on the stub. The ticket example above uses 890 in the ticket face code shown in the next diagram.
- The Row might need to be adjusted a little to move the QR code away from the edge of the ticket and center it across the narrow part of the ticket. The ticket example above uses 100 in the ticket face code shown in the next diagram.
- You may need to remove some of the other fields that are on the stub area of the ticket face
- Test the ticket face with QR code
- Do a test print to see that it works
- Do a test scan of the ticket using your scanners to see that it works. Working only means that the scan is successful and that the ticket will likely be rejected as not being sold, or not for this day, etc
- Adjust the ticket face as necessary and reprint and retest
Sample QR Code from the above ticket exmaple

Explaining the QR code format
<QR#,#,#,#>{barcode text}
NOTE: You should not change the parameters in the QR code without talking to AMS support. Only adjust the position of the QR code on the ticket face using the Row and Column settings.
All of the Quick Response (QR) bar code command parameters are optional. If omitted default values will be used. The QR command and the barcode text is all that is required. For example the command
The Parameters, explained in order, are:
1 is the default for Theatre Manager and is required
Point size
we have found that '4' to '6' are suitable sizes for a bar code on a ticket stub
Apply Tilde
When Apply Tilde is equal to 1, the tilde (~) may be used to recognize some special characters in the input data.
Encode Mode
The data represented in the symbol may be compressed by changing the encoding mode, if certain text is being encoded. Valid values are:
Error Correction
The level of Reed Solomon error correction level placed in the symbol. More error correction creates a larger symbol that can withstand more damage. Valid values are:
{barcode text}
Do not change any values in this - otherwise ticket scanning will not work.
QR Code for Scanning Gifted Tickets
Scanning tickets that have been gifted to another patron in the database require the gifted patron number be included in the QR code inserted on the Ticket Face. The existing ticket face with a QR code can be updated to include the gifted patron number:
- Open the existing Ticket Face that has a QR code

- Locate the line of code in the Ticket Face that looks like this:
con('<QR6,1,1,2>{ticket=',PS_SEQ,'~010patron=',PS_C_SEQ,'~010}')
- Double-click to open this line of code.
-
Replace the entire code with this updated version:
con('<QR6,1,1,2>{ticket=',PS_SEQ,'~010patron=',pick(PS_INTENDED_FOR_C_SEQ>0,PS_C_SEQ,PS_INTENDED_FOR_C_SEQ),'~010}')
Any tickets that have previously been Gifted and printed prior to updating the ticket face code can be unprinted and reprinted. This will ensure they can be scanned at the time of entry.