Version Control
- Omnis Studio VCS - which is provided by the vendor and used exclusively for the version control of any Omnis Studio Code
- GIT - which is used as a version control system for any other project, specifically python, web pages, and C code
GIT Repository
There is ample documentation on
- git-lab on line
- and the general usage of git to make:
- repositories
- Pushing changes (similar to Check-in)
- Pulling revisions (get latest changes for a branch)
- Making branches (we always have master, current development branch and any a number of specific branches for features)
- Merging branches
Various Git tools provide ample ways of diff-ing changes in versions, seeing who made the change (blame) etc.
Omnis Studio VCS
Branches
The Main is the head branch. It is where all new development is done. It is also the first place you should fix when patching an issue.
HotFix branches are created at the time of release. The latest branch is forked and new development continues in latest while issues that are reported are fixed in HotFix.
Getting Source
Get Latest Revisions

Check the recursive checkbox, and when the Build tree check box appears check it as well. Click OK to begin the get process.
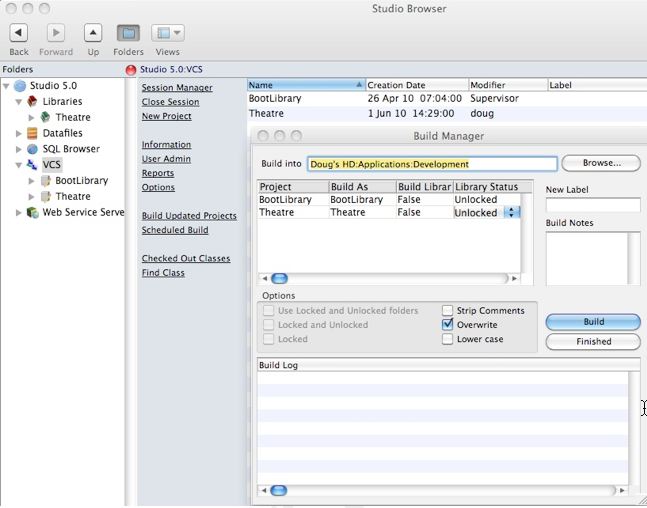
It is possible to build prior revisions of the code based on labels. Labels are applied to each major release and the Build Manager will perform that task when a release is done.
Classes can be deleted or marked deleted in the VCS when they are no longer required or referenced. For that reason, it is recommended on a periodic basis (eg when a major release is completed, or you have finished a project), to check in all code and then rebuild the library.
Comparing Revisions

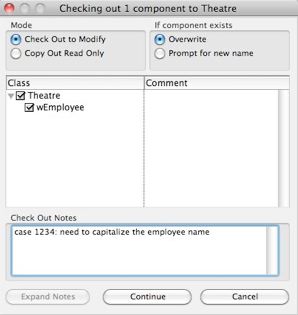
Checking Out
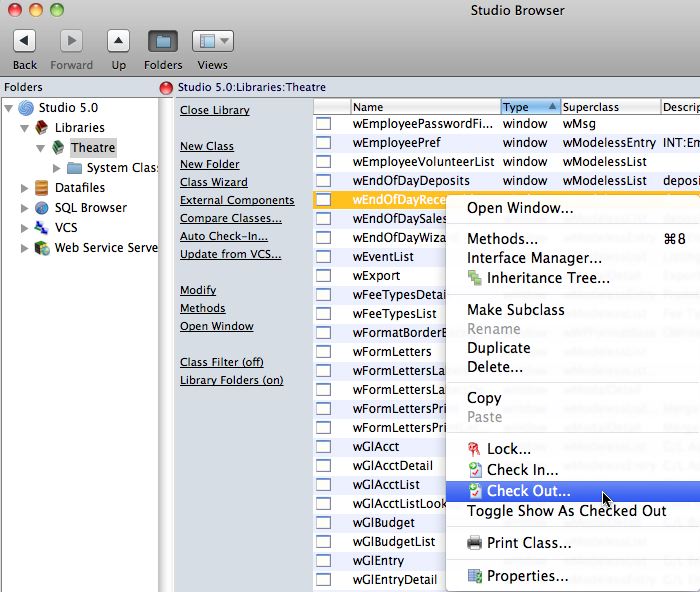
On the checkout window, indicate:
- the reason you are checking out the component. If there is an associated FogBugz case, enter that as in the checkout notes along with a brief synopsis of the activity intended to be worked on.
- If you are updating from the VCS or testing a component, indicate that you are copying out the components for testing.
Adding Classes
The name of the class is to be given a name according to the naming conventions in the coding practices.
If you decide to discard the class before checking it in, simply delete it. If you check it in and discover that you no longer want it or need it, the it must also be deleted from the VCS.
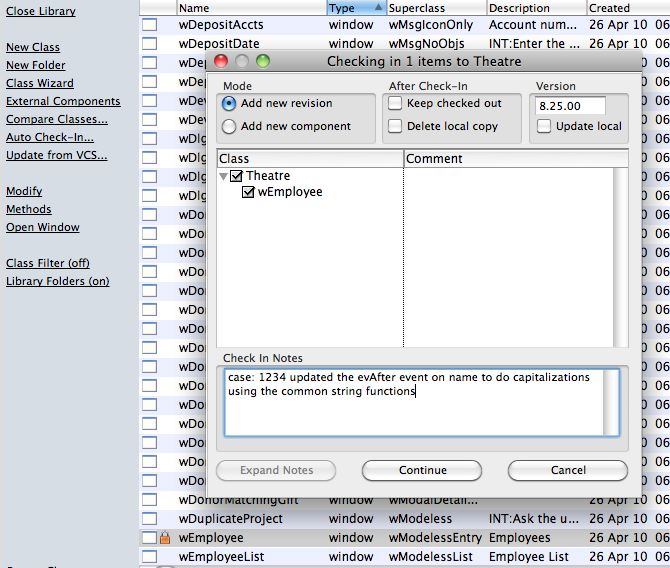
Checking In Changes
When checking in, make sure that you:
- put the issue number from FogBugz in the check in notes (if available).
- add an explanatory comment with the case number
- indicate the severity of the issue and scope of the change
- update the version number to match the current release version to indicate when it was fixed.
- Complete the case number in FogBugz and to indicate its status, mark it complete, ready for testing and put in release notes into FogBugz as well. Ideally, the release notes and the check in notes should be the same.