Wireless Scanner Setup
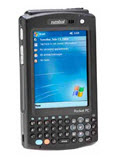
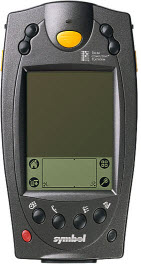
Theatre Manager supports two types of devices, the Symbol SPT 1864 based on the PALM operating system (version 6 - legacy only), or the newer Symbol PocketPC wireless scanners (MC50 pictured here) based on the Windows Mobile operating system (version 6 & 7).
Click on the picture of the device that you need to set up.
|
The software must be purchased & licenced from AMS in order to use it your venue |

|
|
Wireless Scanner Operation - Palm Device
Use these instructions if you are using a Palm OS based scanning device such as a Symbol SBT1846.
|
YMake sure that you fully charge the devices before a performance so that it has a full battery level. Nothing worse than the battery running out in the middle of admitting patrons. We have tested the device while it is in the charger cradle and it will still scan - if you need to do that. |
There are two general functions that can occur:
Check the Patron into the venue - which is used to make sure the ticket has not yet been used for the event
Check the patron out of the venue - which is used if a patron is already in the venue and you need to let them exit and reuse the ticket for some purpose.
Checking in a Patron
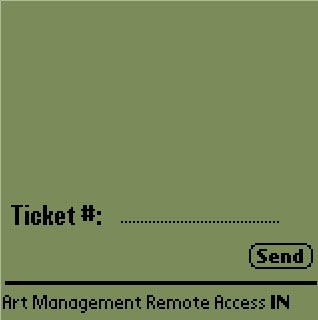 |
Assuming that the device has been configured (step 1 & 2) and that you have started the Scan Ticket application, checking in becomes a simple task. You need to check if you are scanning people in first. If so your screen will look like the screen to the right. The key is that the code at the bottom right says 'IN' (instead of OU). If it does not say 'IN', click the leftmost button under the screen that looks like the picture below. This button toggles the scanner from 'IN' (check in) to 'OU' (checkout) and vice versa. |
|
|
Scanning occurs by pressing any of the yellow buttons on the scanner. If the scan reads properly, you will see the ticket number in the area reserved for it and the scan will be sent automatically. There are a few responses that can happen. If the ticket is fine and the person can go in, you will see the work 'Go' and hear a beep. There may be a message under the 'ticket #' that says 'OK to Enter'. After a successful scan, do the next ticket. |
|
|
If there is any problem with the ticket, you will see the 'stop sign' and will not hear a beep. Under the 'Ticket Number', you will see a message that might be one of:
At that point you will need to decide what to do with the ticket or how to resolve the problem |


Checking out a Patron
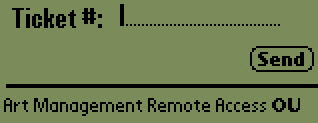 |
Checking out a patron is very similar to checking in a patron. Use the left most black button on the scanner to toggle between check in ('IN') mode and check out ('OU') mode. Your scanner should look like this. |
|
When you scan the ticket and the patron is about to leave, you should hear a beep and see a big 'Exit' on the screen. If there is an issue checking the patron out, you will not hear a beep. You may see an error under the 'Ticket #' that explains the issue. Errors could be one of:
Based on the response, you may need to decide to what to do with the ticket and/or scanner. |
Wireless Scanner Setup - Windows Mobile - Communication Parameters
|
|
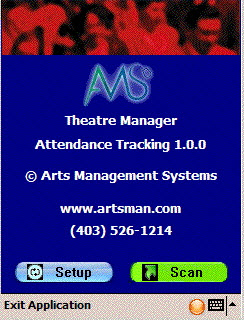
If the previous step was set up right and the scanner is mated to the network, you can click the start menu, programs and the click on the AMS Tickets application It may take a couple of seconds or so to start as the scan program is synchronizing time with a time server and making sure the clock on the program is set properly. When it does start, you will see the screen at the side. Now we can set up scanning for an event. This must be done in advance of each performance that you are scanning tickets for. All that needs to be done is set up some parameters. Click the 'Setup' button on the screen. |
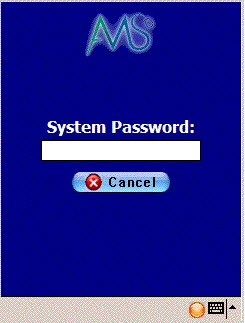 |
You will be asked for a system password to change the settings for the performance. Type '123' (this can be changed) and once the password is right, the next window will automatically appear. |
|
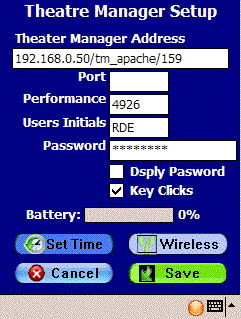
version 7 sample setup |
When you open the preferences window using either of the two methods above, you have some fields that must be filled in. These are below (note you may want to press the orange button on the keyboard twice to turn it into num-lock on mode):
|
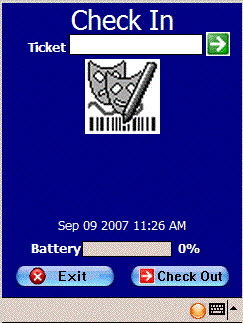 |
There is one other preference that can be set before we begin scanning. This indicates whether we are scanning the person into the venue, or scanning them as they leave to indicate that the ticket was not used You can access this option directly from the main screen where the scan & setup buttons are. Click the 'Scan' button and you will see a screen like the one on the left. At the bottom is a 'checkout' button with a red arrow. This means the mode is currently 'check in' and you click this button to change the mode to 'checkout'. It will also change the arrow at the top from green (checkin mode) to red (checkout mode) If there is a green arrow with 'check in' at the bottom, then the current mode is 'checkout' mode. Click the 'Checkin' button to change the mode to checkin. |
 |
If you are scanning patrons into the venue, the top of the screen looks like the picture to the right. Notice that the text says 'Check In' and the arrow is green. |
 |
If you are checking patrons out of the venue, the text at the top of the screen says 'Check Out' and the arrow is red. |