8.xx-9.00 Upgrade Steps
Please send a note to support@artsman.com to get the links for theatre manager before starting the upgrade if you are attempting the process yourself as we will need schedule the upgrade support (we can't do everybody in one day).
The steps to upgrade generally involve:
- Upgrade Postgres to 9.1.4 (or latest version) following the steps on the next page. It will deal with making backups and then refer you to the appropriate upgrade procedures.
- Convert the Database to UTF8. Version 9 will not be able to access any database until it has been converted.
- To upgrade Theatre Manager use the links you were provided by support@artsman.com and follow the standard install steps
- Upgrade Apache Server and follow the steps for Macintosh or Windows
- Upgrade Web Pages to the latest version by comparing old to new.
- Install Theatre Manager Version 9 on your machines. OSX installs require no extra steps. Windows installs may require you to do one of the following if you get errors starting Theatre Manager. Most Windows installs may not require this step.
- download and install openssl for windows full version if you are using Paymentech Orbital, Moneris, Authorize.net or other internet gateways as Microsoft does not provided it as a standard install (it is free).
- download and install .net version 2 (XP or earlier) or version 3 (Vista or later) if you do not have it
- If you are doing e-blast with Theatre Manager, you will need to implement FTP access to the Apache server. Theatre Manager eblast capabilities should save costs over doing it externally.
- If you are implementing meeting scheduling with the Facility Module in Theatre Manager, you will need to set up a scheduling@ ... email address
- Update the Backup Script by following the specific directions. You will also obtain a copy of the latest script when you install Postgres in Step 1.
- For each web listener that auto-started, you will need to login on that machine and set the web listener to auto-login. Since Encryption was changed (per PCI), this means that you need to set it up again to make it work
- Start up all web listeners again
Upgrade Postgres
- Backup the database
- Restore the backup database to a different name on the same (or different) postgres server.
- To ensure it is a valid backup, use Theatre Manager to log into the restored database. When you see the list of users in your main database, click change database and pick the other database you just restored.
- Upgrade postgres by refering to installation and upgrade instructions for postgres. The specific link for Macintosh and Windows are also referred to in the last section of the install steps about how to do an upgrade. Please follow those. Venues with postgres servers on Linux will need to loosely adapt and follow the Macintosh instructions.
Convert the Database to UTF8
Prerequisites before the conversion will work
You will need a Macintosh intel machine to do the work on (all downloads are free). It assumes that you have:
- downloaded and installed xCode on your Mac
- downloaded and installed Mac Ports (we have tested with version 1.8.2 or later)
- followed the instructions for installing recode on your mac after installing the above two items. Go half way down the page and look at the instructions in the black terminal screen. Start by typing the command that follows and you should be able to see similar results to the white on black text (depending on what needs to be installed).
sudo port install recode
If you have not done the above successfully, the next steps in the process will not work.
If you do not have at least one Macintosh at your venue, there is no available Windows equivalent to this process yet. You will need to FTP your database and we will return it in UTF8 encoding for you.
Converting the Database to UTF8
- The installer for Postgres 8.4.4 will place a file into the /Users/Shared directory called ConvertDBToUTF8. This will be used to upgrade a database from SQL_ASCII to UTF8.
- Start Terminal

- Type /Users/Shared/ConvertDBToUTF8 YourDatabaseName
where YourDatabaseName is the name of the database that you log into each day. This will backup the database to a file in the /Users/Shared/Backup folder called YourDatabaseNameV9.sql. You may need to supply the postgres user password if you do not have 'trust' set for the server IP address in the pg_hba.conf file.
Depending on the size of your database, this step could take as long as 4 hours. The pg_dump shows obvious activity. The 'Recode' step may look hung, but it is not.

- When the script is done, please pay particular attention to the the line that says 'Recoding /Users/Shared/backups/YourDatabaseNameV8old.sql.....'. It should say 'done' at the end of the line and there should be no errors. If there are errors, please stop, contact support and do not continue.
If the 'Recode' completed successfully, it will display some instructions at the end of it similar to the following screenshot.
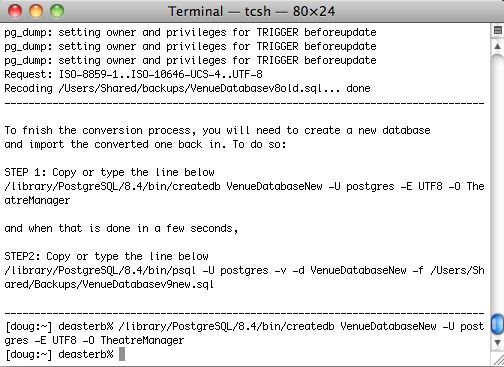
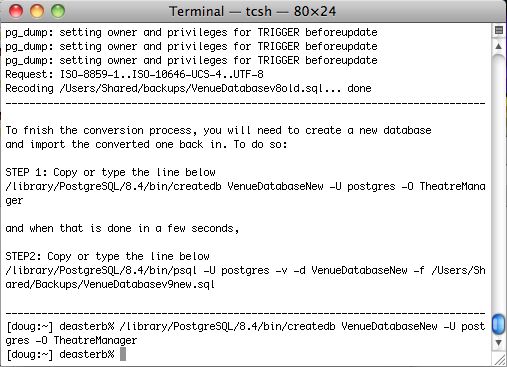
- Look for the line that says 'Step 1:' Copy the command under that and paste it into terminal as follows:
/library/PostgreSQL/8.4/bin/createdb VenueDatabaseNew -U postgres -E UTF8 -O TheatreManager
- Look for the line that says 'Step 2:' Copy the command under that and paste it into terminal as follows:
/library/PostgreSQL/8.4/bin/psql -U postgres -v -d VenueDatabaseNew -f /Users/Shared/Backups/VenueDatabasev9new.sql
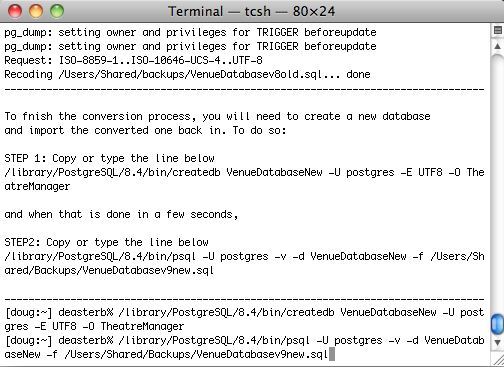
- This will start the import process for the converted database (which may take a while). At the end, you should be able to see the database in pgAdmin and if you install theatre Manager, you should be able to log in to this database.
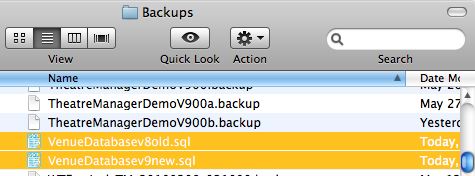
- Once you have logged in to your database with Theatre Manager version 9, you can go into the /Users/Shared/Backups folder. Look for the two files named YourDatabaseNamev8old.sql and YourDatabaseNamev9new.sql and delete them as per the example below.