Project Treelist
On the left side of the project window is the treelist. Treelist is very useful in organizing your tasks. The treelist is a table of the tasks in the order they are to be completed. It also allows you to group like tasks under headings. How you organize groups and tasks in the Treelist, organizes them in the Gantt Chart.

You can see two types of lines in the treelist, Groups and Tasks.
- Groups are only used to assemble tasks together. Groups are higher levels of the outline that are used only to group tasks together. Each line indicates the starting and ending times for each task or group.
- Tasks are the individual activities that make up your project. Click here for more information on Tasks and how to set them up.
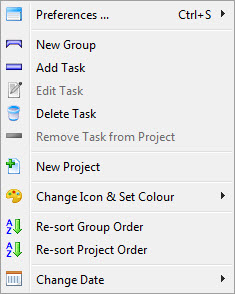
Right-clicking anywhere in the Treelist will bring up the context menu.
Organizing Tasks in the Treelist
You can drag either groups or tasks inside other groups in order to further indent them. You can also drag a group or task to a different level within the outline.
 |
In this case, we are dragging the Dress rehearsal 1 task inside the Rehearsals group. Notice the arrow on the left side of the bar. It indicates that this dragged item will be dragged inside the group under which it has been dropped. If you attempt to drag inside a task instead of a group, the drag is simply ignored because it is inappropriate. |
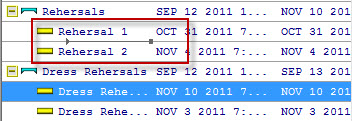 |
In this example, we are going to move the Dress
Rehersal Tasks from the Dress Rehersal Group to the Rehersals Group by
clicking and dragging. In the image the task to be moved has been highlighted and "dragged" to the line of the appropriate spot. Note the line looks like |
 |
Notice the lack of an arrow on the left side of the bar. This indicates that this dragged item will be dragged just below the task (or group) under which it has been dropped. The order things are dragged into is maintained the next time you reopen the project. |
 |
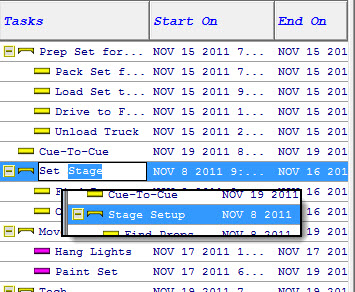
In this picture, the Group Light Rehersals is part of the rehersals group |
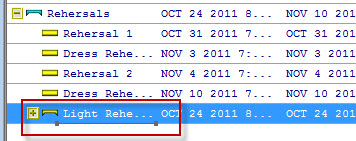 |
We Click and Drag until we see |
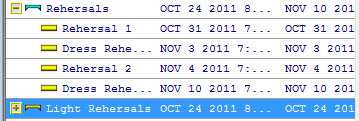 |
When we let go of the button, the Group is no longer part of the Rehersals Group, but is at the same level. |
Editing in the Treelist
Editing the name of a task or a group of tasks and their starting or ending dates is simple in the treelist.
In the treelist, you can edit the name of a task and the Start On and End On dates, by clicking on what you want to change, make the change and press Return.
|
You must press Return rather than clicking out of the field or pressing the Tab key or the changes are not saved. |

Quick Add Tasks in the Treelist
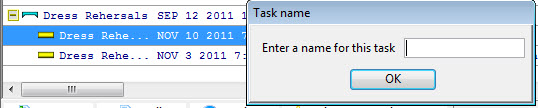
When a line is selected in the treelist, you can go into Quick Add mode by pressing Return. This will display a dialog box allowing you to just enter a task description. It will create a new task at that same level in the outline and save just enough task information to serve as a placeholder in the project. Later you can go back and enter the rest of the task information. This will help you quickly put together the list of the tasks required for your project.
Editing Treelist Columns
You can add and remove columns in the treelist, change the order, and alter the text displayed at the top of each column by right-clicking on the treelist header area.
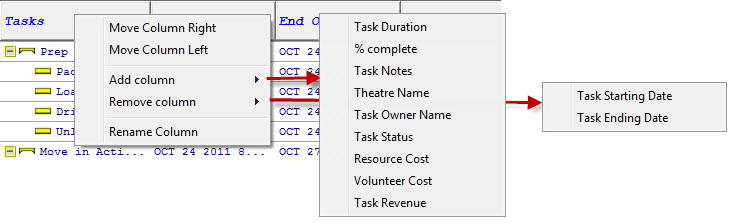
The first column cannot be moved and cannot be removed. Other selections are:
- Move Column Right - moves the selected column to the right.
- Move Column Left - moves the selected column to the left.
- Add Column - the selection brings up a flyout of available columns that are not currently displayed. Selection one will add it to the Treelist display.
- Remove Column - displays a listing of the columns currently being displayed. Selecting one will remove it from the Treelist display.
- Rename Column - allows you to change the text in the header area of the selected column.