Elavon Installation
 |
Elavon implements either user ID and password authentication; or access from specified IP addresses over HTTPS connections to provide compliance with PCI DSS 4.1 |
Installation is quite straightforward. You would contact Elavon using information provided by Arts Management, and they create a Merchant Account for you. Money gets authorized by Elavon as 'Card Not Present' or as 'Swiped Card' and then deposited right to your own bank upon settlement from Theatre Manager. This account information that you are provided is all you need to set up in the merchant setup window below to provide secure credit card authorization.
Elavon will need to provide the following 2 account setups (both are required):
- Elavon Virtual Terminal - uses the Elavon VirtualMerchant Gateway via a web browser to "view the transactions" that have occurred. This account setup is used during the EOD deposit process to review your transactions prior to the settlement process.
- Certified Connection for User ID and Password - uses the Elavon Gateway to allow authorizations to occur but not be viewed. This information is what needs to be entered into Theatre Manager's Merchant account to allow authorizations to occur.
|
The user IDs and passwords for both of the above are completely different and should not be interchanged or confused with each other. Follow the appropriate setup steps for each. |

After following the setup for both accounts, make sure to test the gateway.
Elavon - Contact Information
US Clients:
1-855-770-0526
Canadian Clients:
1-844-352-8661
Ask for an Elavon Virtual Terminal account to be set up
Once your Merchant Account information is provided to you, the following steps will need to happen:
- Settle any existing credit card batch (run an End of Day)
- Create a new merchant account in Theatre Manager
- Follow the steps to change your merchant provider
Then you can start using Elavon Virtual Merchant.
If you have any questions directly related to your Elavon merchant account setup, please contact them directly. Contact Arts Management if you have questions about how to setup Theatre Manager to reference and authorize credit cards using your Elavon merchant account.
Elavon Gateway Account
The Elavon Gateway Setup for User ID and Password setup is obtained from Elavon and is entered into the Setup --> System Tables --> Merchant Accounts window as below:
Software Type
The following values are set on the software type tab per the diagram below:
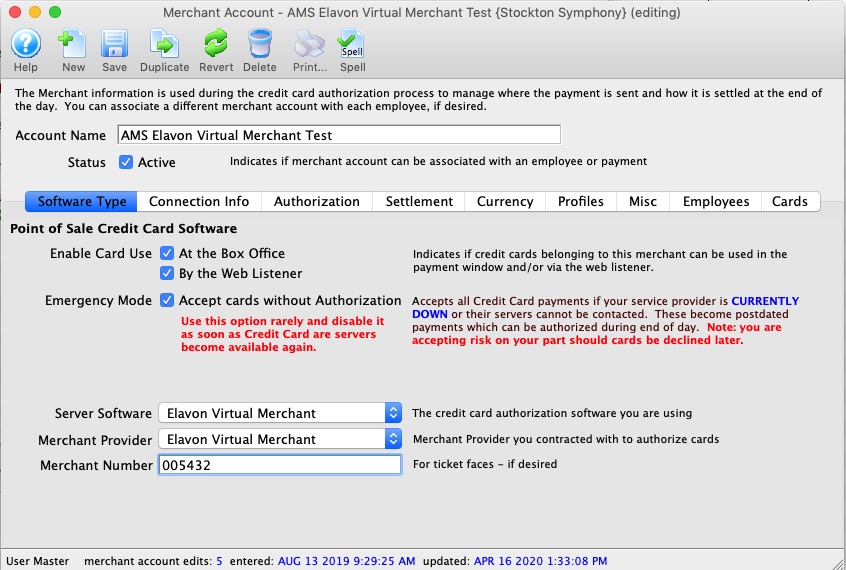
- Set the server software to be Elavon Virtual Merchant
- The merchant provider will automatically be set for you
- The merchant number is provided by Elavon and will need to go into the Merchant number field. It is typically 6 or 7 digits.

This number may be referred to by Elavon Support as the Virtual Merchant Account ID or Converge Account ID. The Elavon Developer guide calls the the Virtual Terminal Merchant ID. Look for the Account ID: on the Welcome to the VirtualMerchant Application form.
Elavon will provide both a Merchant Account ID and a Converge Account ID when setting up the account. Enter the Converge Account ID into the Merchant number field.
Connection Info
The following entries are set on the Connection Info tab per the diagram below:
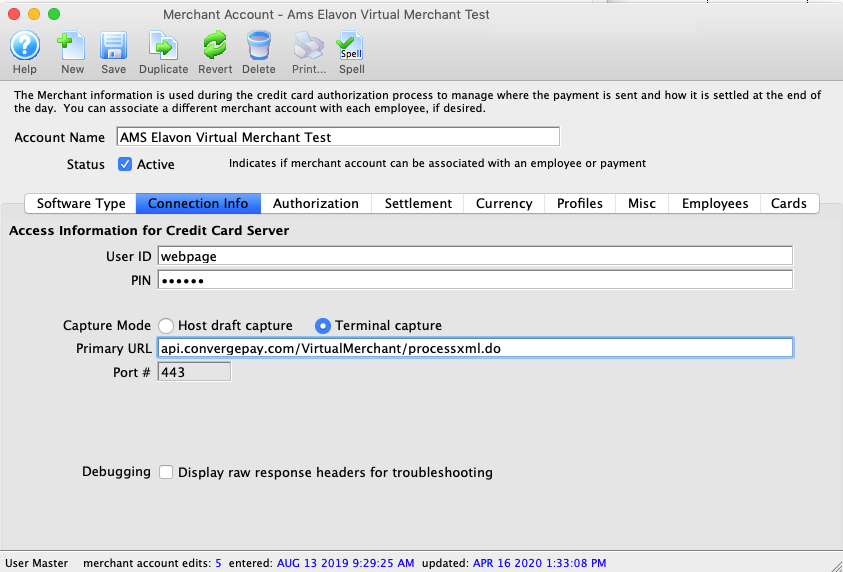
- User id - provided by Elavon and is the user id for the gateway, not to the Elavon VirtualMerchant Account (they are not the same thing - the latter is the online interface).
- Password - provided by Elavon and is the password for the gateway. It is not the password for the Elavon VirtualMerchant Account.
- Primary URL - is always api.convergepay.com/VirtualMerchant/processxml.do
- Port - is always 443
Merchant Profiles
The following entries are set on the Profiles tab per the diagram below:
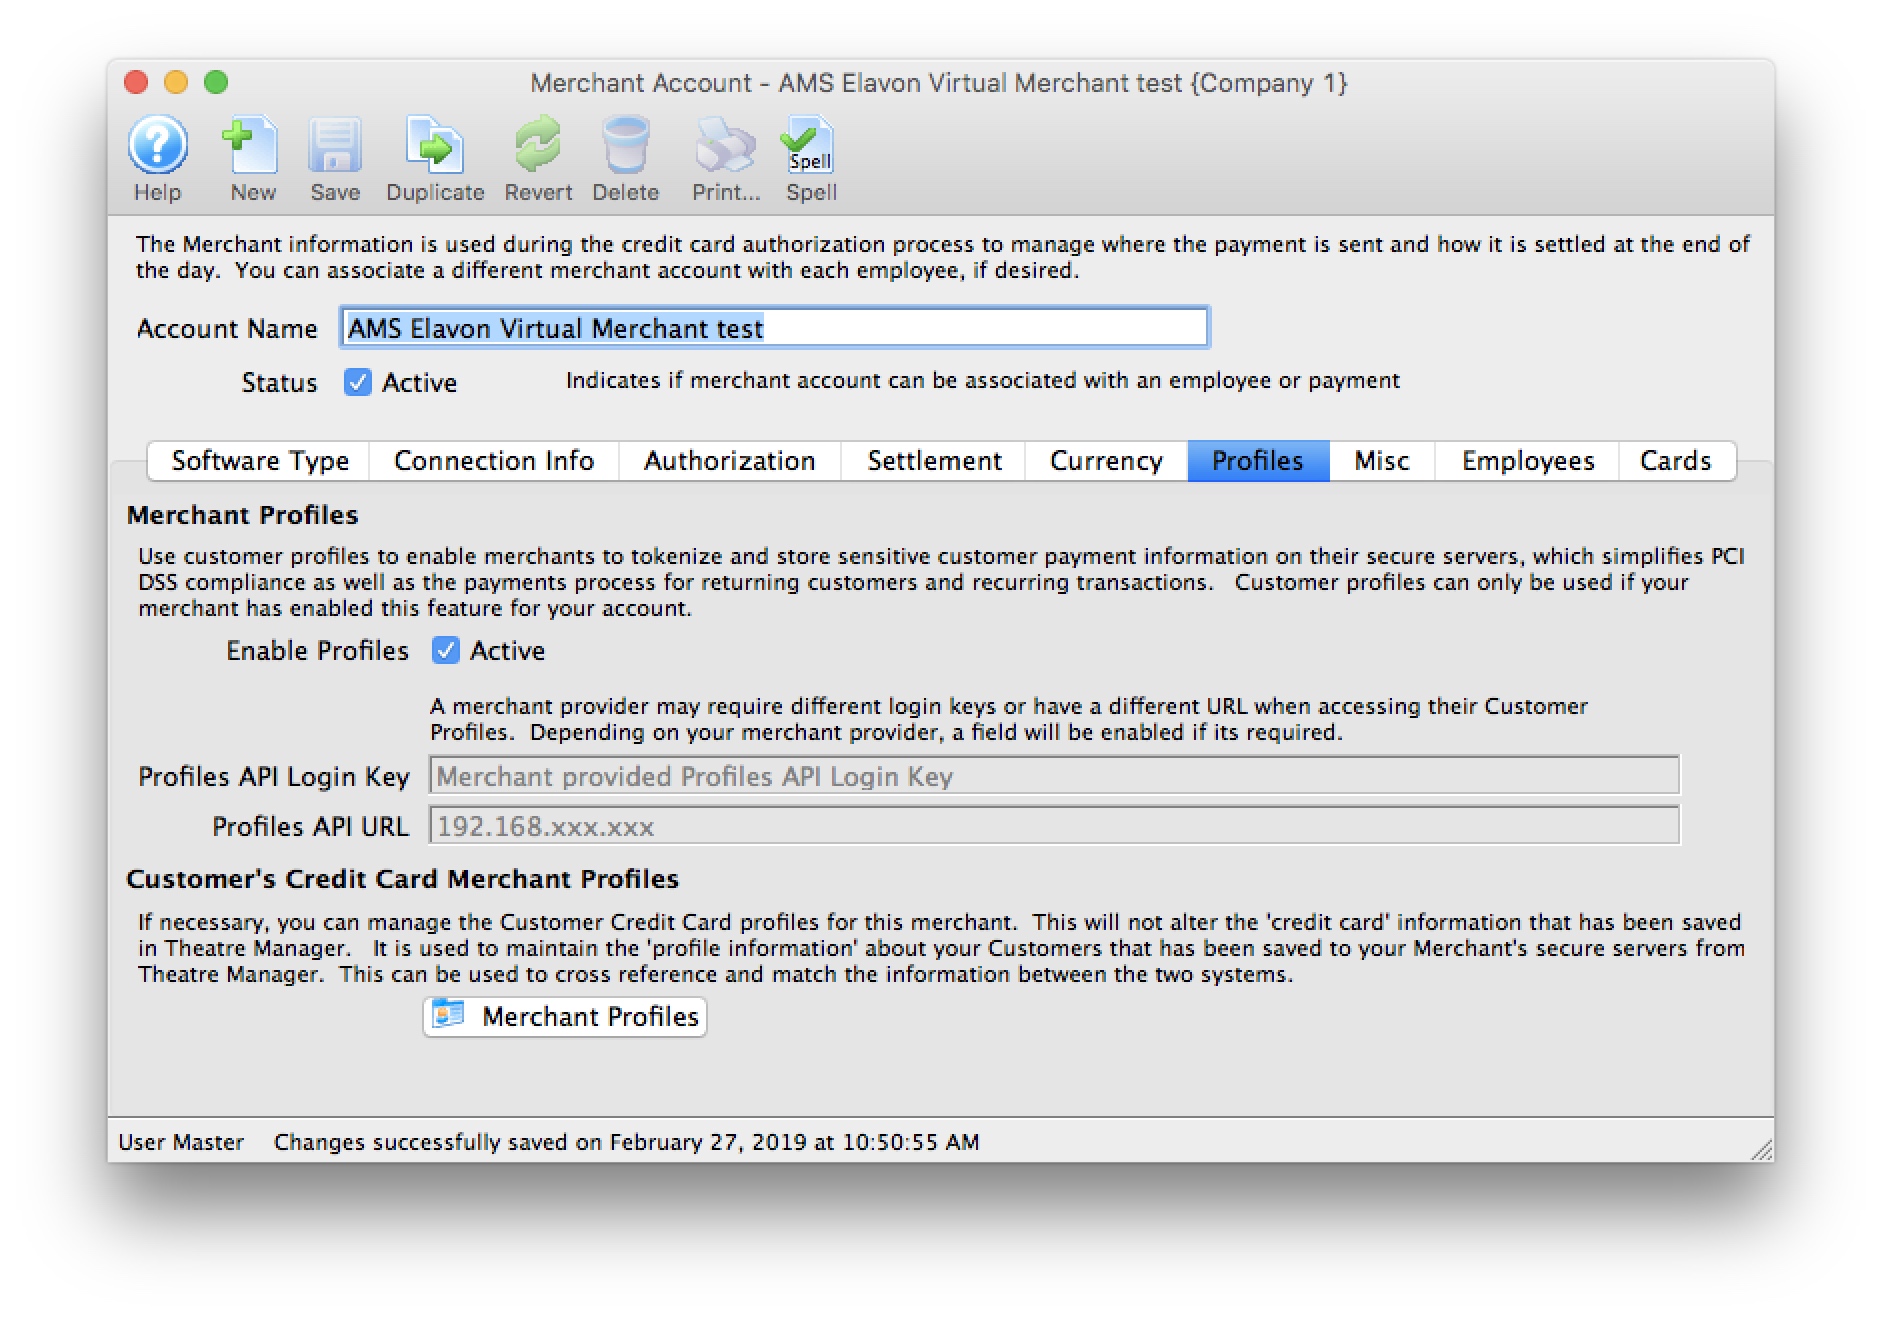
- Enable Profiles - set to Active if Merchant Profiles will be used.
- Profiles API Login Key - not required. Elavon uses the same connection information from the Connection Info tab.
- Profiles API URL - not required. Elavon uses the same the connection information from the Connection Info tab.
|
Refer to Merchant Profiles for further information on functionality. |

Employee and Card Setup
- To assign employees to this merchant account, click on the Employee tab and find the employees to assign. In a multi-merchant setup situation, drag those employees that should use this merchant account by default from the same employee tab in another merchant record. While some employees may have permission to use multiple merchant accounts, viewing their name here means this is the default merchant account assigned to them for charging cards. If the employee is able to use another merchant account, they will need to select it on the payment window.
- Click on the Card tab to select which credit card payment methods are associated with this merchant account.
If you need to have multiple merchant accounts and both are to take Visa (for example), you will need two Visa payment methods and assign one of them to each merchant account.
|
if you are switching from one merchant services provider software to another, you can open both merchant accounts and drag the employees from one window to the other. You can do the same for the credit card payment methods - to make the switch easy and fast. |
Any future dated 'post dated payments' associated with the card you drag to another merchant provider will automatically be reassigned to authorize on the new merchant provider card network.
Elavon Virtual Merchant - Account Setting for Manual Settlement
- Account ID - provided by Elavon and is the Virtual Merchant Account ID.
- Password - you created after your initial access/activation for the Virtual Merchant
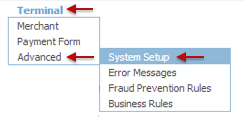
- Log into your Virtual Merchant Account and from the Tab selection at the top click on Terminal >> Advanced >> System Setup from the drop-down menu as shown in the following image.
- The following setting window will appear.
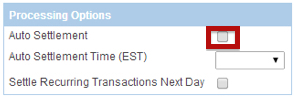
Note the Auto Settle Section of the settings.
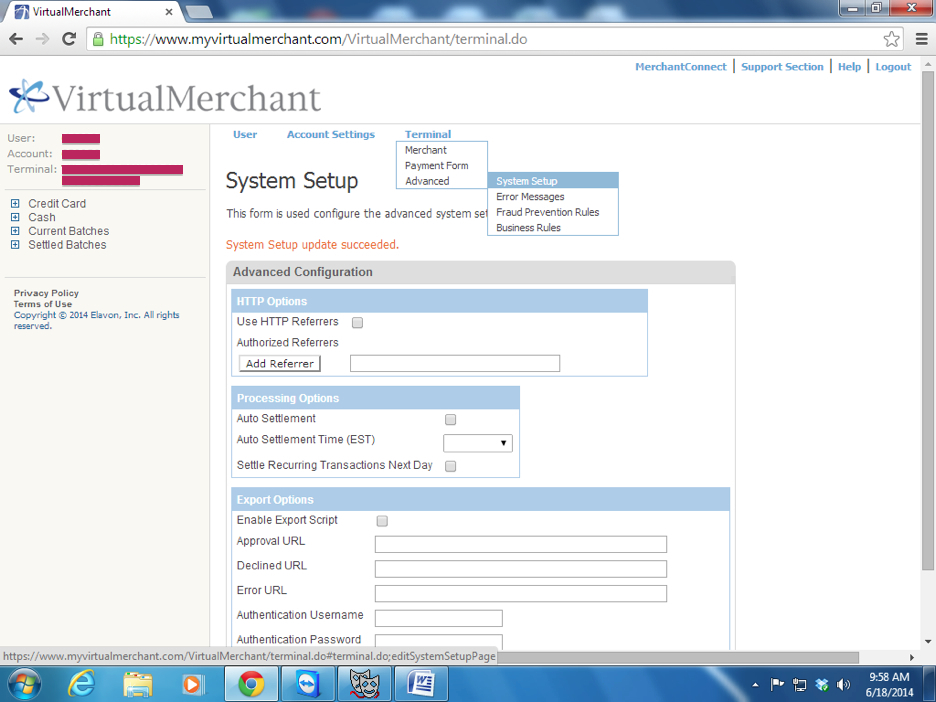
- Make sure the Auto Settlement box is not checked.
- Save your changes by clicking the save button at the bottom of the settings window
Elavon Virtual Merchant Web Portal Login
- User ID - provided by Elavon and is the user ID for the Elavon VirtualMerchant gateway.
- Password - provided by Elavon and is the password for the Elavon VirtualMerchant gateway
- Elavon VirtualMerchant 'Converge' Gateway - is always accessed via a web browser through https://www.convergepay.com/converge-webapp/#!/login. This is used to verify current and past batches, look at transactions, generate reports and manage your Elavon account.
All users of the Elavon VirtualMerchant in conjunction with Theatre Manager are encouraged to download the VirtualMerchant Users Manual directly from Elavon.
Testing Elavon Gateway
- Find yourself in the database or create a new patron that is yourself
- Create a new order and attempt to by a ticket
- On the payment window, select the credit card you want to use and do a test authorization
- If you get an authorization with a message indicating AVS match and/or CVV2 match, then the setup is correct
- Log in to your Elavon VirtualMerchant account and view the batch to see that your transaction is there
- In Theatre Manager, void the credit card payment and then confirm in the orbital Virtual Terminal that the charge is marked as void
Trouble Shooting
If you get a response that looks like it is HTML or XML and indicates that it was not authorized, then your user ID/password is probably wrong (please verify), or Paymentech set up the account to require a specific IP. Contact your Elavon representative and tell them of the issue so that they can correct it. They may put you in touch with the Gateway people. You can inform Elavon Gateway support staff that you need to be able to authorize via user ID and password (per their standard setup instructions for Theatre Manager).